
WooCommerce
Learn about using plugins to power up your WooCommerce website
1 Review the Online Payment Quick Start Guides
Understand the pre-requisites for incorporating the Maya Online Payment solution, starting from setting up your Maya Business Manager, all the way to deploying your platform in a live Production environment.
2 Install and configure Maya Business Plugin in WooCommerce
Must-have requirements before proceeding:
- A Maya Business Merchant Manager account
- Knowledge in Wordpress and WooCommerce
- A hosted Wordpress and WooCommerce application
2.1 Installing Maya Business Plugin
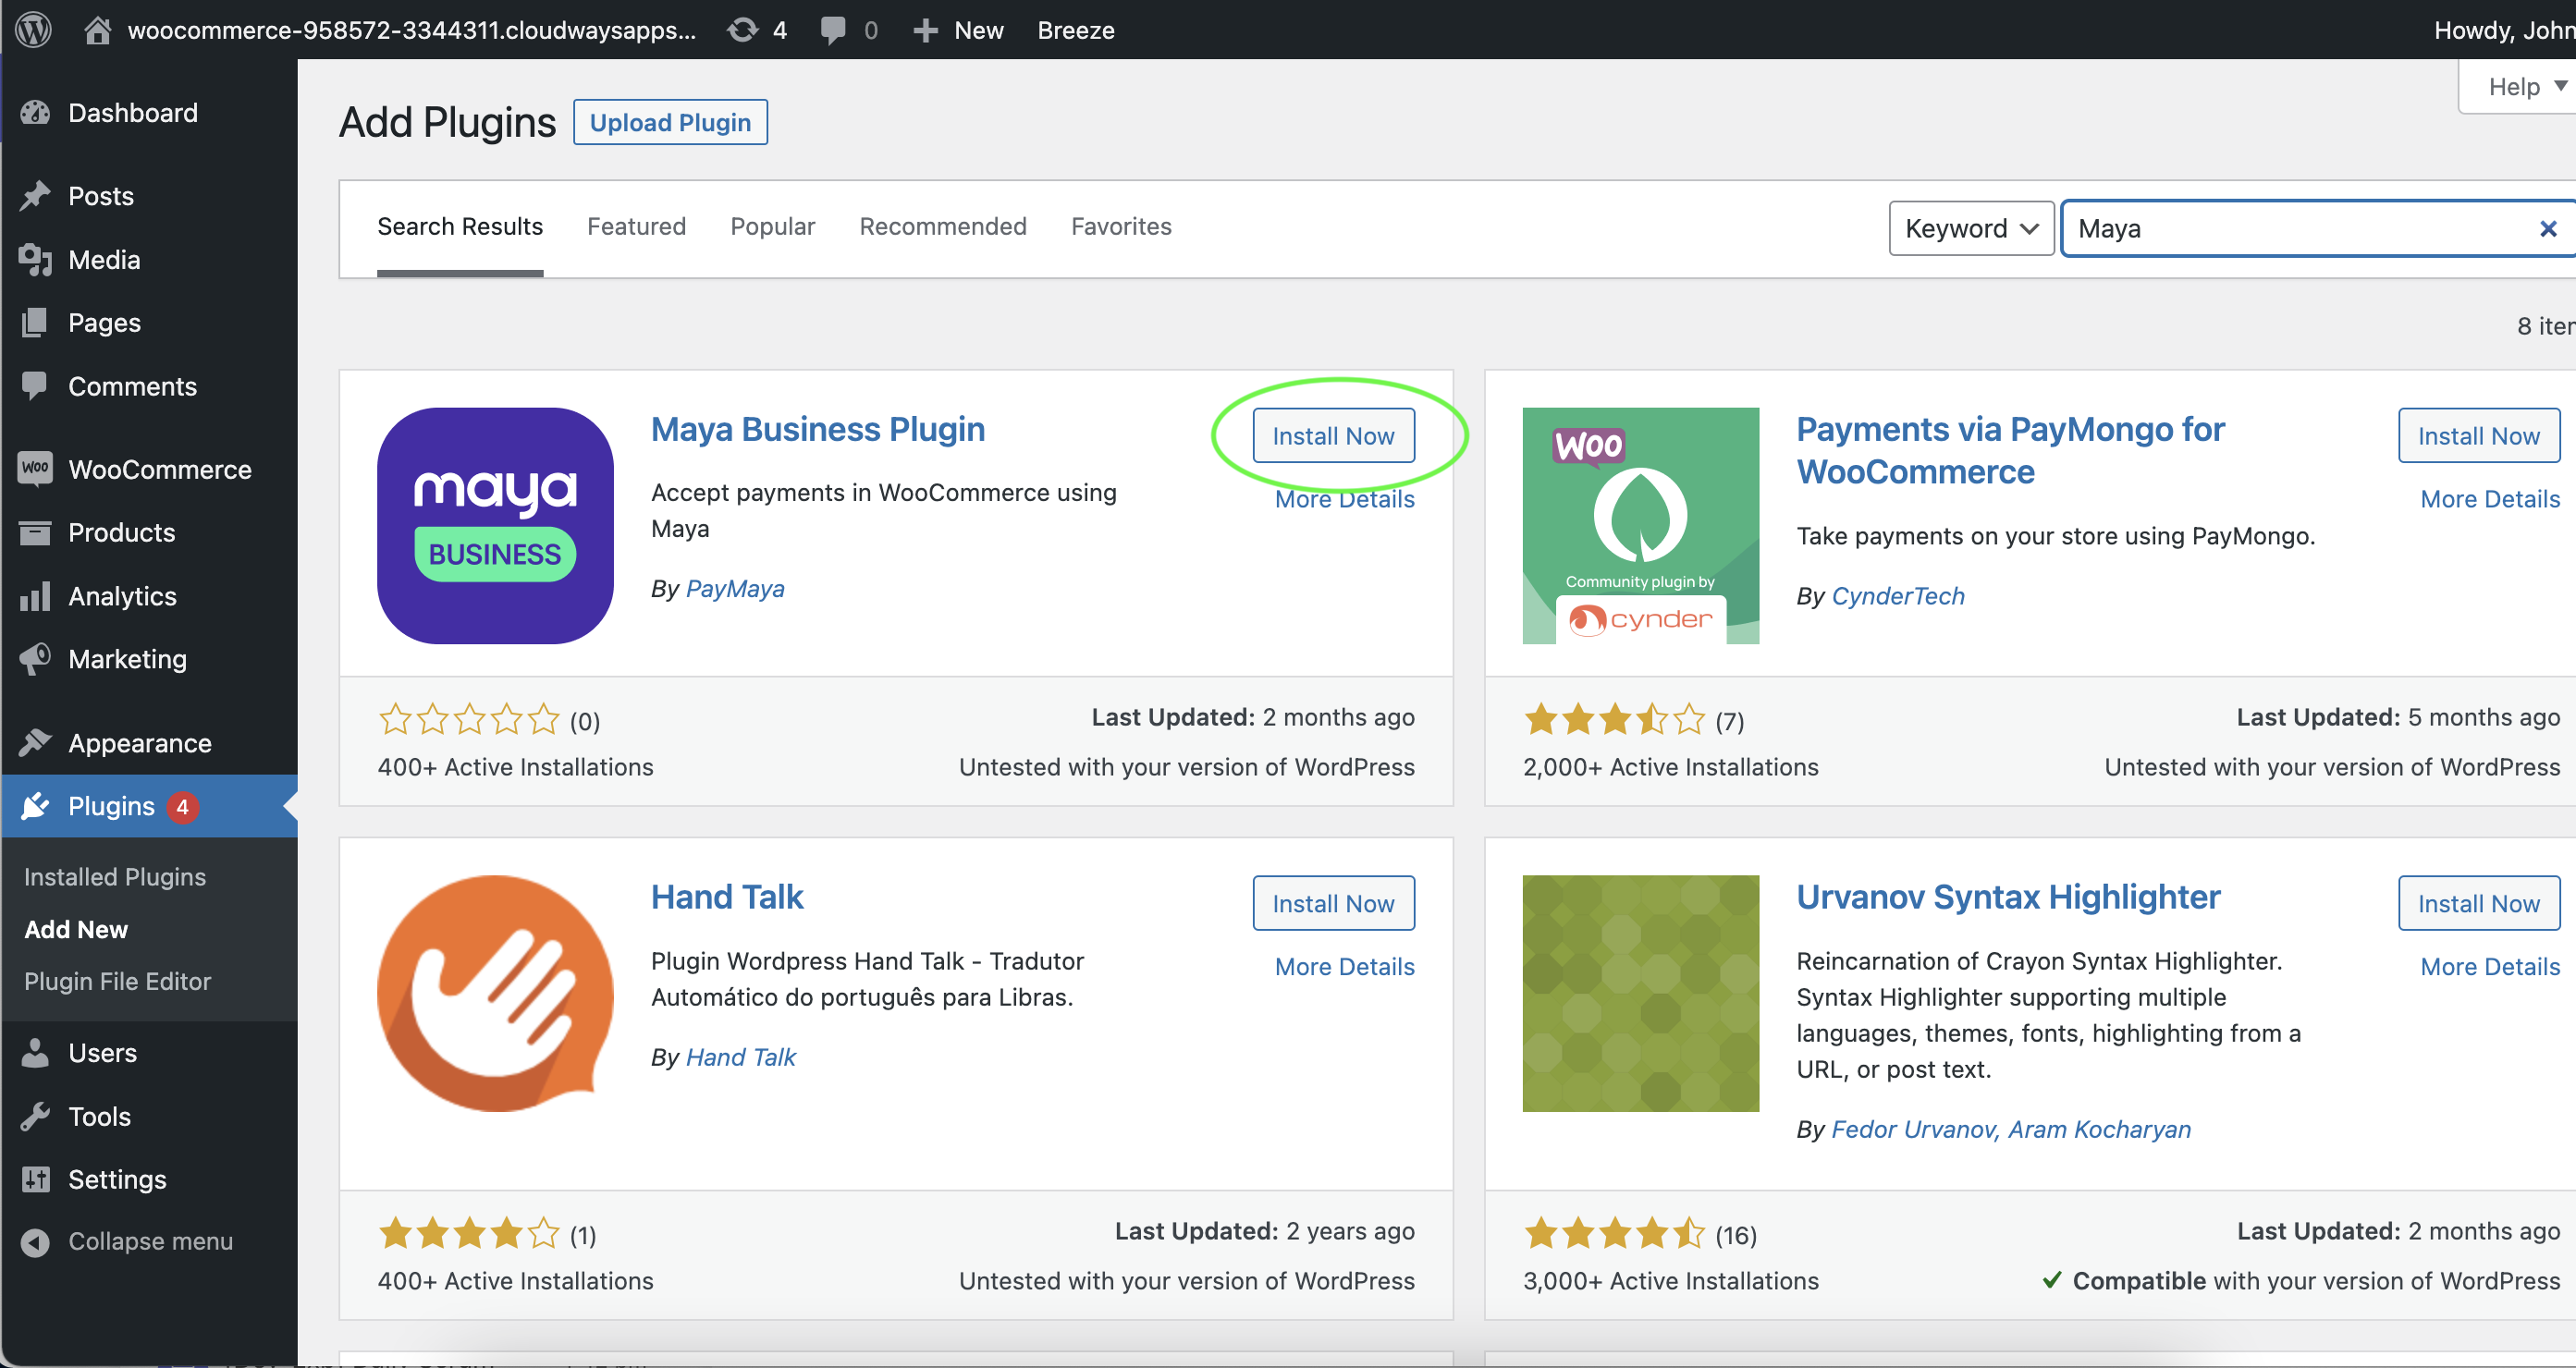
- Go to the Plugins menu on your WordPress dashboard, then click Add New submenu.
- Search for the Maya plugin by typing "Maya" keyword.
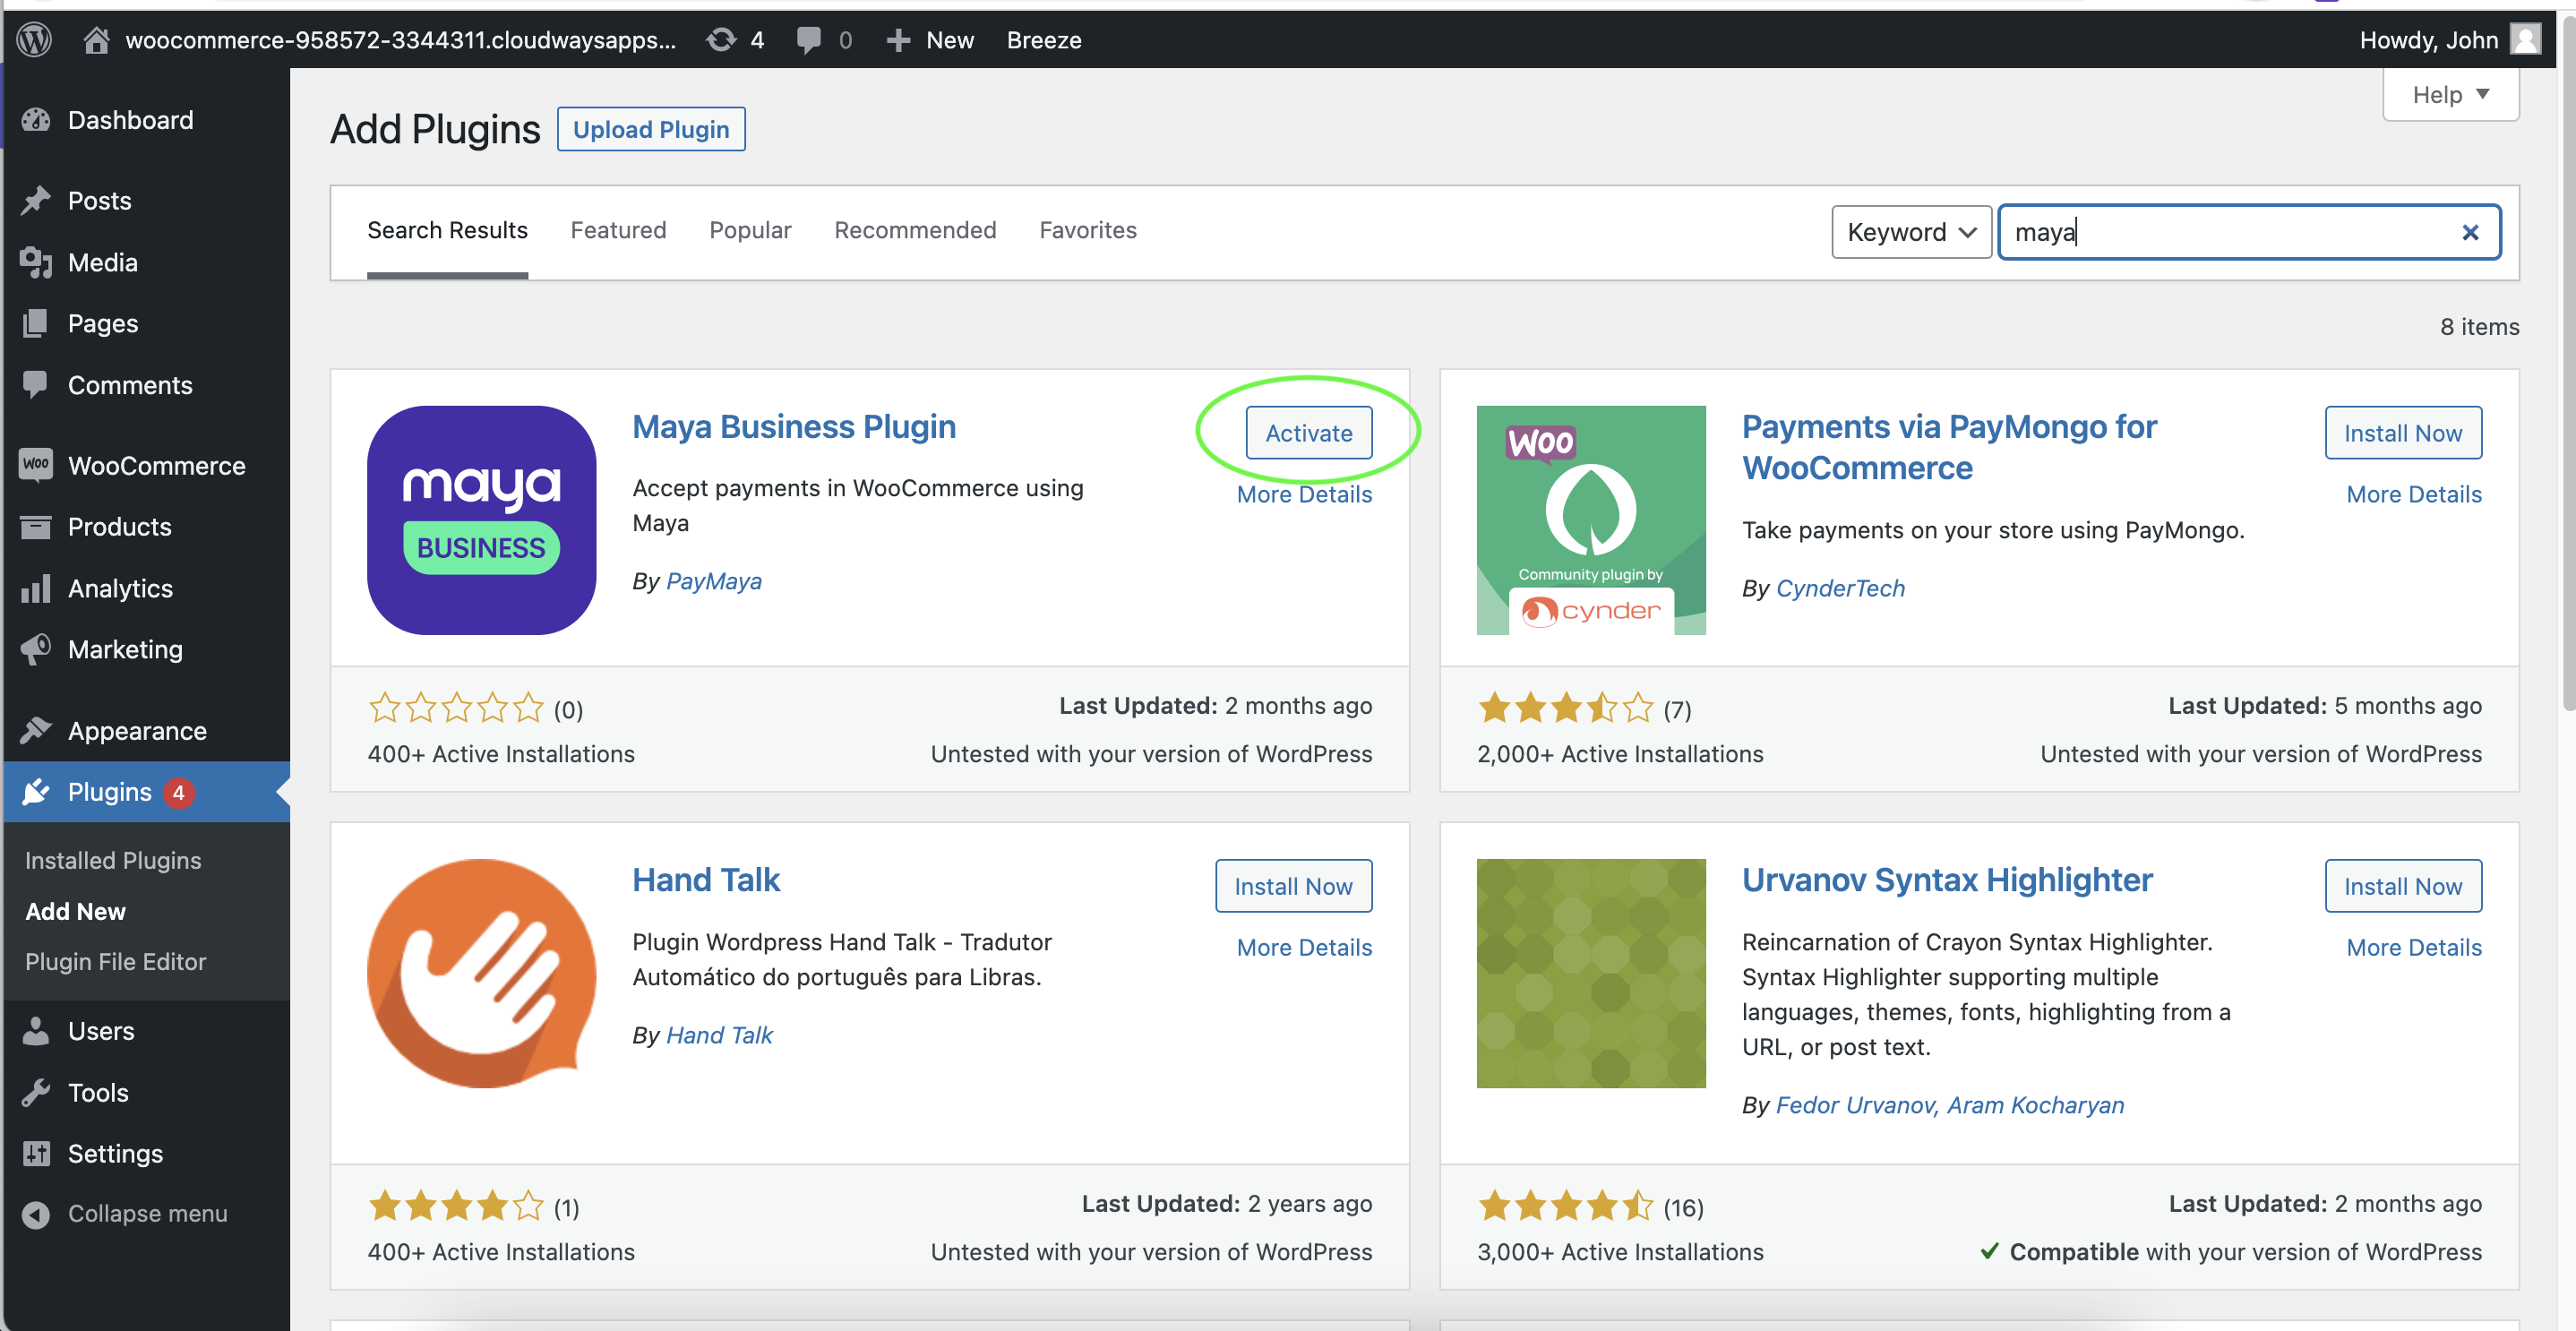
- It should return the list of plugins with that keyword, select Maya Business Plugin and click Install Now.
- Once installed, click Activate.
- You can also check Maya Business Plugin
 for additional details.
2.2 Configuring Maya Business Plugin to accept payments
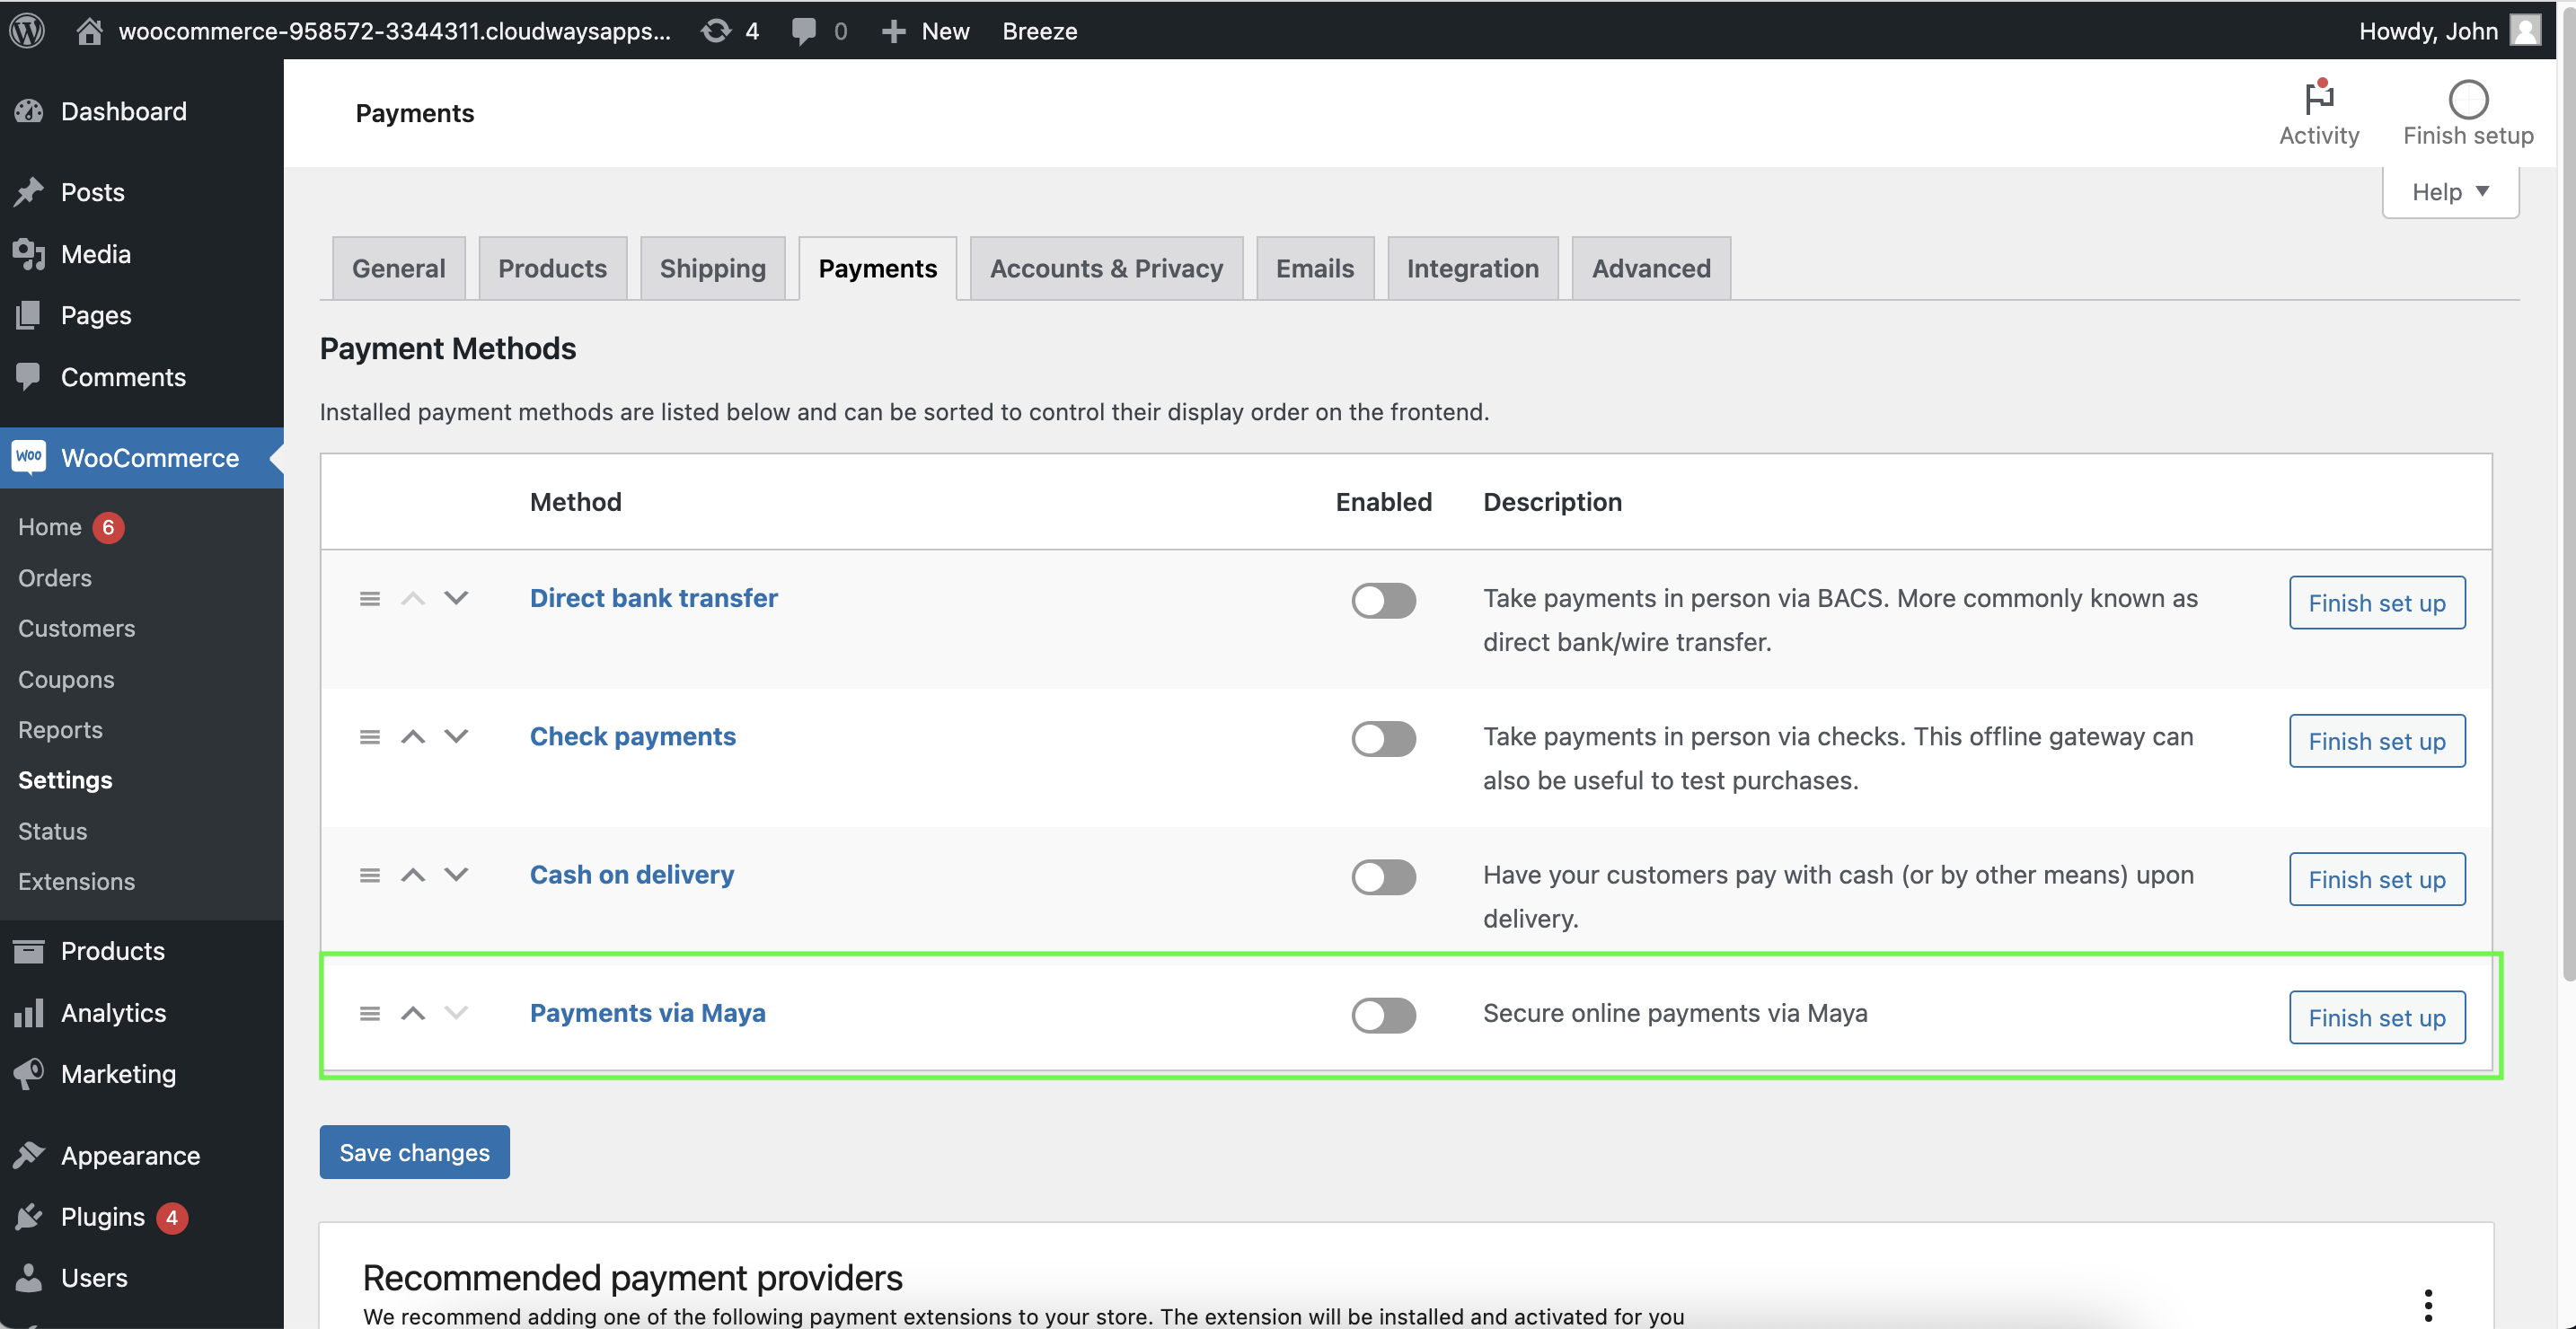
- In WooCommerce menu, click Settings. It will open a center navigation where you can click Payments tab.
- Scroll and look for “Payments via Maya”. Click Finish set up.
- Tick the checkbox for Enable Maya Gateway.

- Customize how your customers will see Maya as a payment method by updating the Title and Description fields.
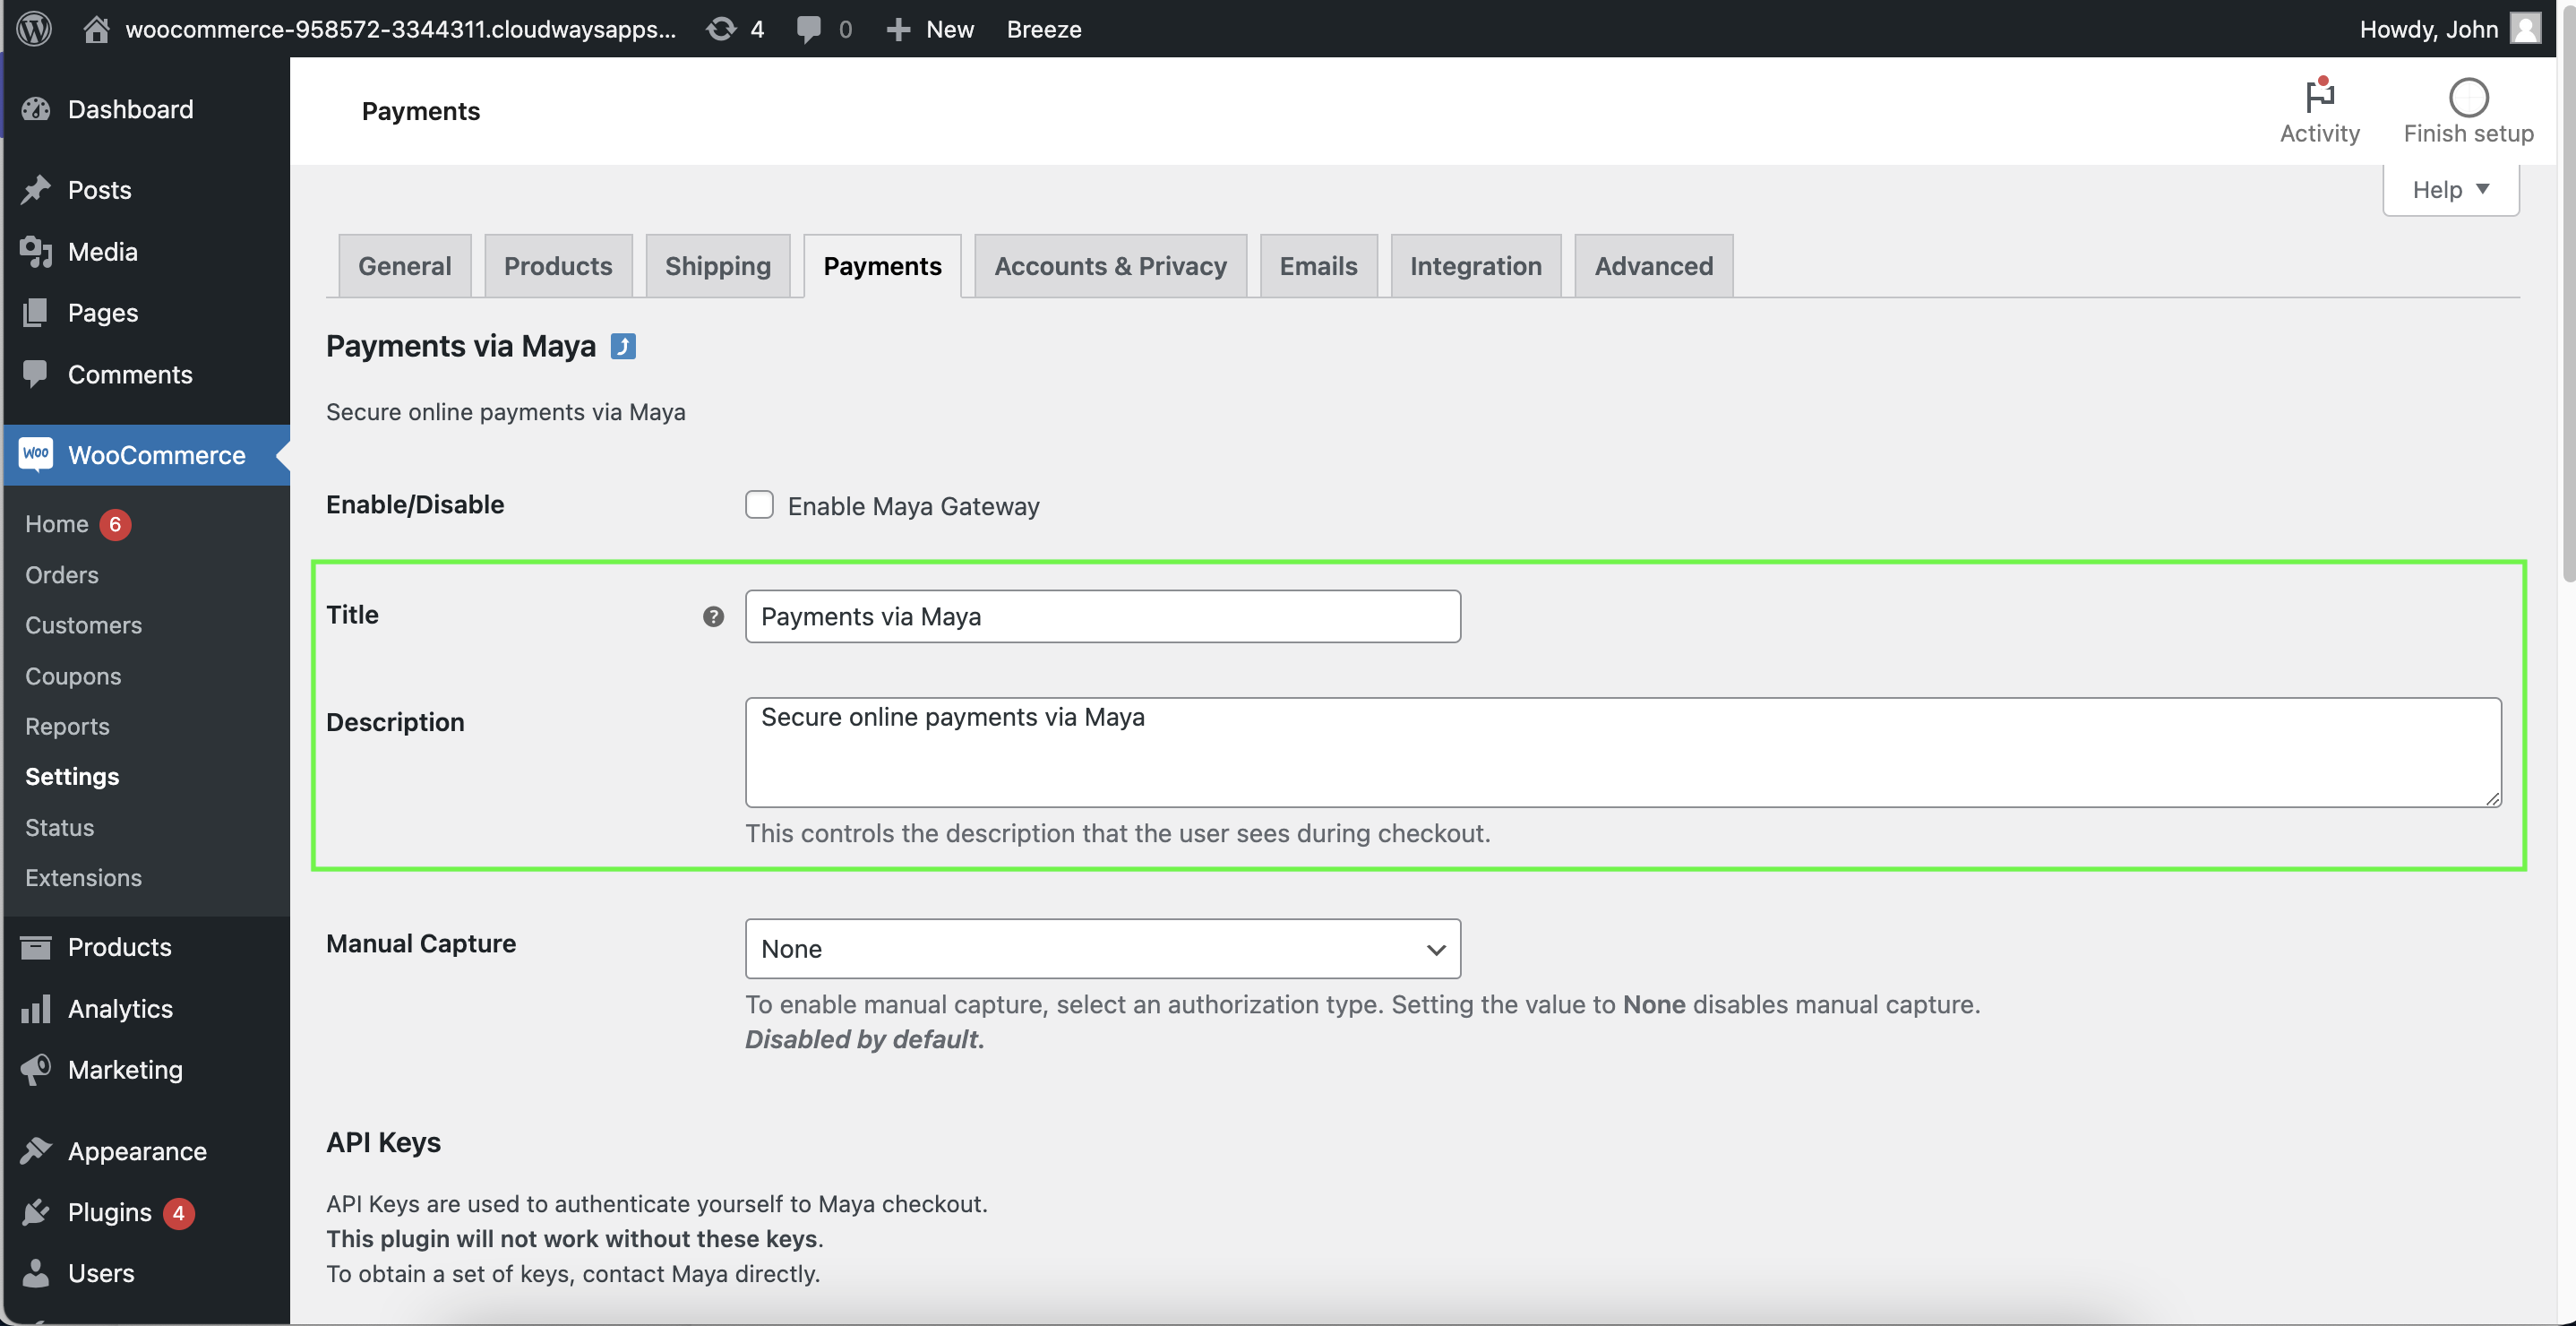
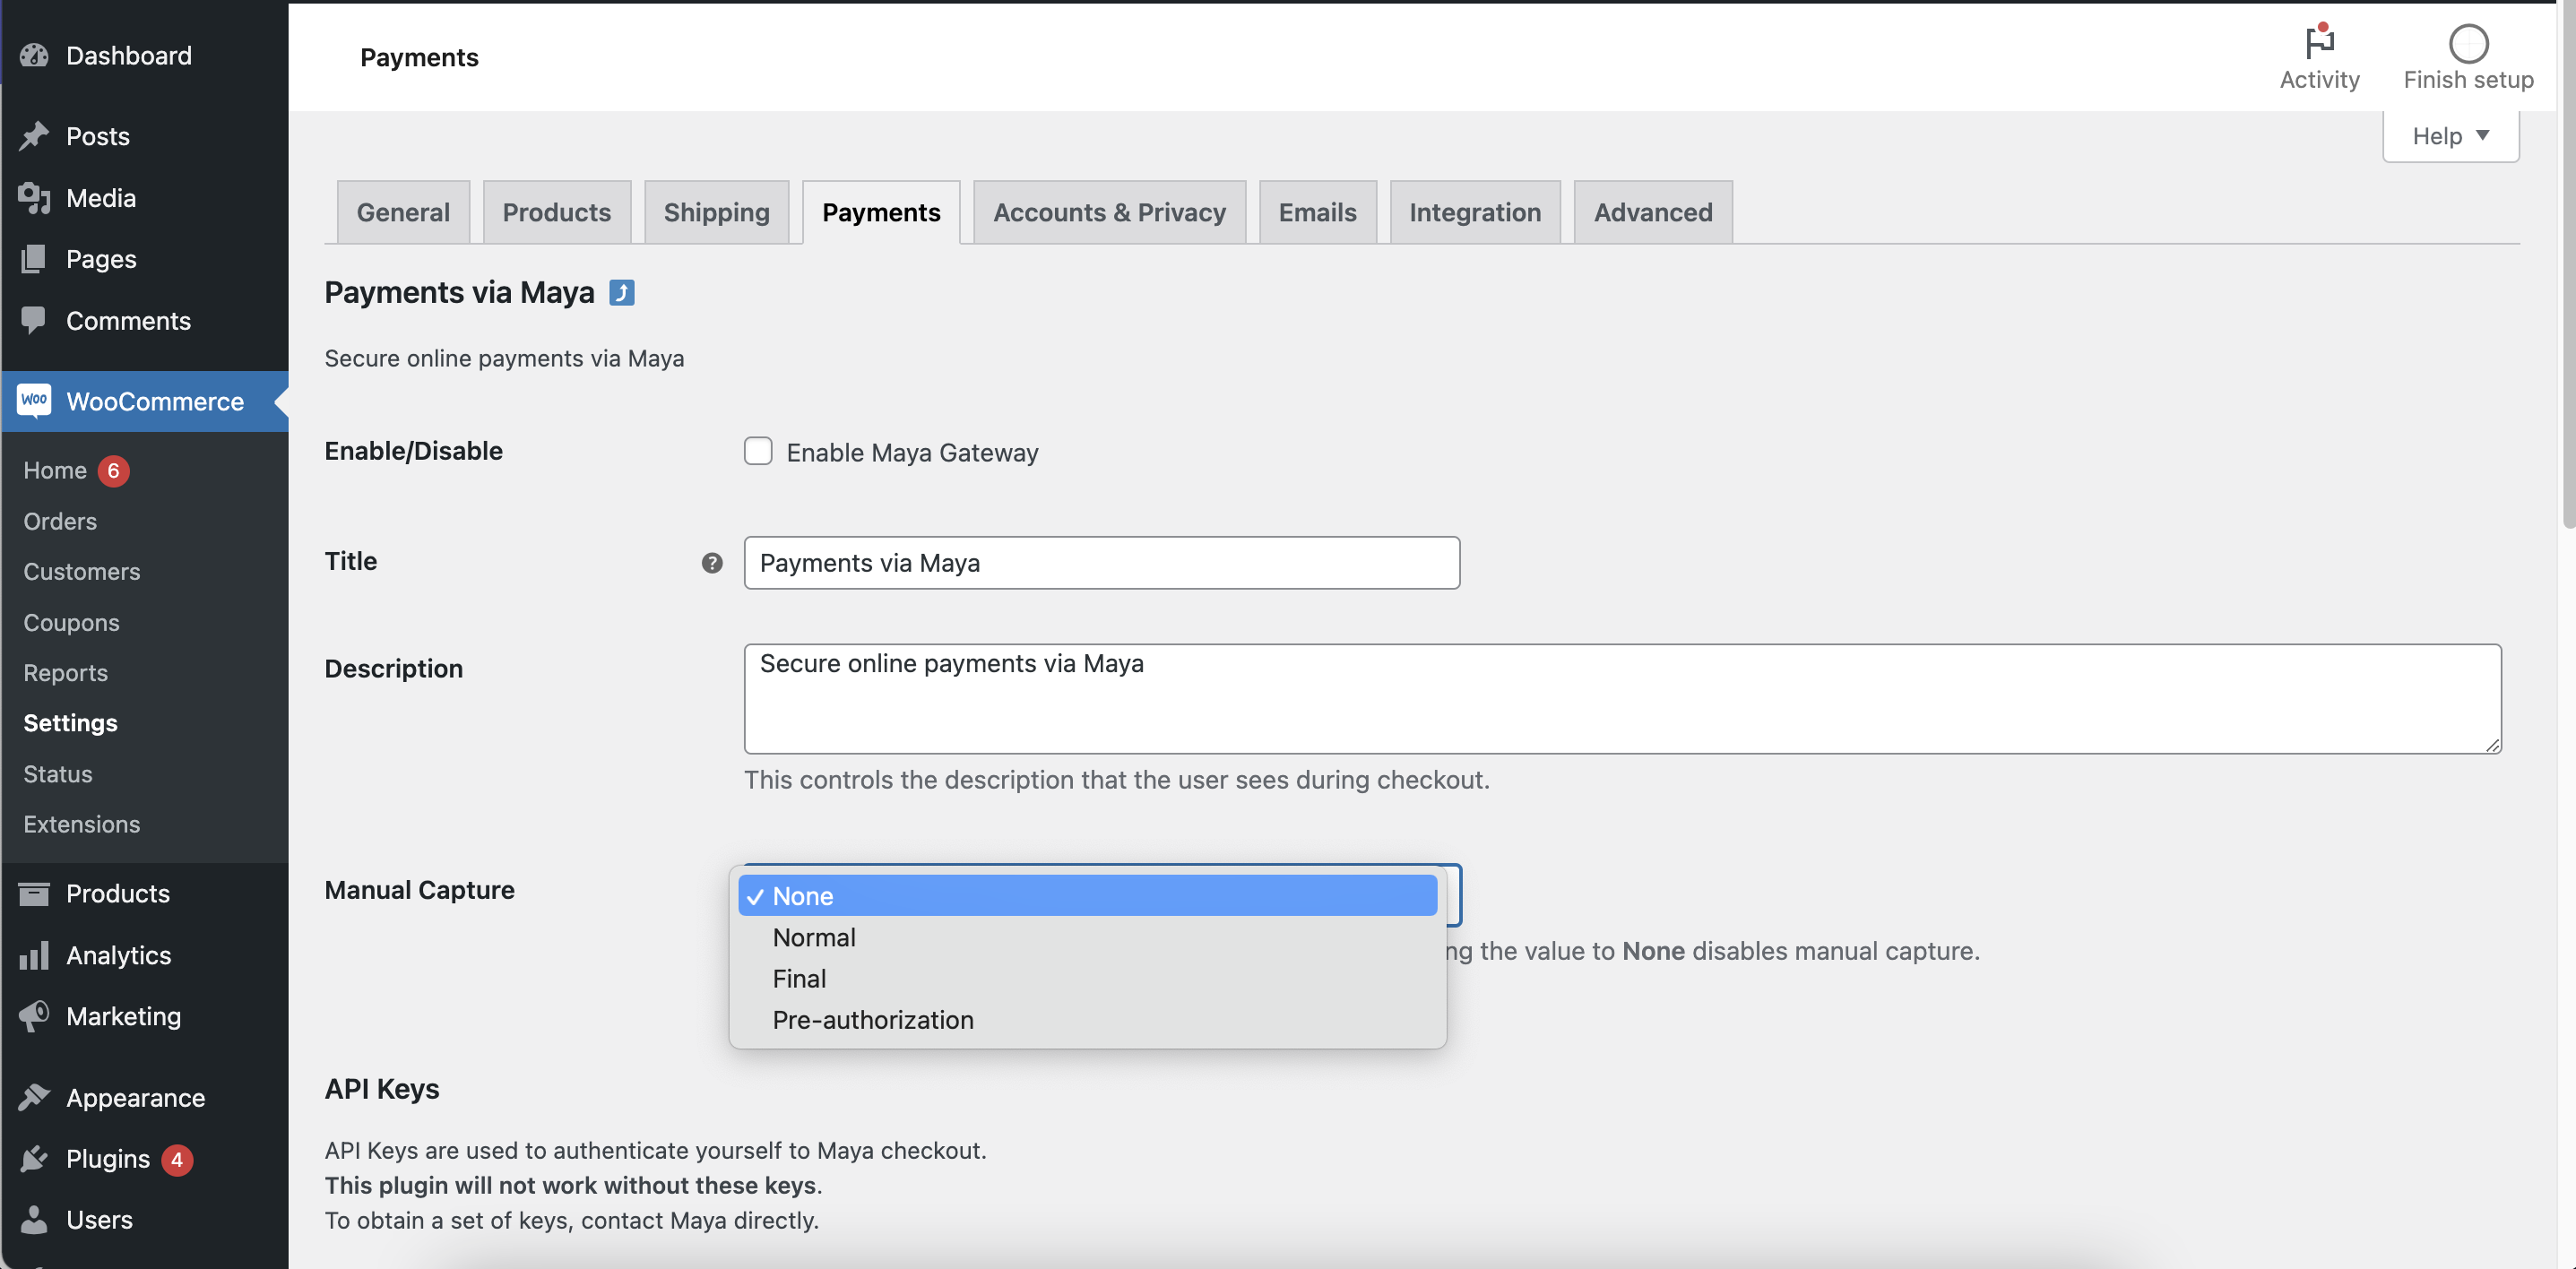
- Your Maya Checkout setup will determine whether you need to customize the Manual Capture field. By default, this feature is set to None, which means it's disabled. If you disable manual capture, you can charge the client directly without any delay.
For advanced merchants who wish to use the Manual Capture feature, go here for more details.

- Paste your public (
pk-...) and secret (sk-...) keys on the appropriate fields. Make sure that there are no extra whitespaces.
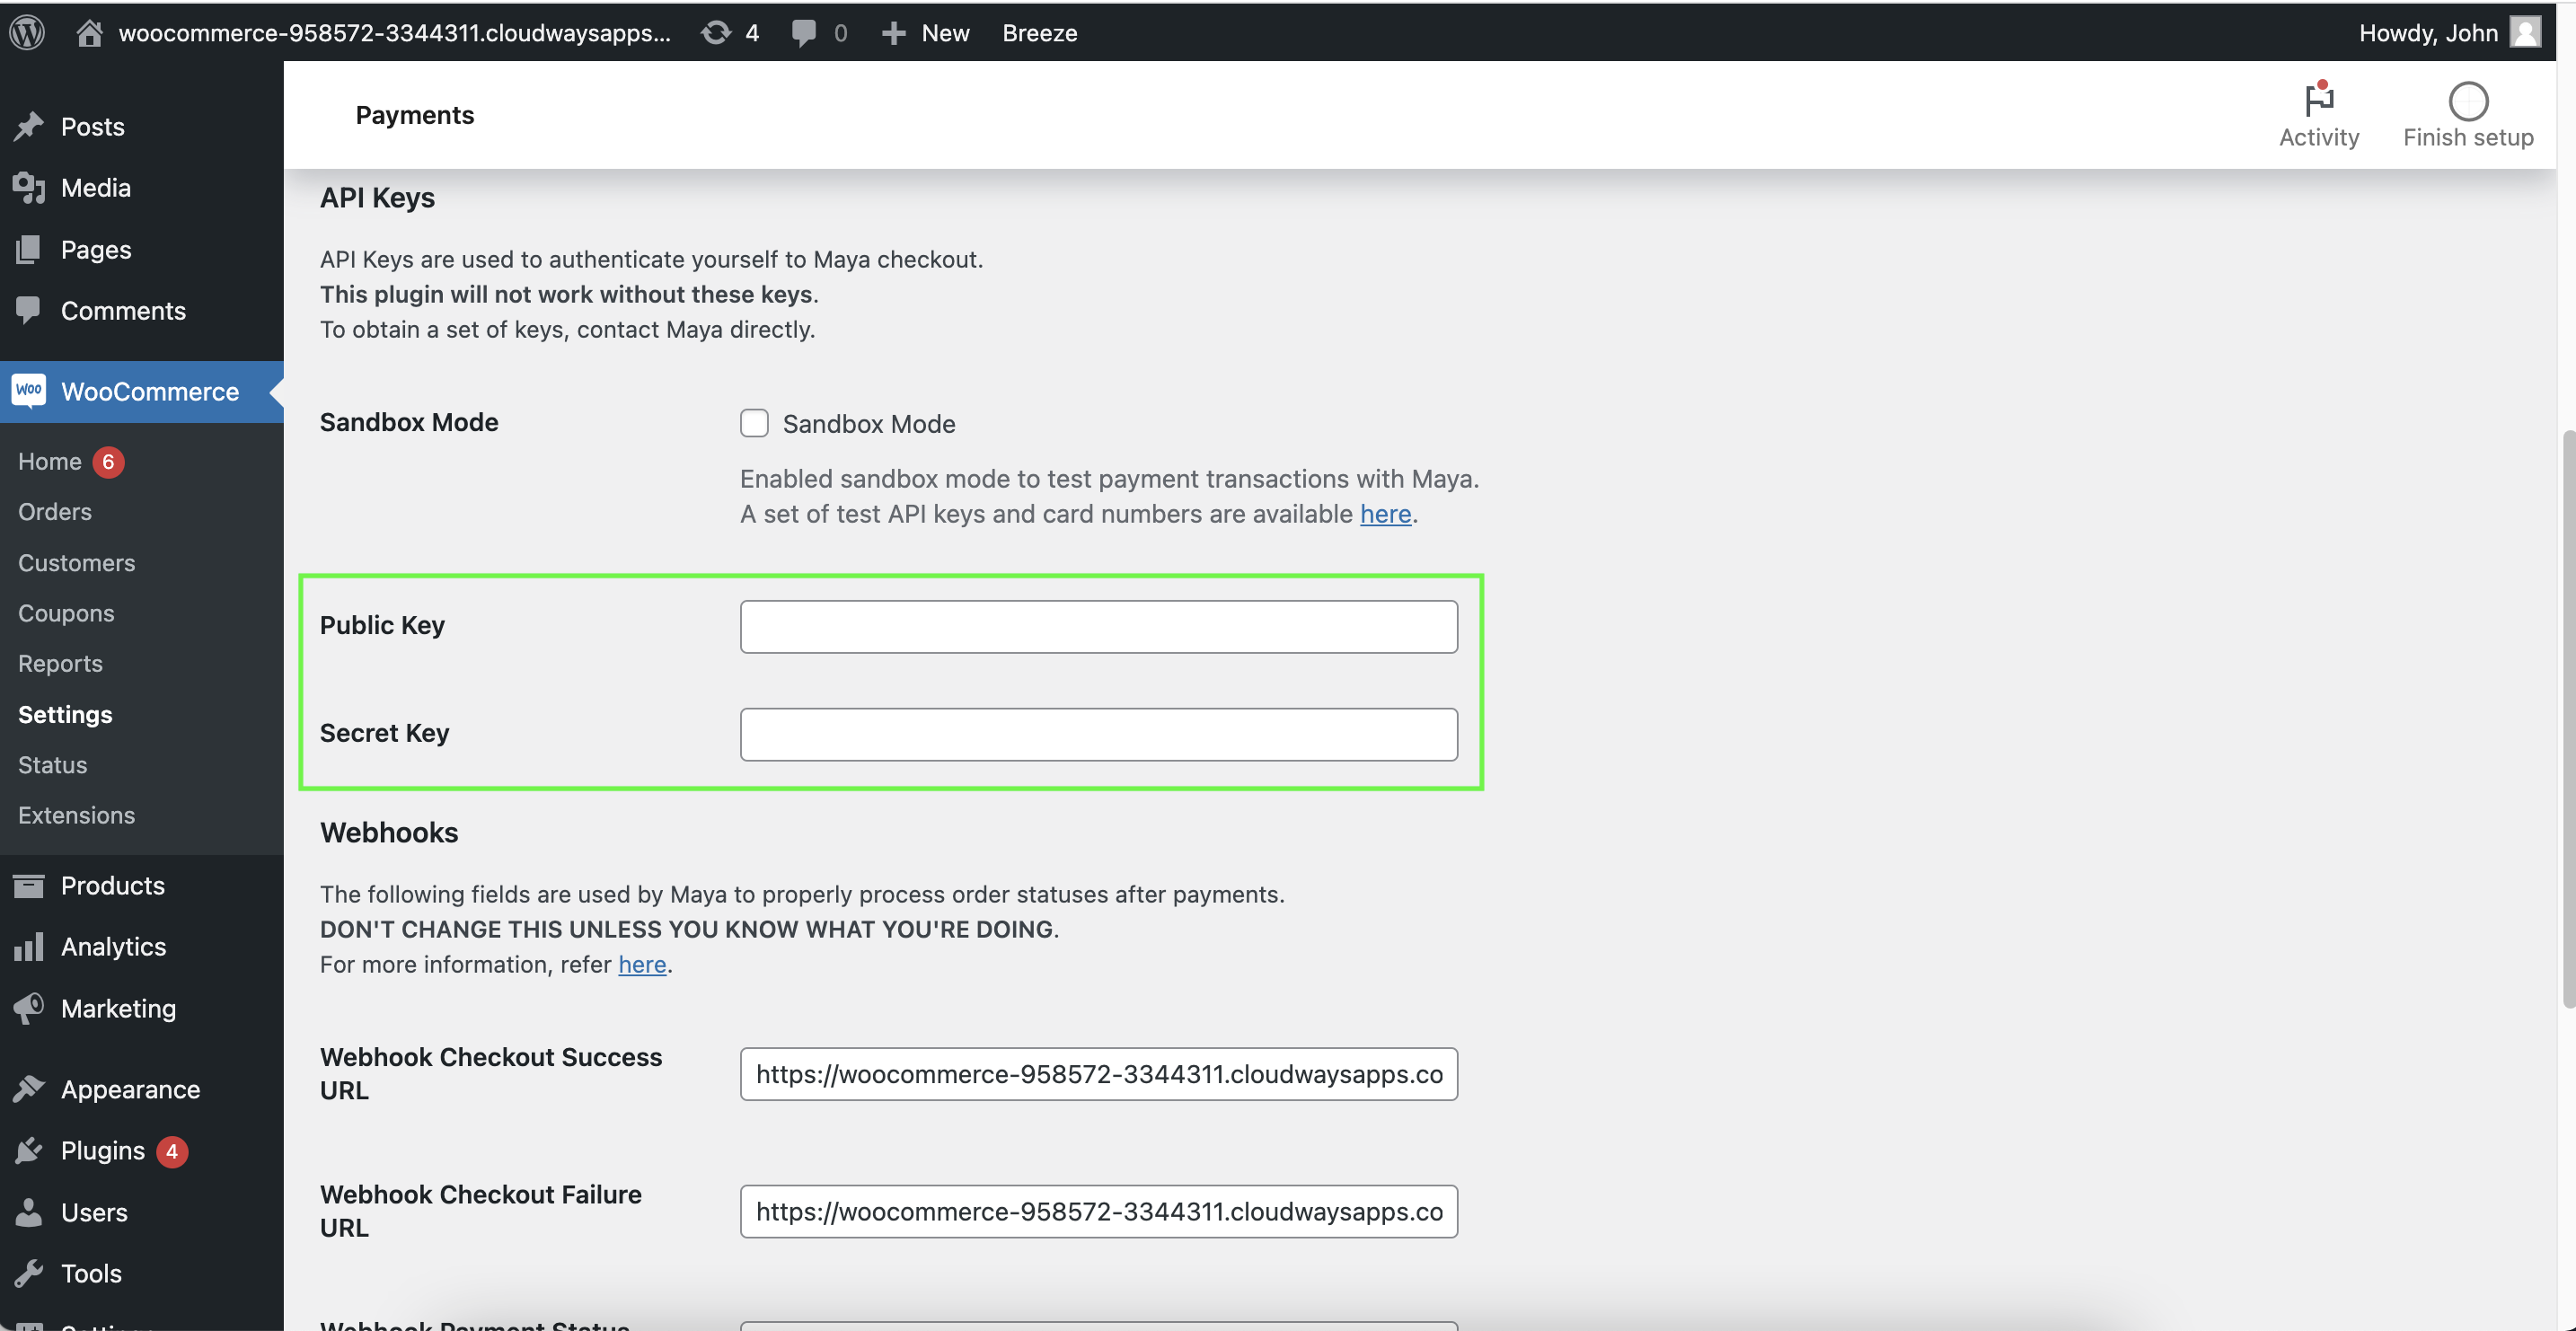
- The generated webhooks are pre-set values that come with the plug-in and do not require any further updates.
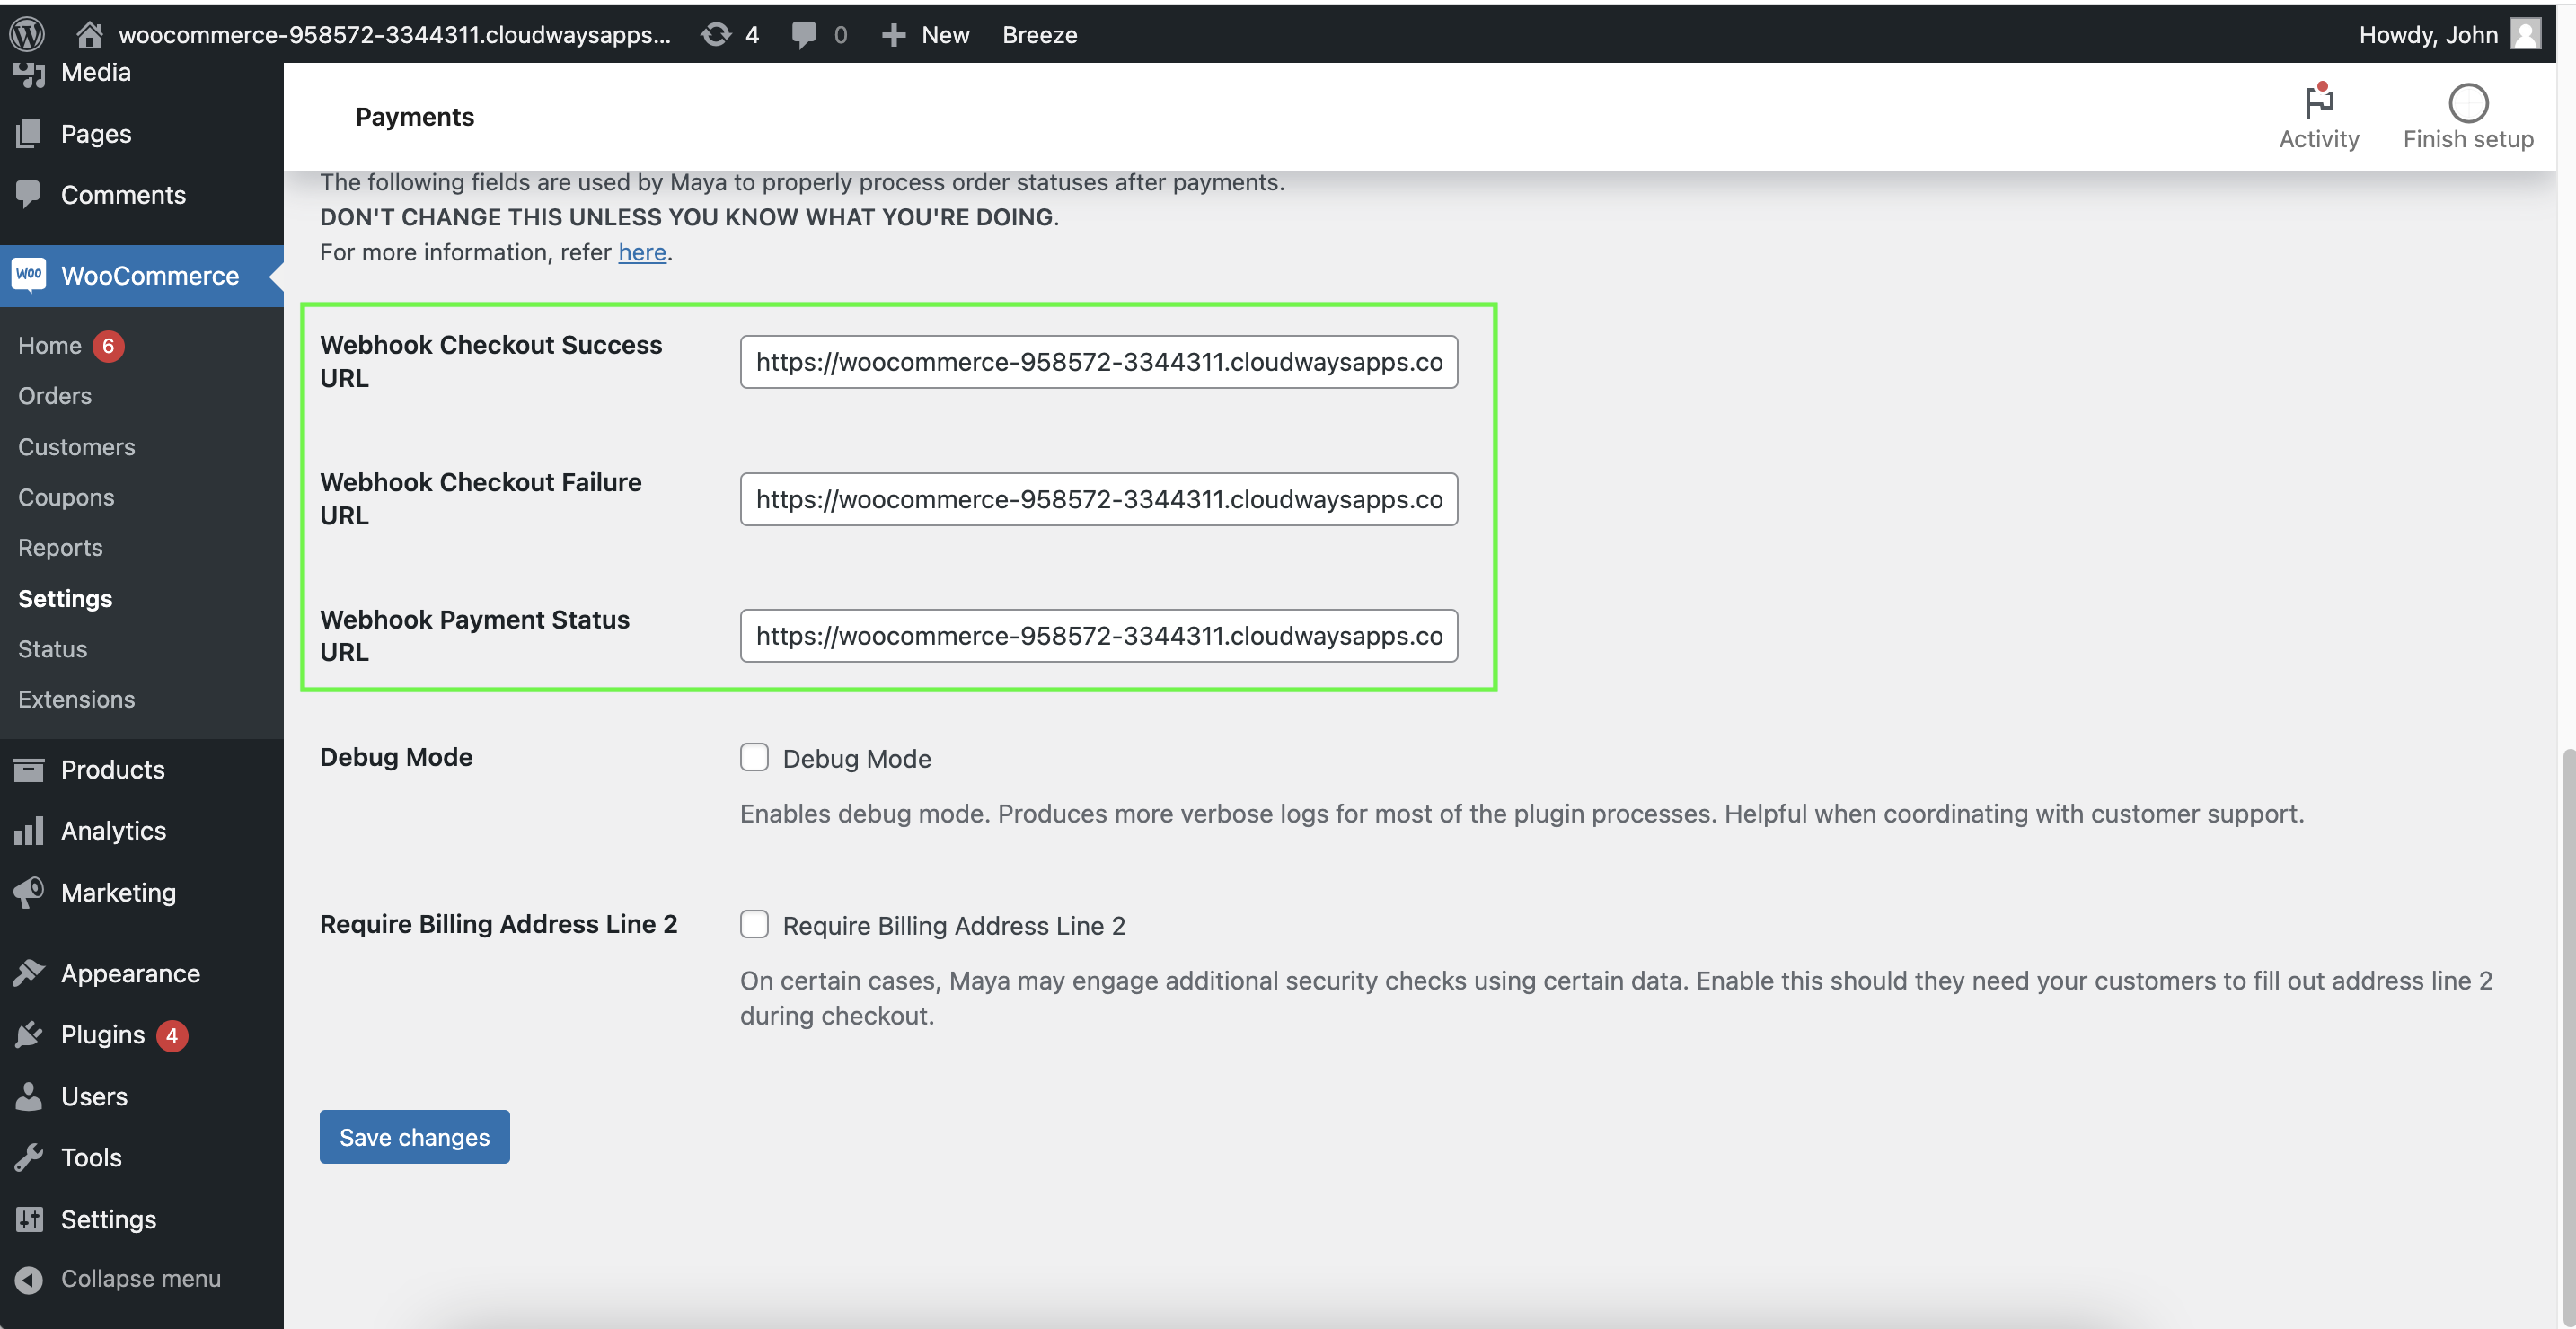
- Click Save changes.
To ensure that the configuration was a success, login to your Maya Manager 1.0. Go to Webhooks, and select the WooCommerce merchant.
You should find the Webhook URLs from your WooCommerce plugin successfully saved on Maya Manager 1.0.
2.3 [Recommended] Sandbox Mode Testing
At this point, you should have done the following:
- Generated Sandbox API Keys.
- You should have added products in your WooCommerce store.
Currently, only the Production environment is accessible through the Maya Business Manager. If you require Sandbox Access via the Maya Manager 1.0, please reach out to [email protected].
Stay tuned for more features to be released within the portal.
- In WooCommerce menu, click Settings. It will open a center navigation where you can click Payments tab.
- Scroll and look for “Payments with Maya”. Click Finish set up or Manage button.
- Enable / Tick Sandbox Mode checkbox.
- Paste your public (
pk-...) and secret (sk-...) keys generated from Maya Manager 1.0 Sandbox on the appropriate fields. Make sure that there are no extra whitespaces.
- Click Save changes.
To ensure that the configuration was a success, login to your Maya Manager 1.0 Sandbox
You should find the Webhook URLs from your WooCommerce plugin successfully saved on Maya Manager 1.0.
At this stage, you should now have a working checkout button that redirects your customer to Maya Checkout.
- Click the checkout button.
- You are redirected to Maya Checkout Page.
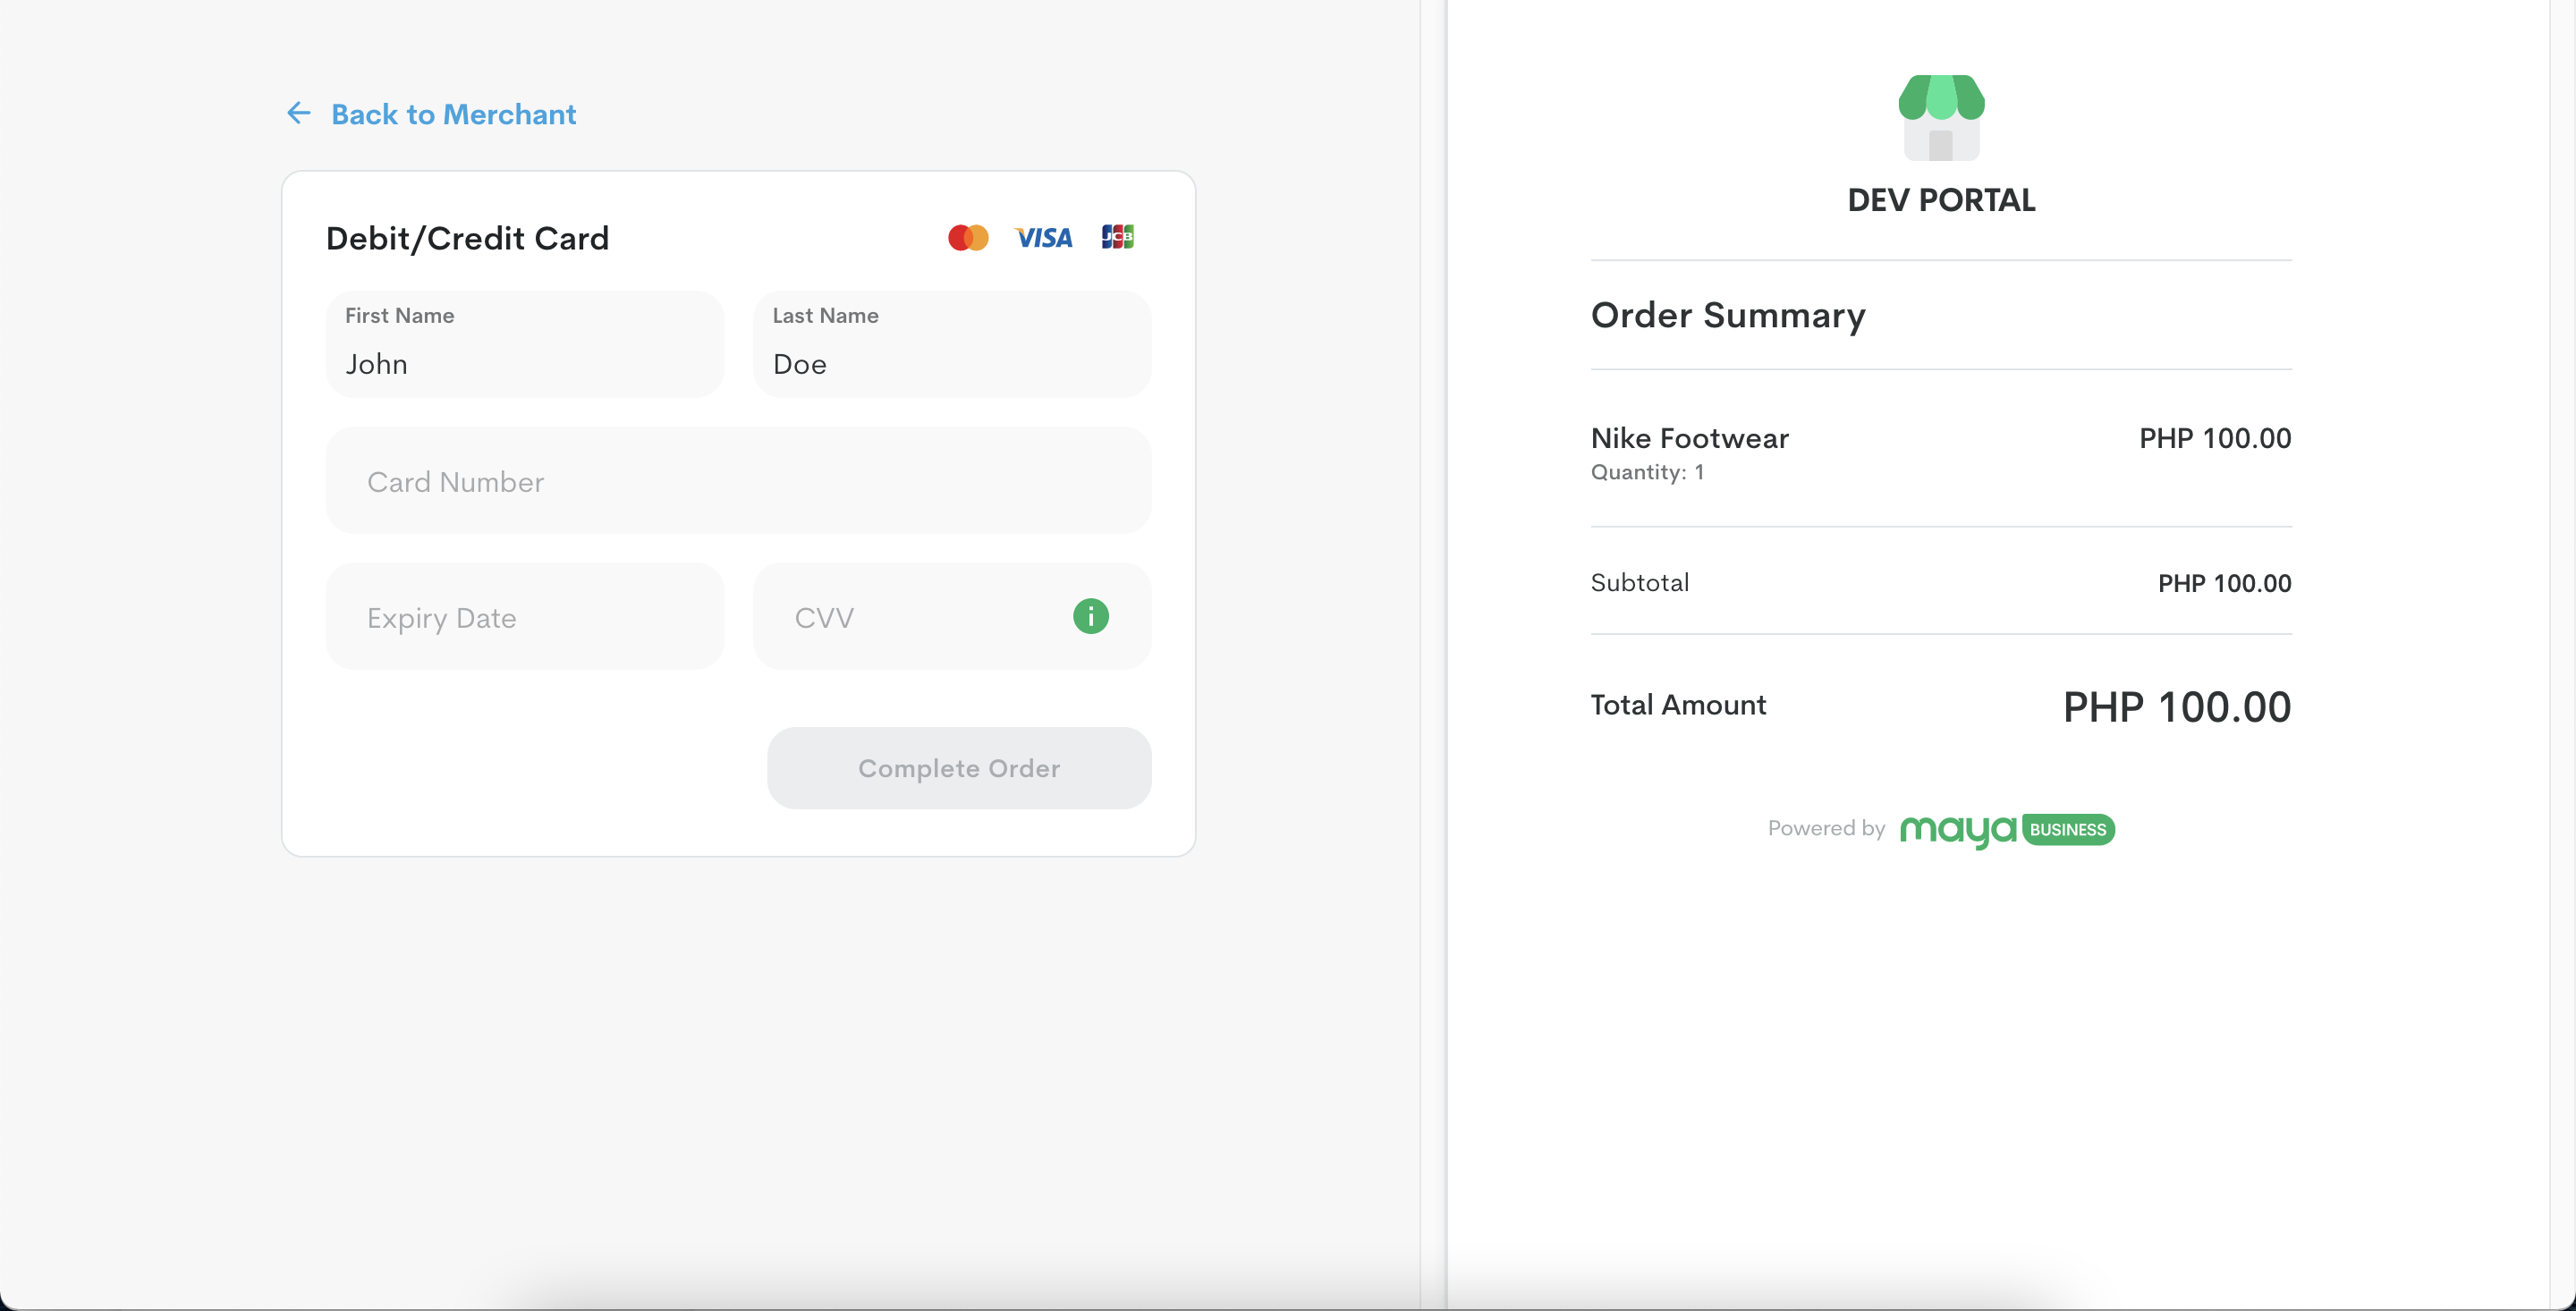
Sample Maya Checkout page
- Before your customer will input their payment details, their order will be marked as Pending Payment on your WooCommerce Orders Dashboard.
- Once the payment is successful, go to your WooCommerce Orders Dashboard. The order should now have the status Processing.
Keep in mind
During your tests on the Sandbox
2.4 Go Live
Once you are done with your tests on the Sandbox Environment, it is time to move to Production.
At this point, you should have done the following:
- Generated Production API Keys.
- You should have added products in your WooCommerce store.
- In WooCommerce menu, click Settings. It will open a center navigation where you can click Payments tab.
- Scroll and look for “Payments with Maya”. Click Finish set up or Manage button.
- Disable / Untick Sandbox Mode checkbox.
- Paste your public (
pk-...) and secret (sk-...) keys generated from Maya Manager 1.0 Production on the appropriate fields. Make sure that there are no extra whitespaces.
- Click Save changes.
To ensure that the configuration was a success, login to your Maya Manager 1.0 Production
You should find the Webhook URLs from your WooCommerce plugin successfully saved on Maya Manager 1.0.
2.5 Live Testing
At this stage, when you checkout products from your store and proceed to payment, you should now be redirected to a live Maya Checkout page.
- Click the checkout button.
- You are redirected to Maya Checkout Page.
Sample Maya Checkout page
- Before your customer will input their payment details, their order will be marked as Pending Payment on your WooCommerce Orders Dashboard.
- Once the payment is successful, go to your WooCommerce Orders Dashboard. The order should now have the status Processing.
Keep in mind
If you wish to test live transactions in Production, you will need to use real cards and e-wallet accounts. Transactions performed will incur real charges.
Advanced Use Cases
Configure Manual Capture
For specific merchants that requested to have Auth and Capture enabled in their Maya Checkout.
This is limited to Card Payments only.
- In WooCommerce menu, click Settings. It will open a center navigation where you can click Payments tab.
- Look for the Manual Capture field, set your chosen Capture method. See here for the details of each type .
- Click Save changes.
- Make sure that this Auth and Capture setting is aligned with your Relationship Manager.
Quick Test
At this stage, you should now have a working checkout button that redirects your customer to Maya Checkout.
- Click the checkout button.
- You are redirected to Maya Checkout Page.
Sample Maya Checkout page
- Once the payment is successful, the payment transaction will be marked as Authorized in Maya Manager 1.0 Transactions List.
- The status of the order will be Pending Payment. This will allow your store team to review inventory before moving the order to Processing.
- After reviewing the order in your store, click Capture and set the final amount that needs to be captured. Once you do this, the transaction will be marked as Captured on Maya Manager 1.0.
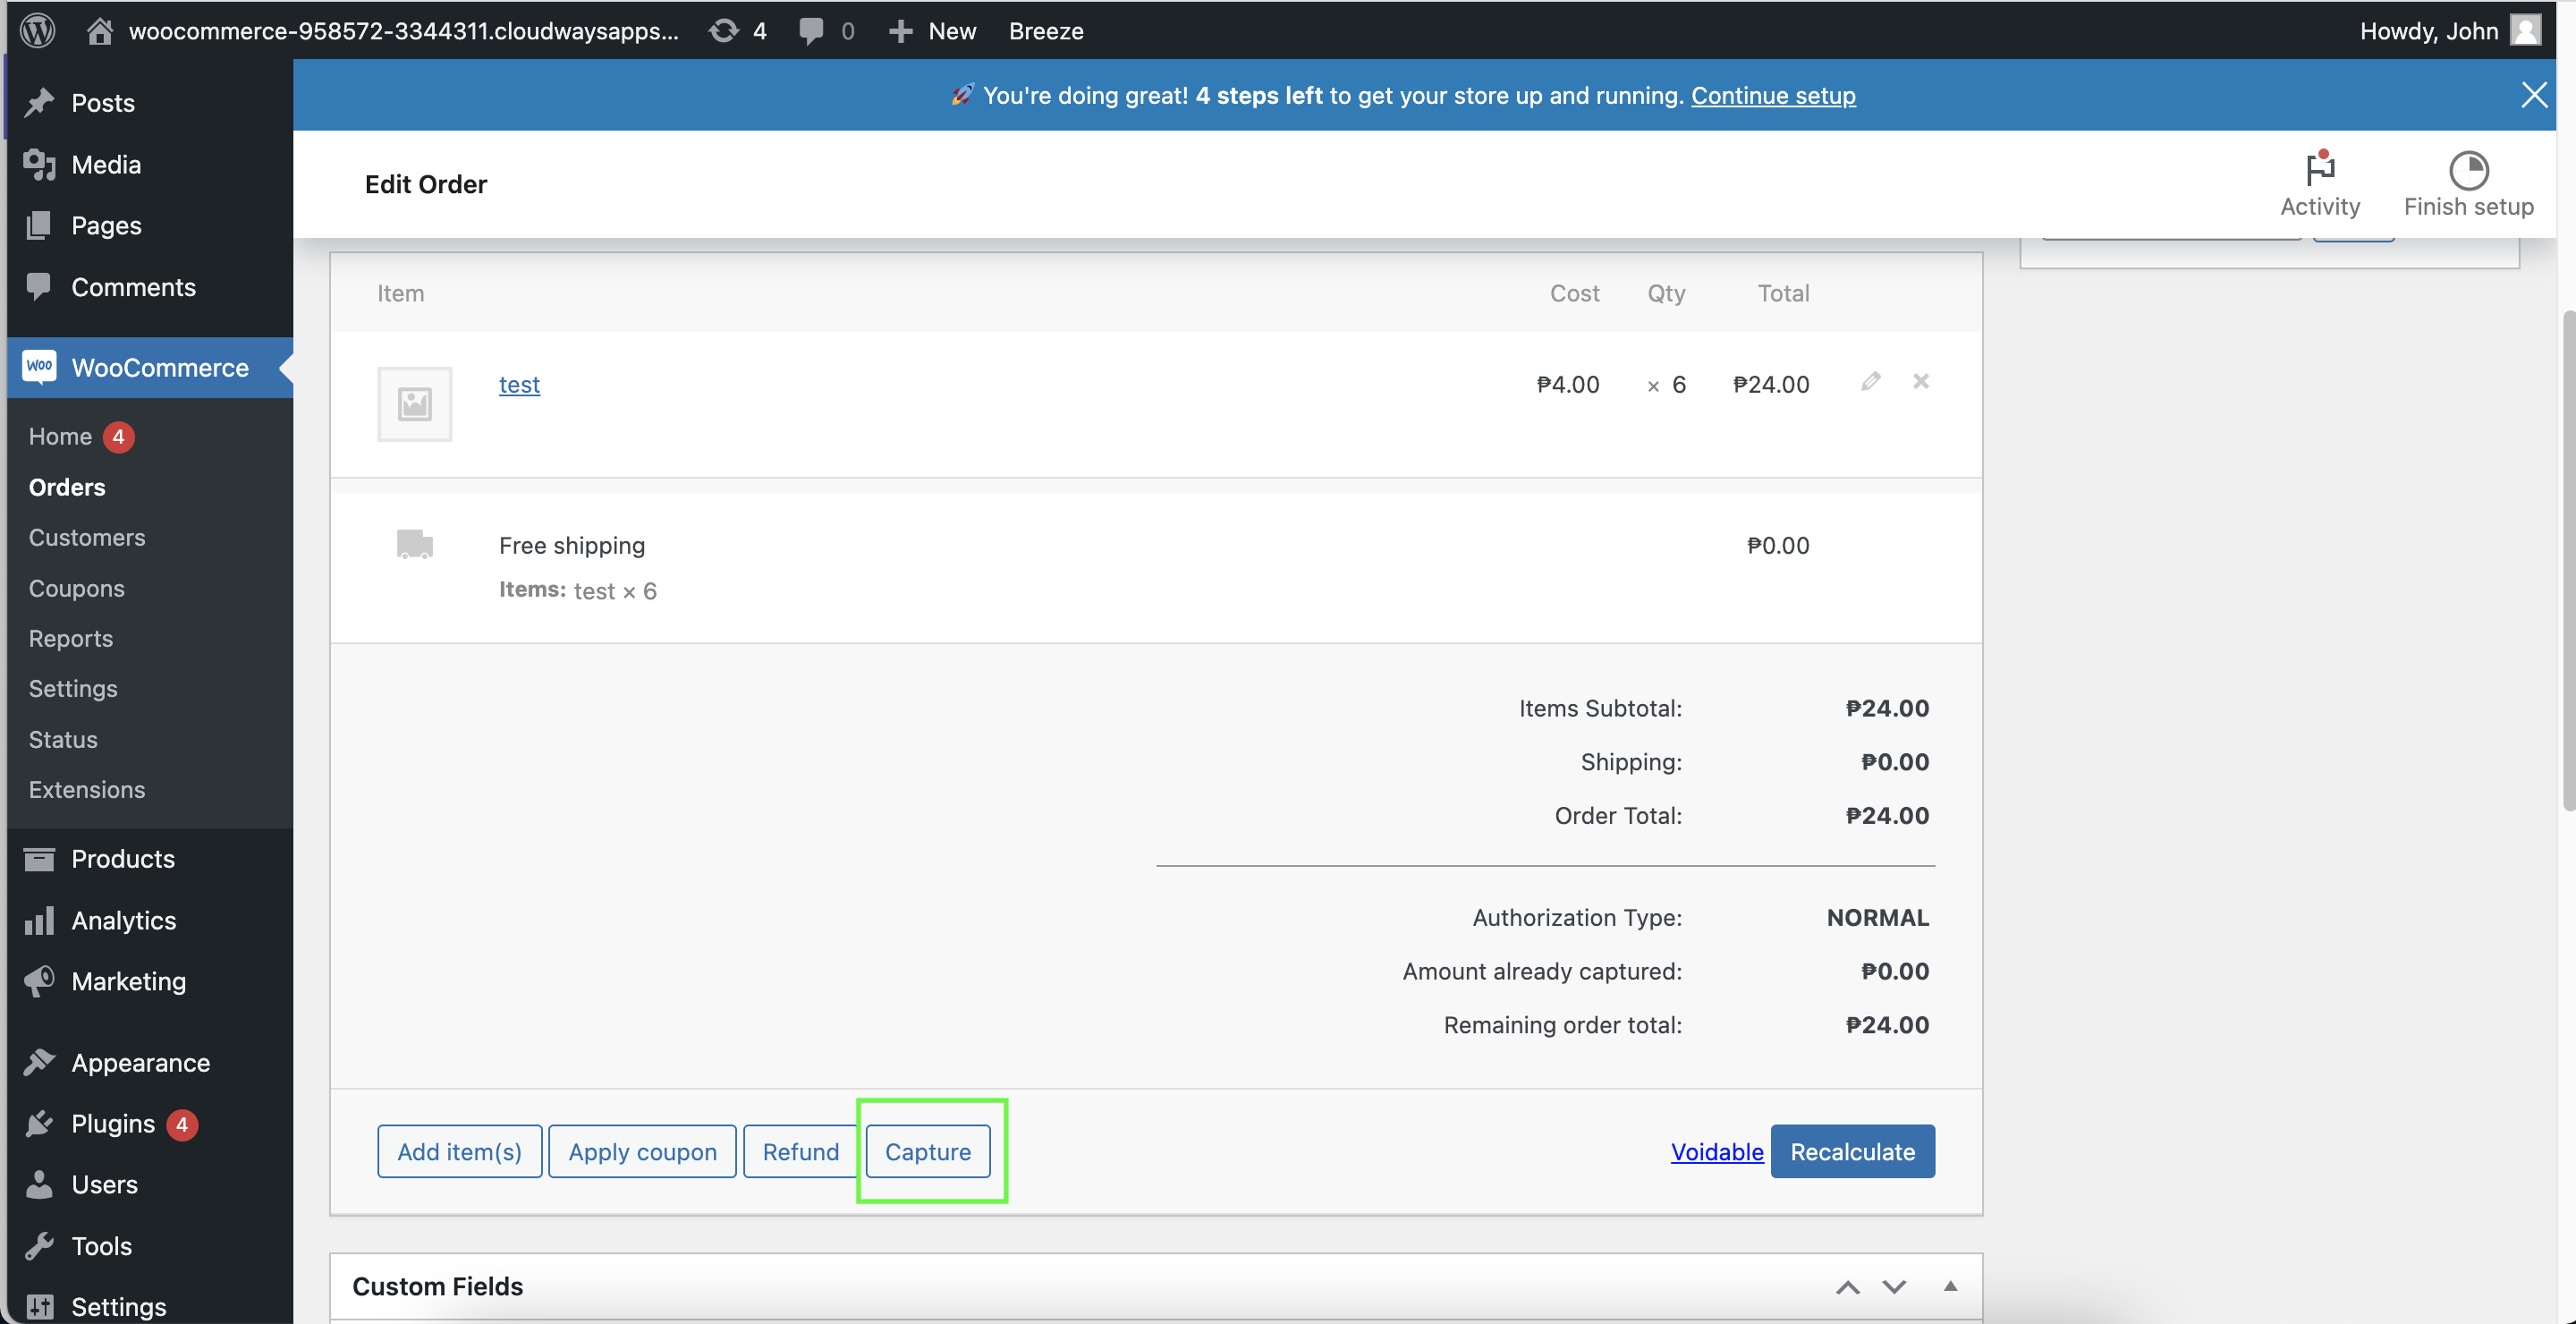
Click Capture button
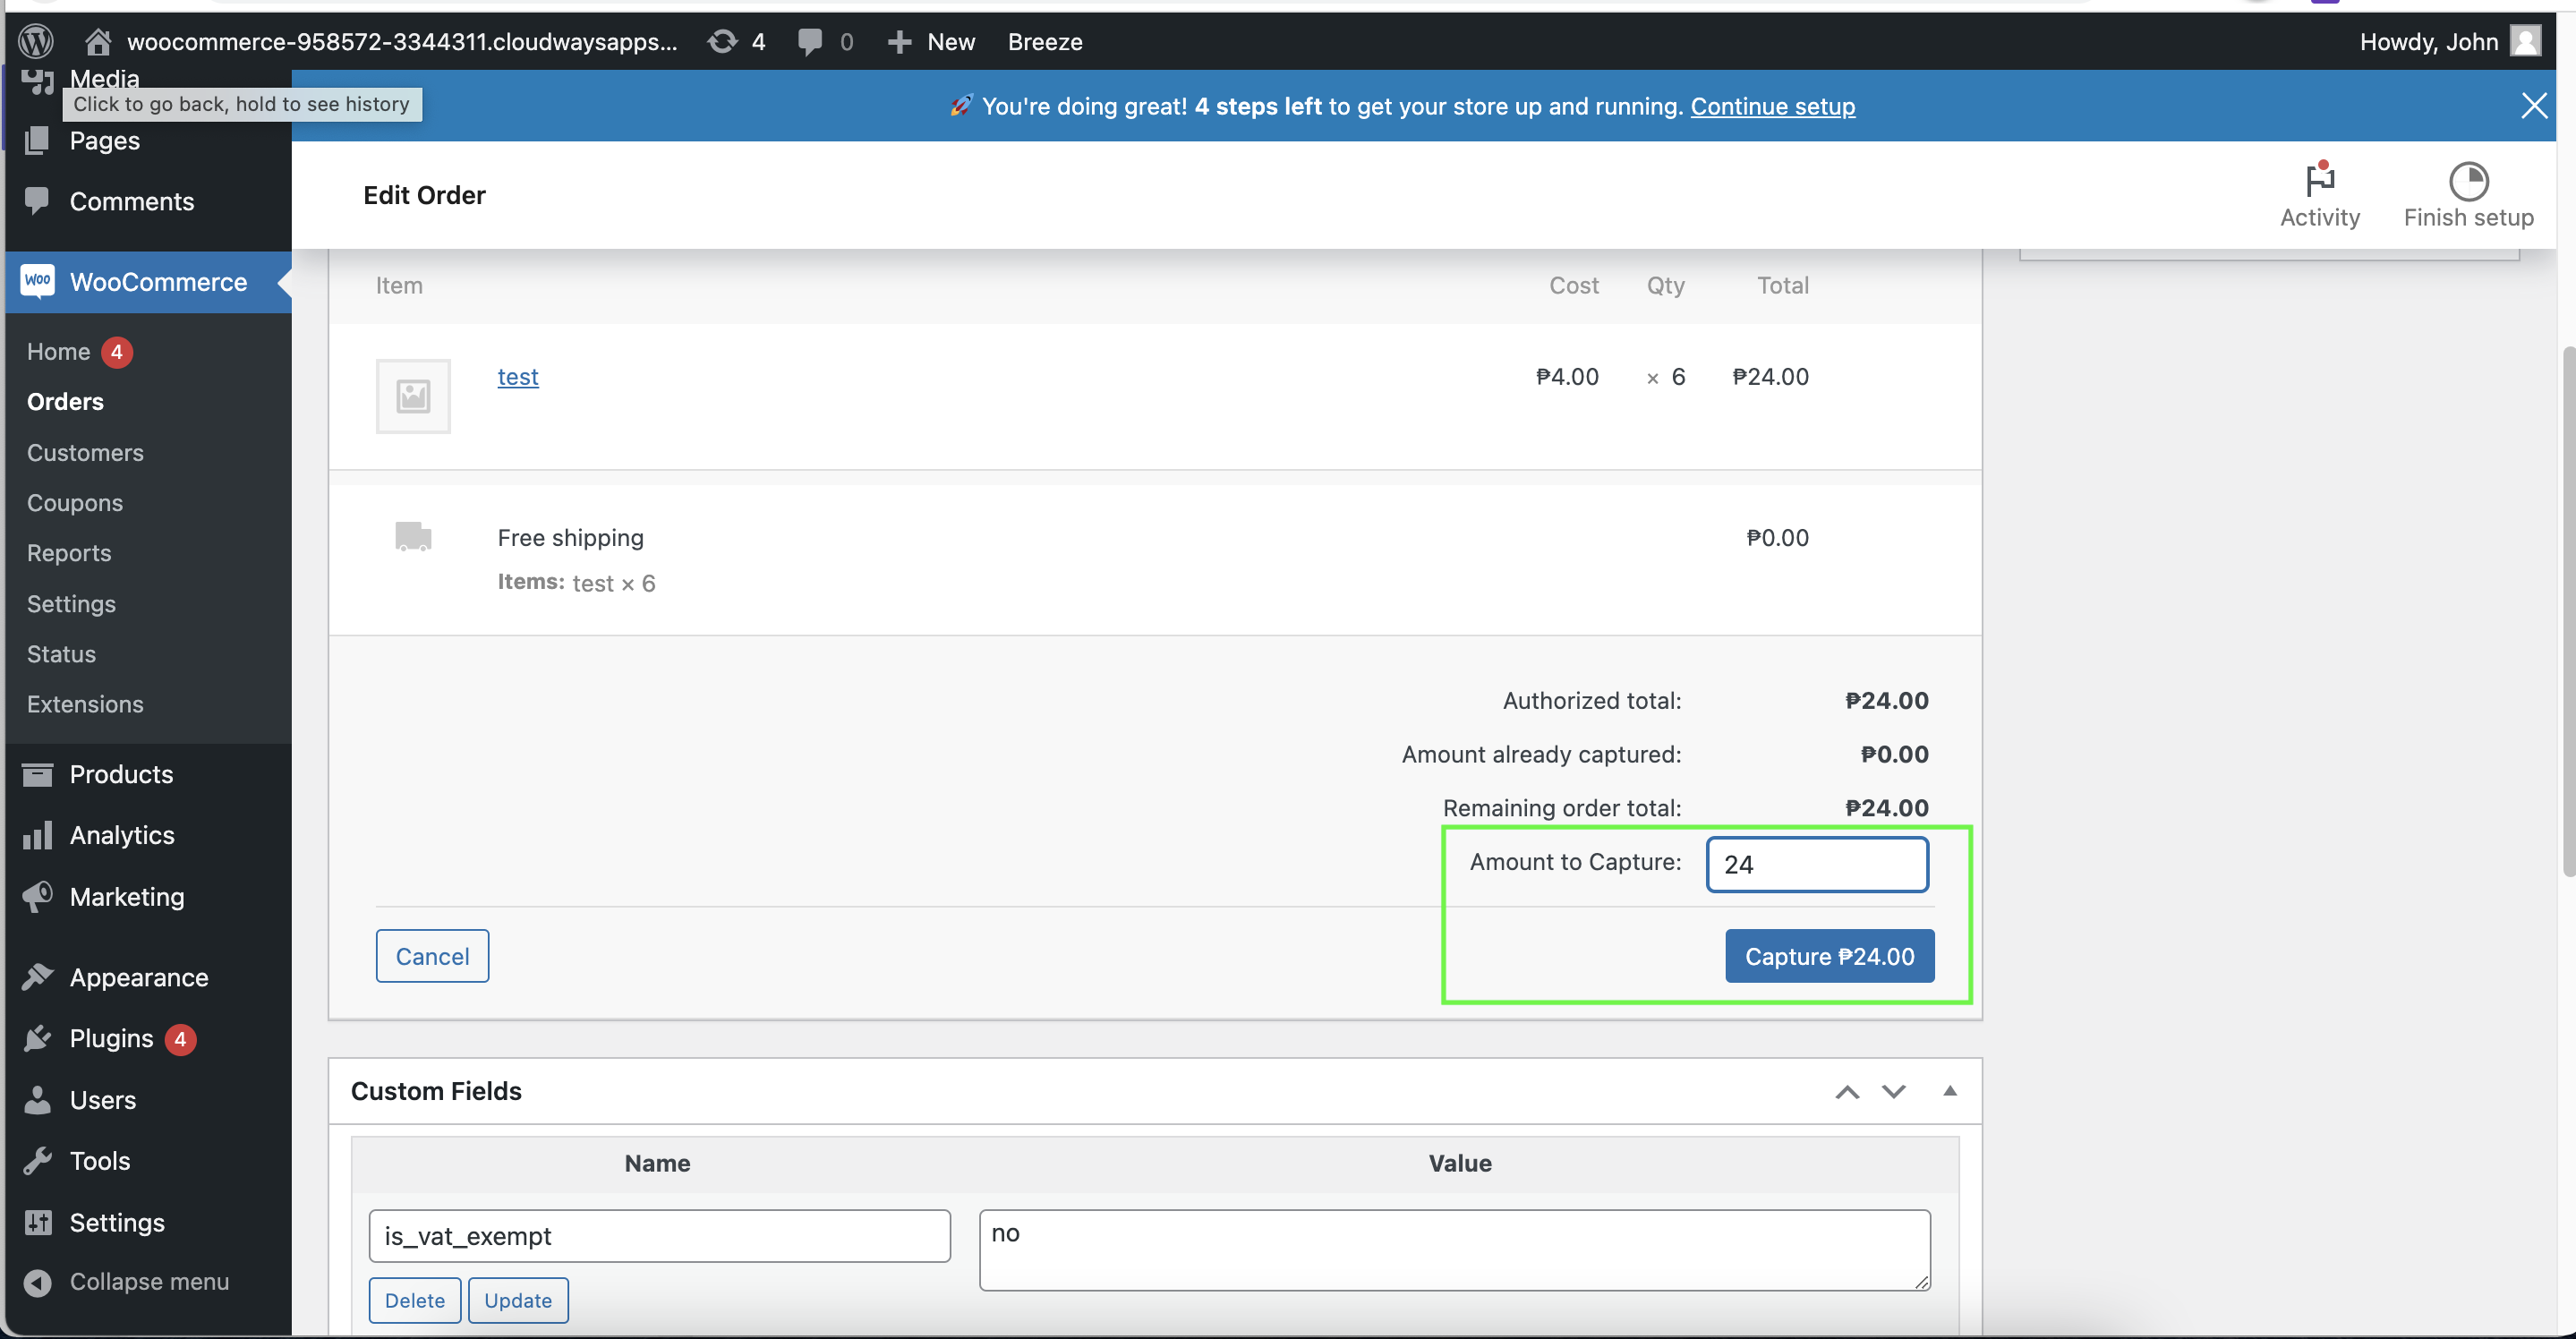
Set the Amount to Capture. Click the Capture button to confirm
Depending on merchant’s fulfillment rules, a fully captured amount will result in an automatic change of status from Pending Payment to Processing. Partial capture of amount will still result to Pending Payment, it will be the merchant’s responsibility to change the status of the order in accordance to their fulfillment rules.
Troubleshooting
For troubleshooting tips and guides, please refer to WooCommerce Troubleshooting Guide
Updated almost 3 years ago