Quick Start Guide with Maya Business Manager
This is your first step to being part of our inclusive digital financial economy. In this section, you will understand the prerequisites of integrating with Maya’s Online Payment solutions using Maya Business Manager.
Are you still using Maya Manager 1.0? Refer to the Quick Start Guide with Maya Manager 1.0
instead.
1 Setup the Maya Business Manager
Register and complete your business profile in Maya Business Manager and activate the Maya Online Payment solution of your preference.
Exploring Maya Online Payments that have captured your interest, please reach out to [email protected] or to your assigned Maya Relationship Manager.
2 Learn the Environments
Access to Maya Business Manager is currently limited to Production ONLY.
Maya offers its partners the ability to integrate with Maya solutions through the Sandbox and Production environments.
- Sandbox - The Sandbox environment provides an instance for integrating Maya solutions and testing development builds, without the risk of impacting live transactions and real customers. During this testing phase, you may use our Sandbox Credentials and Cards.
- Production - The Production environment represents the live setting where actual transactions will result in real charges. To conduct live transaction testing in the Production environment, you will need to use real cards and e-wallet accounts.
3 Generate your API Keys
At this point, you should have done the following:
- Completed your Maya Business Manager profile
- Have activated the Online Payment solution of your choice, e.g. Online Checkout
- Solution ordering status is provisioned and is no longer tagged as PENDING.
Before you can start accepting online payments, you need to generate and set up your API keys. In technical terms, API keys serve the purpose of securely identifying and authenticating your transaction requests to Maya. The API keys you generate will then be used to establish payment integration on your platform, enabling you to accept online payments.
If you simply want to explore Maya Checkout, Maya Vault, or Pay with Maya in the Sandbox environment without making any formal commitments yet, you have the following options:
- Use the default Sandbox API keys listed in the Sandbox Credentials and Cards.
- Generate temporary Sandbox API keys through the Developer Sandbox Application Management feature in Maya Business Manager, allowing you to test Maya Checkout, Maya Vault, or Pay with Maya.
When you are required to perform tests for Maya Checkout, Maya Vault or Pay with Maya in Sandbox (such as fulfilling a requirement before going to production), you will need access to Maya Manager 1.0. Kindly reach out to [email protected] or to your assigned Maya Relationship Manager.
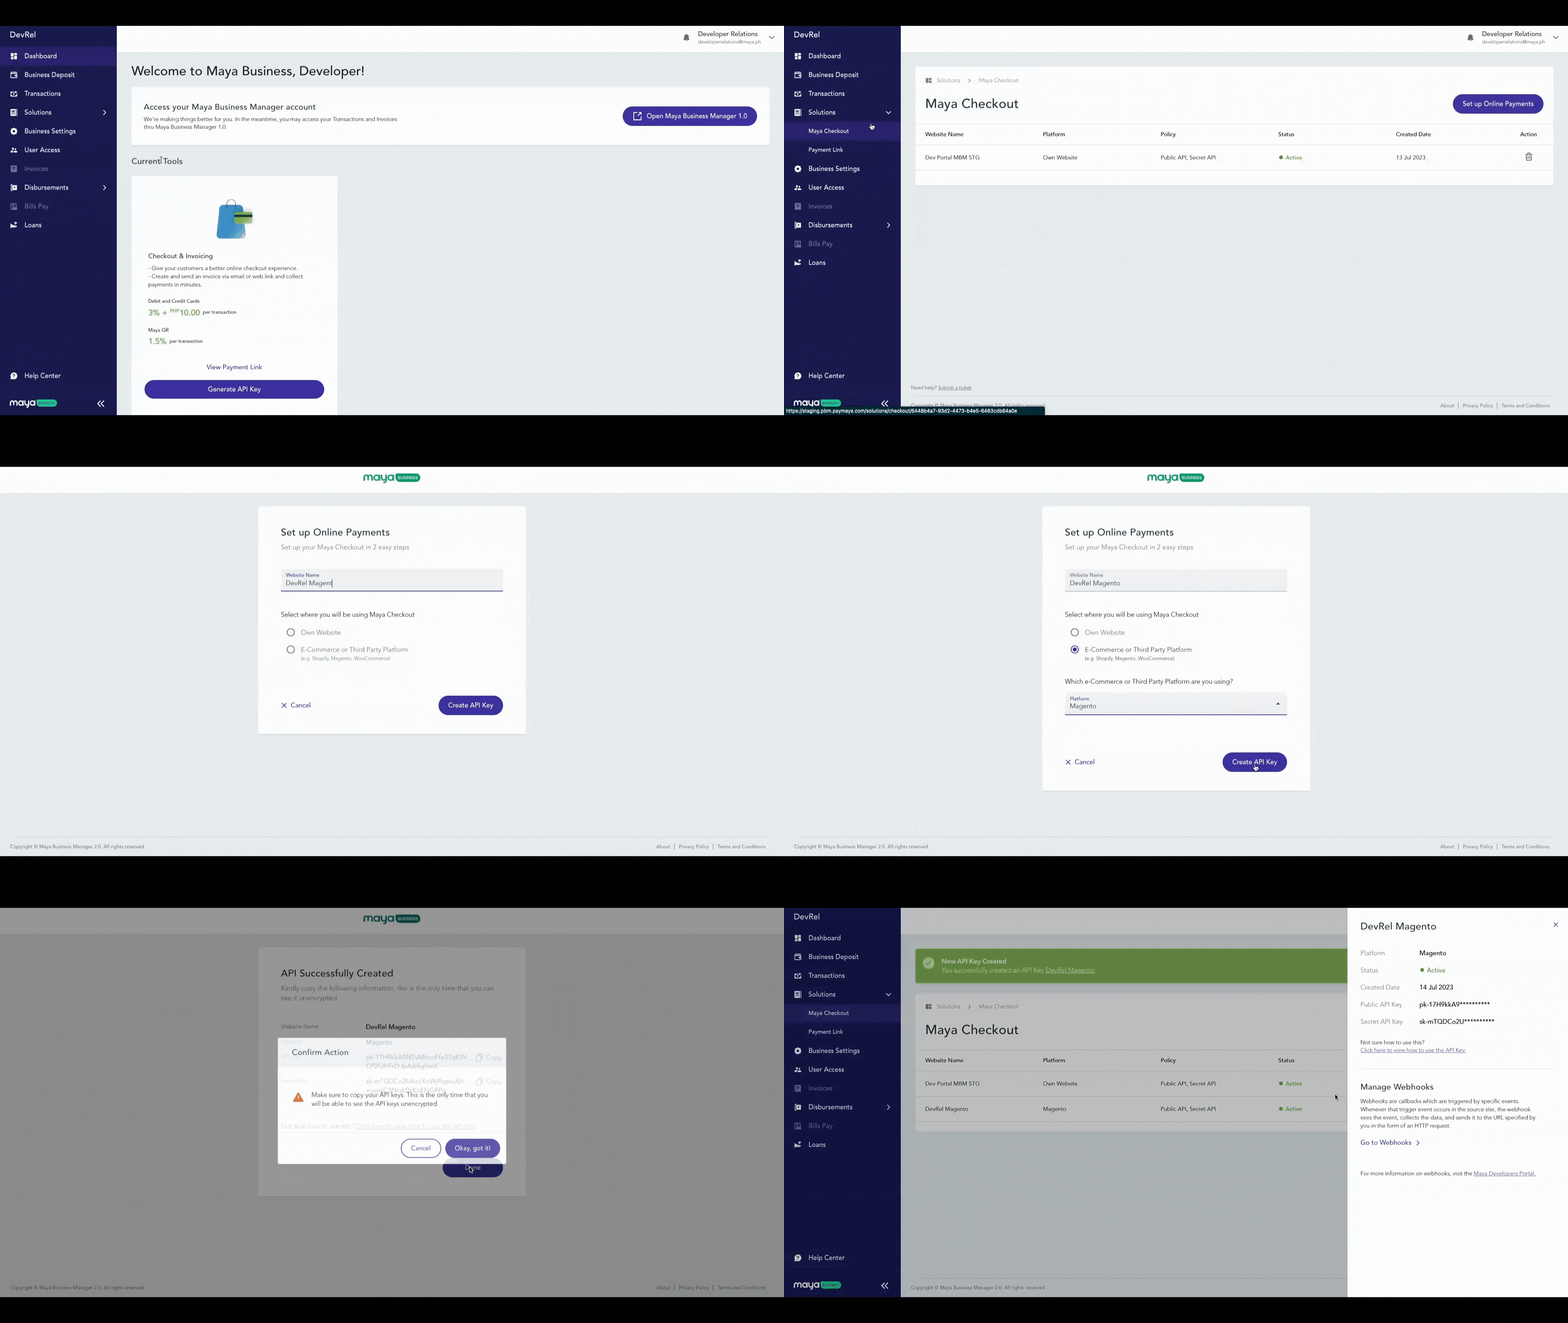
Generate your API keys by following the steps provided below:
Current setup of the Maya Business Manager can only support Production API key generation for Maya Checkout and Maya Plugin.
- Login in to Maya Business Manager
.
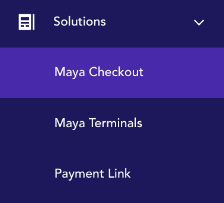
- On the sidebar, navigate through “Solutions” and choose an activated online payment solution; for example “Maya Checkout”.
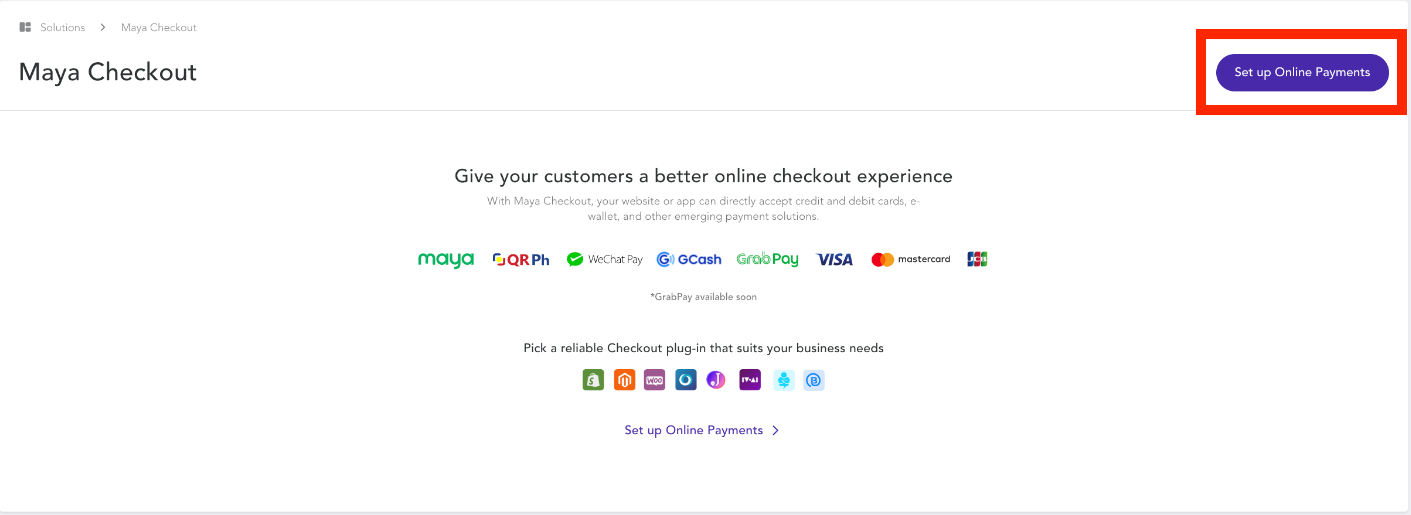
- Click “Set up Online Payments”.
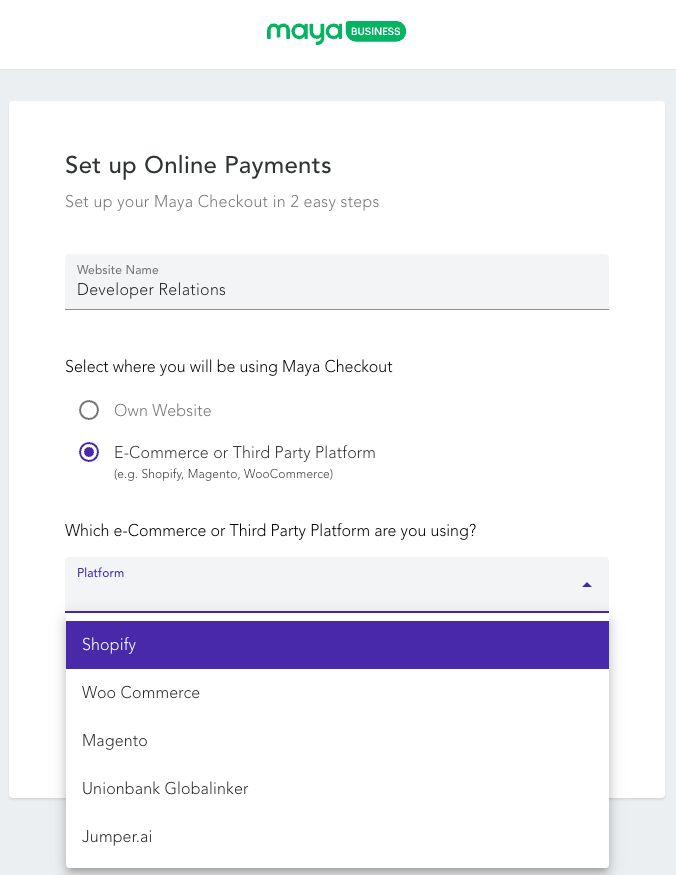
- On the Set up Online Payments form, fill out the website name field, choose where will you be using the Maya Checkout, and select the platform you are using. Click Submit.
- Unencrypted API keys will be shown on the screen. This is the only time that you can visibly see this; once you exit, only the masked values will be reflected.
- Copy and store the generated public and secret API keys in a secure and encrypted location. Do not store your keys anywhere that unauthorized personnel can access.
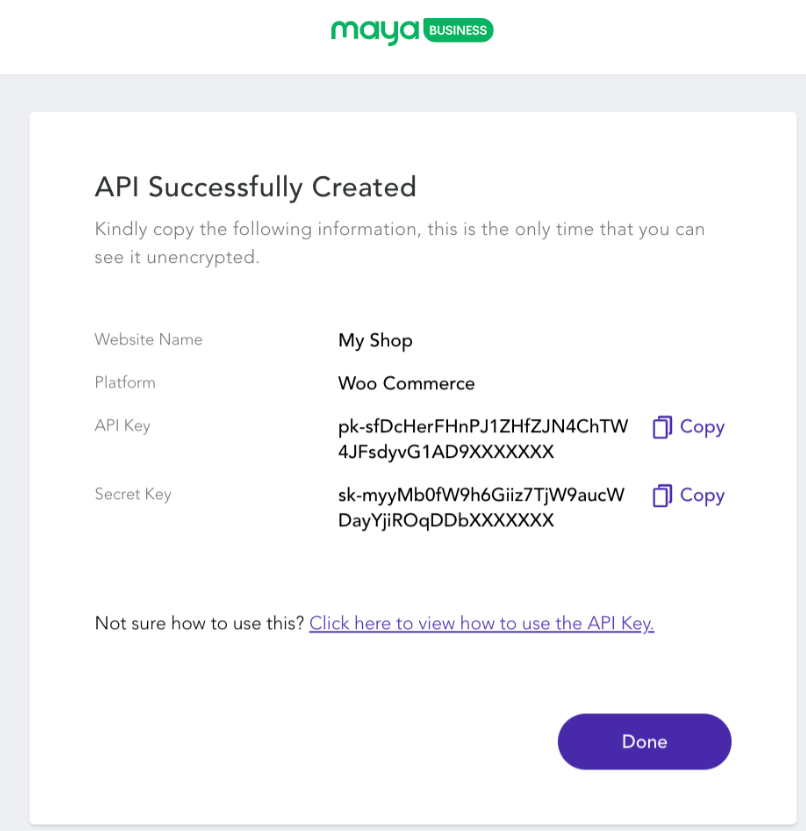
Save your API key in a secured location
Misuse or mishandling of tokens or keys within the jurisdiction of the Partner, could entail risks and vulnerability of transactions.
⚠️ If your API keys are lost or breached, delete the old API keys and generate new ones in the same environment.
4 Authenticate with our APIs
For every Maya solution, there are multiple API endpoints that you as a Partner can utilize. To establish your identity as an authorized entity accessing Maya's endpoints, API Authentication is necessary when making transaction requests.
In the case of Maya's Plugin solutions, the generated API keys are configured within the dashboard of the utilized Maya Business Plugin. The plugin manages the communication and handling of transaction authentication requests with Maya.
Integrating directly with Maya’s APIs? Refer to the Maya Manager 1.0's API Authentication
.
5 Proceed to the Payment Solutions Guide
Now that you have generated your API keys, proceed to the setup guides of your Online Payments . Select the Maya solution you have activated and read the guides.
Keep in mind
The API Keys generated are exclusive to the particular Maya Online Payment solution for which they were activated.
To illustrate, an API key created for Maya Checkout cannot be repurposed for a Maya Card Payment Vault Endpoint. Each solution mandates the use of its own distinct API key.
6 Implement Webhooks to know payment statuses
After your customer performs a payment from your application or platform, that transaction is sent to Maya for processing. Maya uses webhooks to notify you of specific events that occur during the payment request. Payment events include successful payments, a customer decides not to authorize the payment, or when the payment fails.
Learn how to implement webhooks by following the steps provided in the Create and Configure your Webhook
guide.
7 Go Live
Once you are done with your tests on the Sandbox Environment, it is time to move to Production.
- Generate your Production keys. Refer to Generate your API Keys.
- Set up your Production Webhooks. See Webhooks for Payment Solutions
for guidance.
- Be ready for your Post Production Testing. Once launched in production, prepare the following:
- For initiating transactions: Download the Maya App
(For Pay with Maya) and/or use real cards.
- Production launch of your application/platform.
- For initiating transactions: Download the Maya App
If you wish to test live transactions in Production, you will need to use real cards and e-wallet accounts. Transactions performed will incur real charges.
Are you still using Maya Manager 1.0? Refer to the Quick Start Guide with Maya Manager 1.0
instead.
Updated 7 months ago