Learn how to integrate with Maya Checkout
Looking for No Code Solutions?
1 Setup Maya Manager
Contact your assigned Relationship Manager to gain access to your Maya Manager Sandbox account.
Keep in mind
Maya Manager has two environments: Sandbox and Production.
- Sandbox is used for development, testing, and integration. Once the integration is completed in this environment, it will be verified by our Operations team. Only then the production credentials will be provided.
- Production is for live payments. Testing in this environment will incur real charges.
Both environments have the ability to generate API keys. Once your account is onboarded to a sandbox account, you need to log in to the manager account of your respective environment.
2 Generating API Keys and API Authentication
Generate your API keys by following the steps below:
Step 1: Login to Maya Manager Sandbox and generate your API Key.
Step 2: Go to the menu on the left side of the screen and look for API Keys.
Step 3: On the main navigation, select the name of the Merchant that you registered earlier. Then generate the API key by clicking Generate API Key.
Step 4: After being redirected to another screen, create keys for both Public and Secret policies.
Step 5: Click Create then your API key will be shown to you.
The same flow will be used when generating keys on to your Production environment.
Save your API key in a secured location
The full API key will only be shown once. It is important that you store it in a secure location. If you lost your API key, try generating it again using the environment you are working on.
Authenticating with our API
Authentication is done via HTTP Basic Authentication. Depending on the API endpoint, the public (pk-....) or secret (sk-....) key must be provided as the username and the password left as blank.
Steps are as follows:
- Combine Username and Password (left blank) separated by ‘:’ (colon). If your API key is “pk-Z0OSzLvIcOI2UIvDhdTGVVfRSSeiGStnceqwUE7n0Ah”, the resulting string is:
pk-Z0OSzLvIcOI2UIvDhdTGVVfRSSeiGStnceqwUE7n0Ah:
- Apply Base64 encoding to the resulting string from Step 1. Using the resulting string from Step 1, the Base64 encoded string will be:
cGstWjBPU3pMdkljT0kyVUl2RGhkVEdWVmZSU1NlaUdTdG5jZXF3VUU3bjBBaDo=
- Indicate the authorization method i.e. “Basic” followed by a space then the Base64 encoded string in Step 2. An example is shown below.
Authorization: Basic cGstWjBPU3pMdkljT0kyVUl2RGhkVEdWVmZSU1NlaUdTdG5jZXF3VUU3bjBBaDo=
See also: HTTP Basic Auth
3 Prepare the required screens for Maya Checkout
Every payment state should show an appropriate web page in order for the customer to know the status of their transaction. You need to host these pages in your website.
Click here to see sample pages
Success Page Sample
<html>
  <head><title>Payment is successful</title></head>
  <body>
    <h1>Thank your for your order!</h1>
    <p>
      <a link="/track-order">Tracker your order here</a>.
    </p>
  </body>
</html>
Failed Page Sample
<html>
  <head><title>Payment Failed</title></head>
  <body>
    <h1>Payment Failed!</h1>
    <p>
      <a link="/track-order">Create a new order?</a>.
    </p>
  </body>
</html>
Cancelled Page Sample
<html>
  <head><title>Cart</title></head>
  <body>
    <h1>List of items inside the cart</h1>
    <p>
      <a link="/track-order">Checkout</a>.
    </p>
  </body>
</html>
4 Redirect your customer to Maya Checkout
Add a checkout button to your website to call Maya's Checkout API to create a Checkout Page.
<html>
  <head>
    <title>Wear Vamos</title>
  </head>
  <body>
    <form action="/create-checkout" method="POST">
      <button type="submit">Checkout</button>
    </form>
  </body>
</html>
Maya's Checkout is a self-hosted page in which users will choose how to pay for the transaction. A Checkout Page is a representation of what the customer has transacted. Your application can configure the Checkout data by passing the fields below:
{
     "totalAmount": {
          "value": 100,
          "currency": "PHP"
     },
     "buyer": {
          "contact": {
               "email": "[email protected]"
          },
          "billingAddress": {
               "countryCode": "PH"
          },
          "shippingAddress": {
               "countryCode": "PH"
          },
          "firstName": "John",
          "lastName": "Doe"
     },
     "redirectUrl": {
          "success": "https://merchant-site.com/payment/success",
          "failure": "https://merchant-site.com/payment/failure",
          "cancel": "https://merchant-site.com/payment/cancel"
     },
     "requestReferenceNumber": "uuid-generated-123"
}
Visit Create Checkout API for more details on the fields.
5 Quick Test
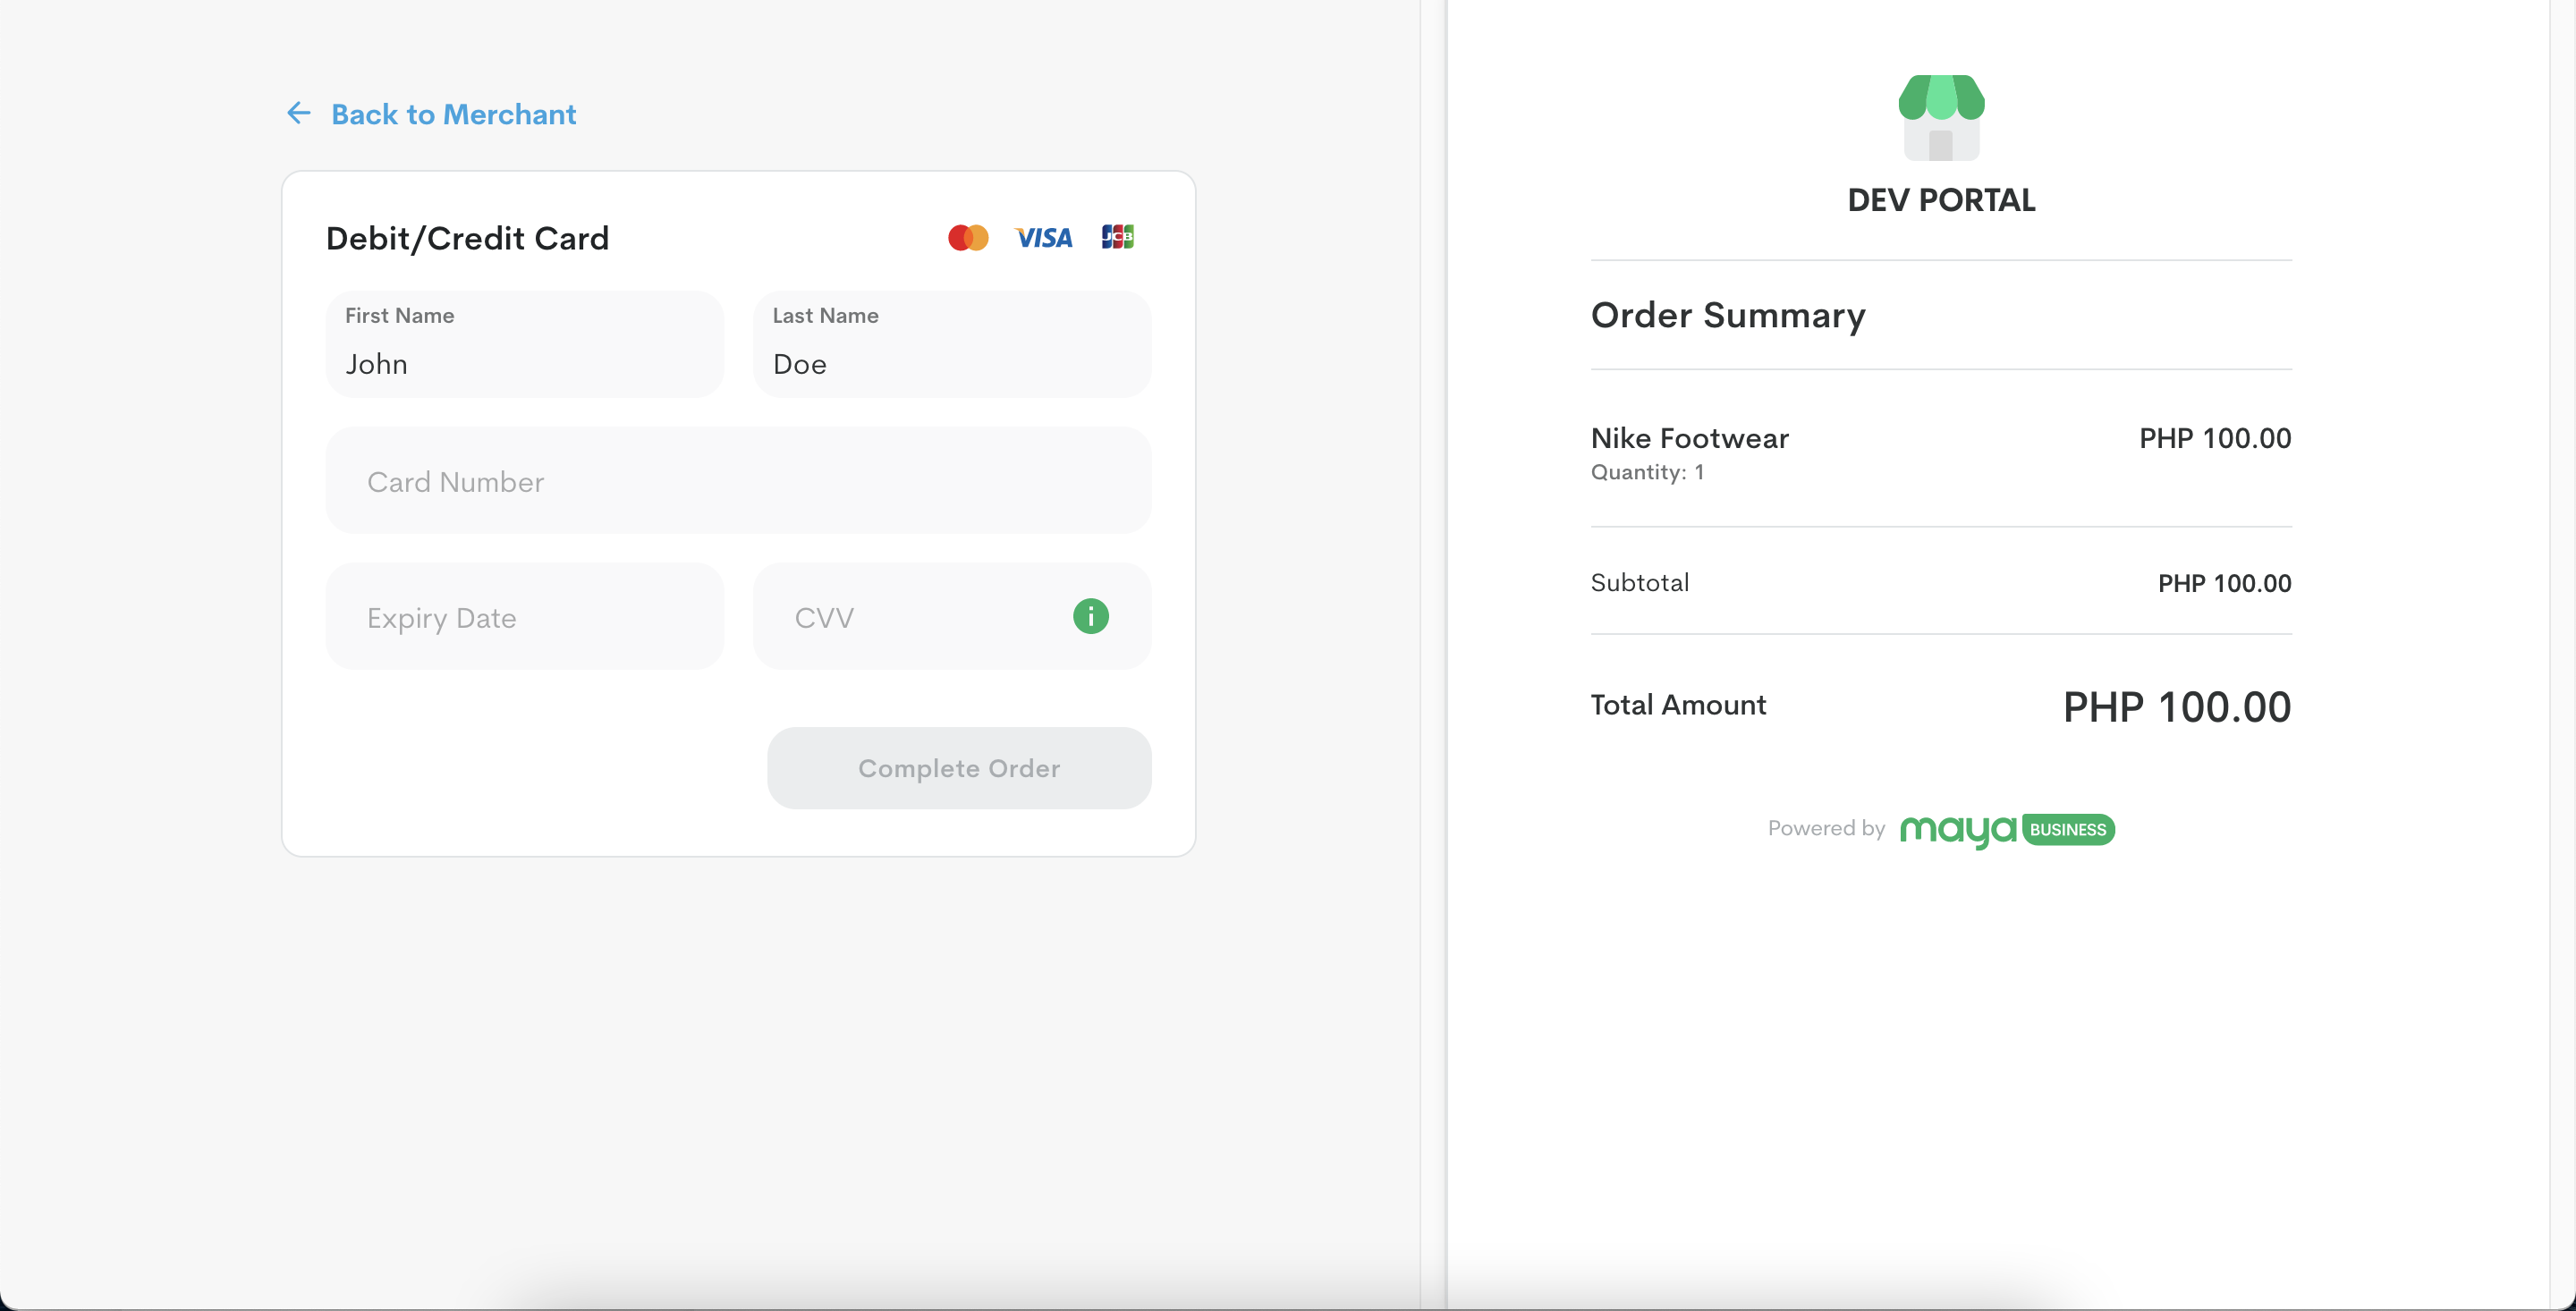
At this stage, you should now have a working checkout button that redirects your customer to Maya Checkout.
- Click the checkout button.
- You are redirected to Maya Checkout Page.

Sample Maya Checkout Page
Feeling lost?
Go to our demo website and see Maya Checkout in action.
Keep in mind
- The Checkout page will expire after one hour.
- Maya is the only e-wallet that can be tested in Sandbox. Other e-wallets like GCash, QRPh, ShoppePay, and WeChat can only be tested in Production environment. You may reach out to your Relationship Manager if you want to enable them.
6 Monitor real-time transaction events
Maya uses webhooks to notify your application when a specific event occurs with your payment request, such as when a customer decides not to authorize a payment, when a payment fails, or when a payment succeeds.
Learn more on how to create and configure your webhook →
7 Go Live Testing
For Online Payments, you will need to do the following test transactions in Sandbox or follow the email sent by the Maya Fulfillment Online Team.
- You will need to test the following card transactions in Maya Checkout: VISA, MasterCard and JCB.
You can use Maya’s list of mock test cards. - Ensure that your Webhooks are registered in Maya Manager. To validate, follow the instructions outlined in our Webhook guide →
Additional References
Updated over 2 years ago
