
Overview
Use the Maya Vault to tokenize the card details and secure the payment without using clear card details.
Do you prefer Maya's Checkout form?
Explore Maya Checkout for simple card acceptance without creating your payment form.
Use Maya Vault to perform the following:
- Tokenize and secure the customer’s card details, and accept card payments without storing sensitive information on your platforms.
- Initiate a singular payment transaction (If the customer decides not to save their cards)
Experience Maya Vault on our demo website and test how it works using the Sandbox Credentials and Cards
.
API Sequence
Understand the API sequence and transaction flow of Maya Vault for one-time card payments.
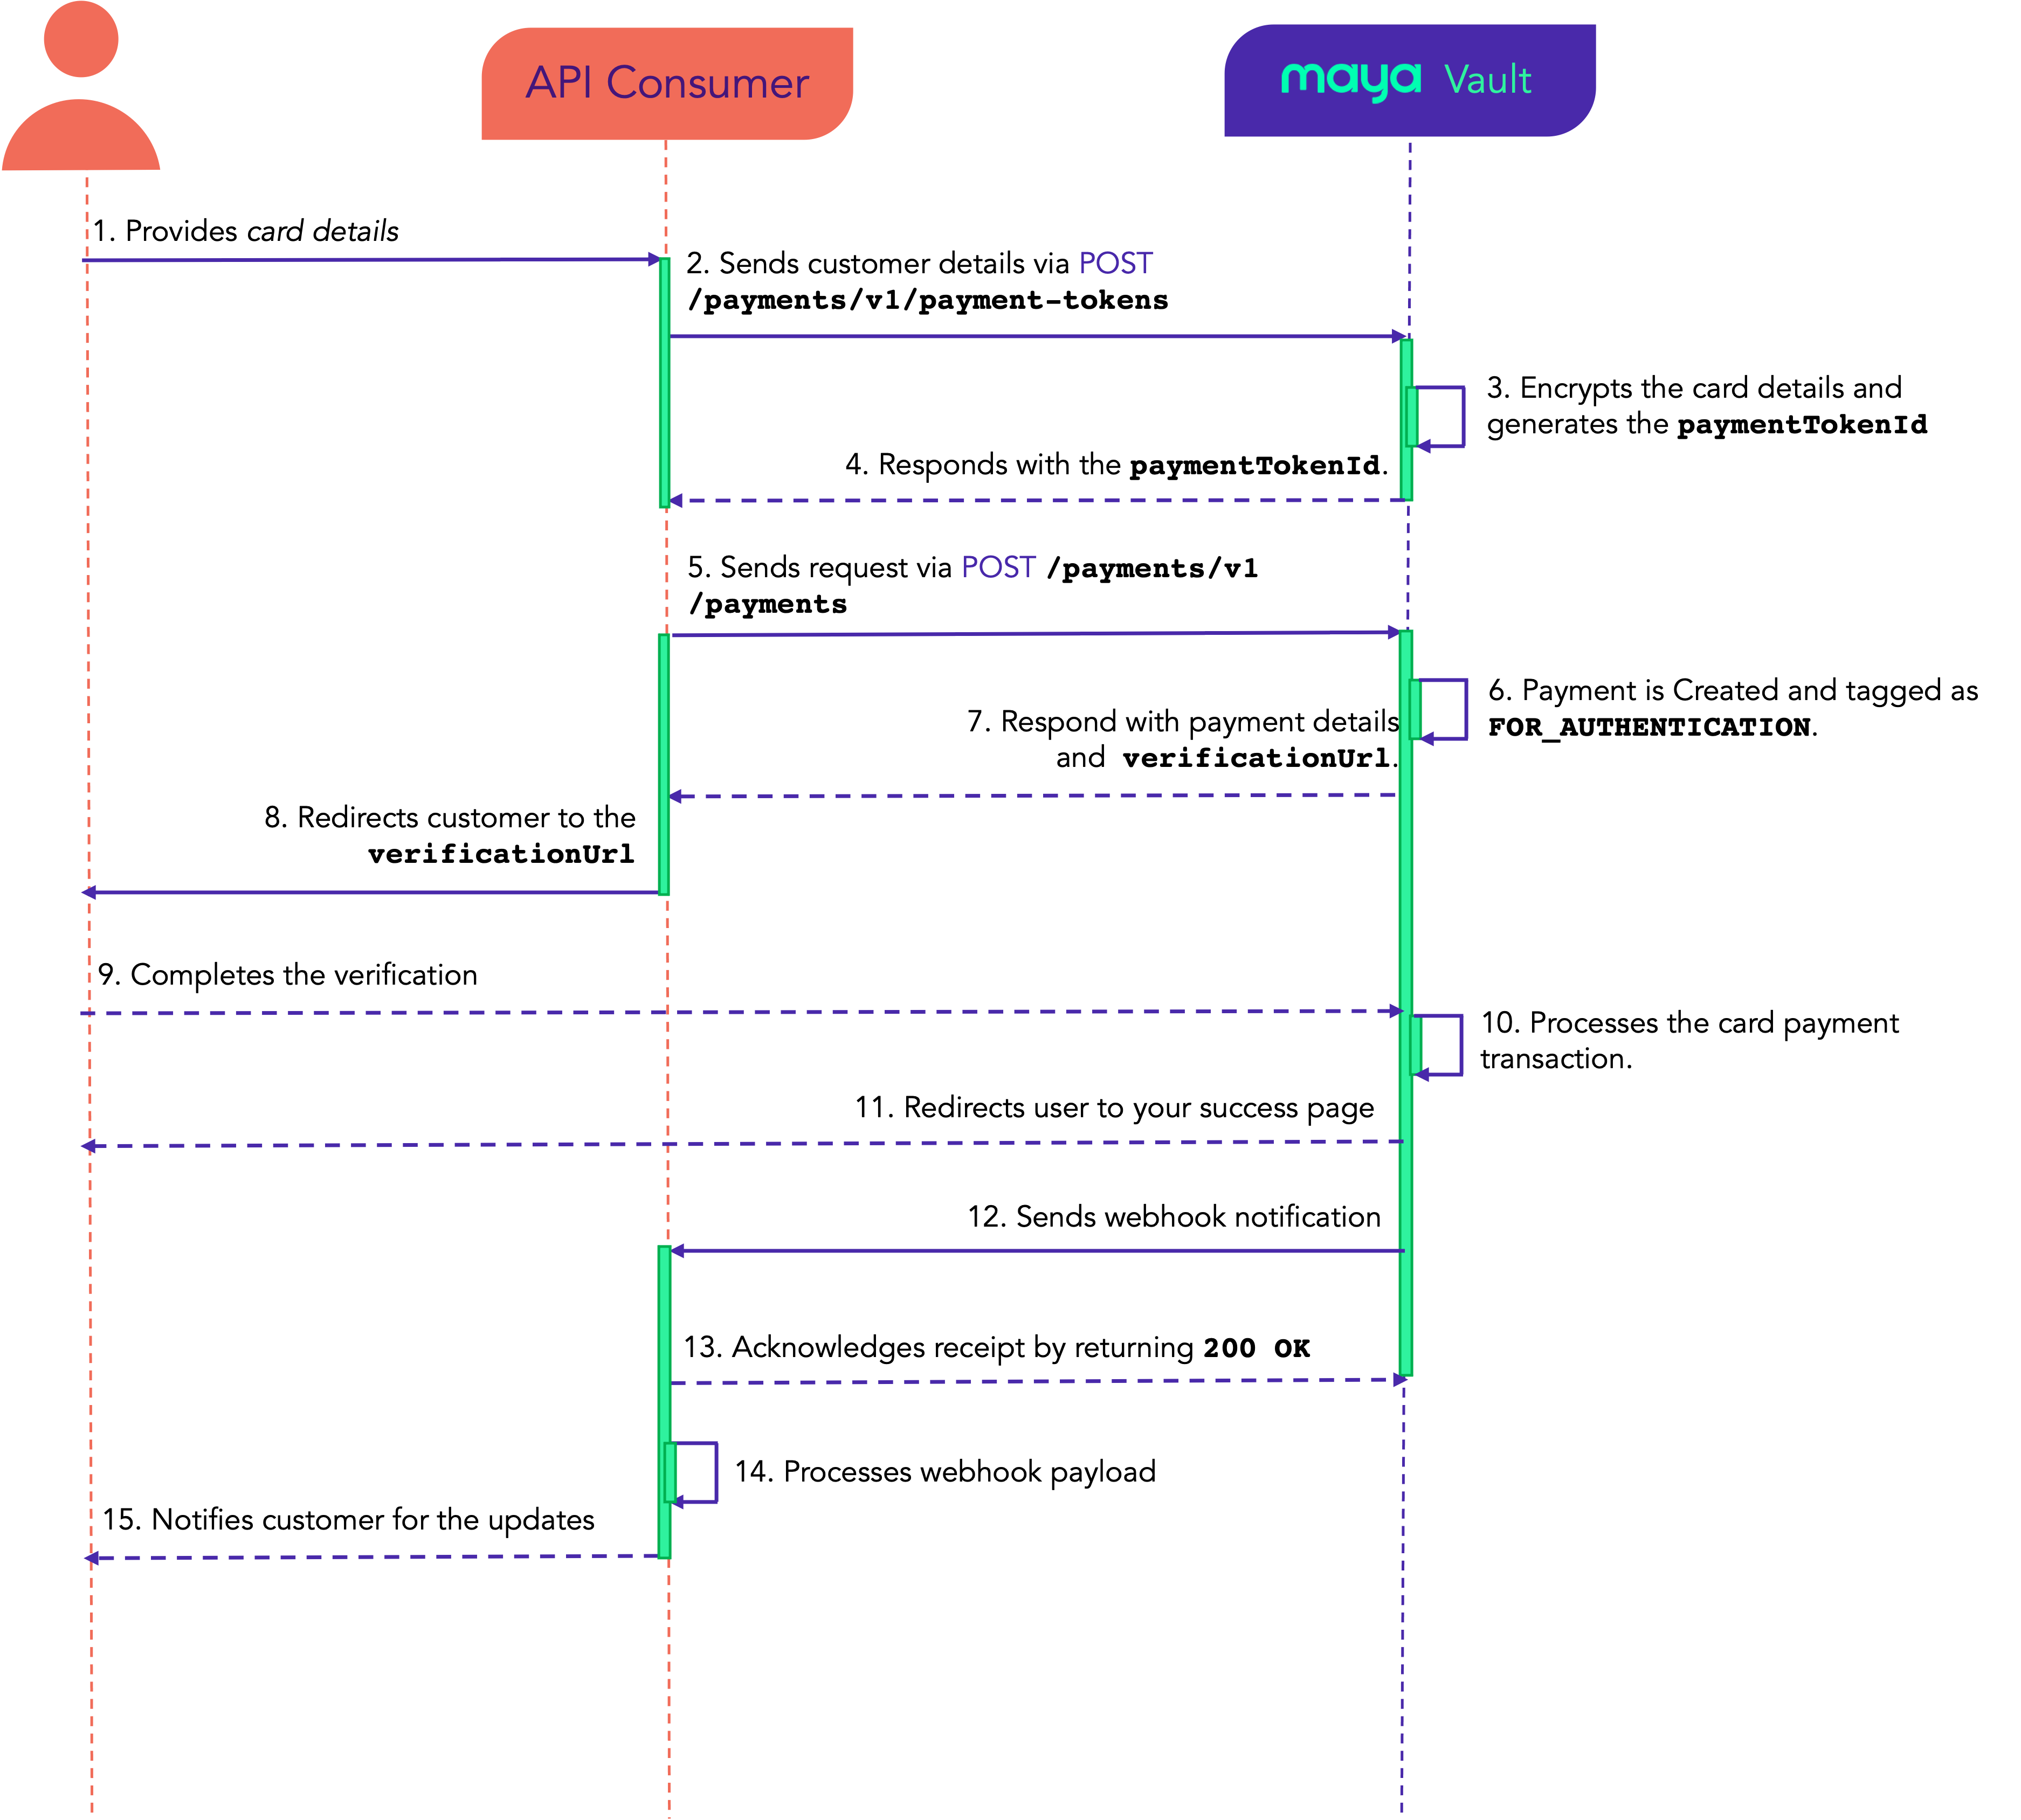
- The customer fills out your hosted card form.
- Your platform (The API Consumer) sends the acquired card information to Maya’s Create Payment Token
endpoint, to request card tokenization.
- Maya Vault encrypts and stores card details, generating a
paymentTokenIdto identify the vaulted card. - Maya returns the
paymentTokenIdto your platform. - Your platform initiates the payment using the
paymentTokenIdvia the Create Paymentendpoint.
- When Maya receives a Create Payment request, it will create a payment record with
FOR_AUTHENTICATIONstatus. - Maya then responds with the payment details and the
verificationUrl. - Your platform redirects the customer to the
verificationUrlobtained from the payment creation (Step 5). - The customer complies and completes the verification process, based on the Issuing bank rules of their card.
- Once the transaction is authorized, Maya will process the payment and update the status of the payment record based on the result, either to
PAYMENT_SUCCESSorPAYMENT_FAILED. - Upon successful payment, Maya Vault will redirect the customer to your success page as provided in the
redirectUrlduring the payment creation (Step 5). - Maya Vault sends a webhook notification to your platform.
- Your platform acknowledges the webhook payload and returns
200 OK. Please avoid processing complex logic before you reply to webhook to prevent timeouts. - Your platform parses and processes the webhook payload.
- Your platform notifies the customer of the updates of the transaction.
Build your Integration
This solution uses Basic Authentication, which requires API keys to authenticate incoming requests. To obtain your API key, please refer to the Generate API Keys for Online Payments guide.
Design the required pages
Design and host your own forms and response web pages.
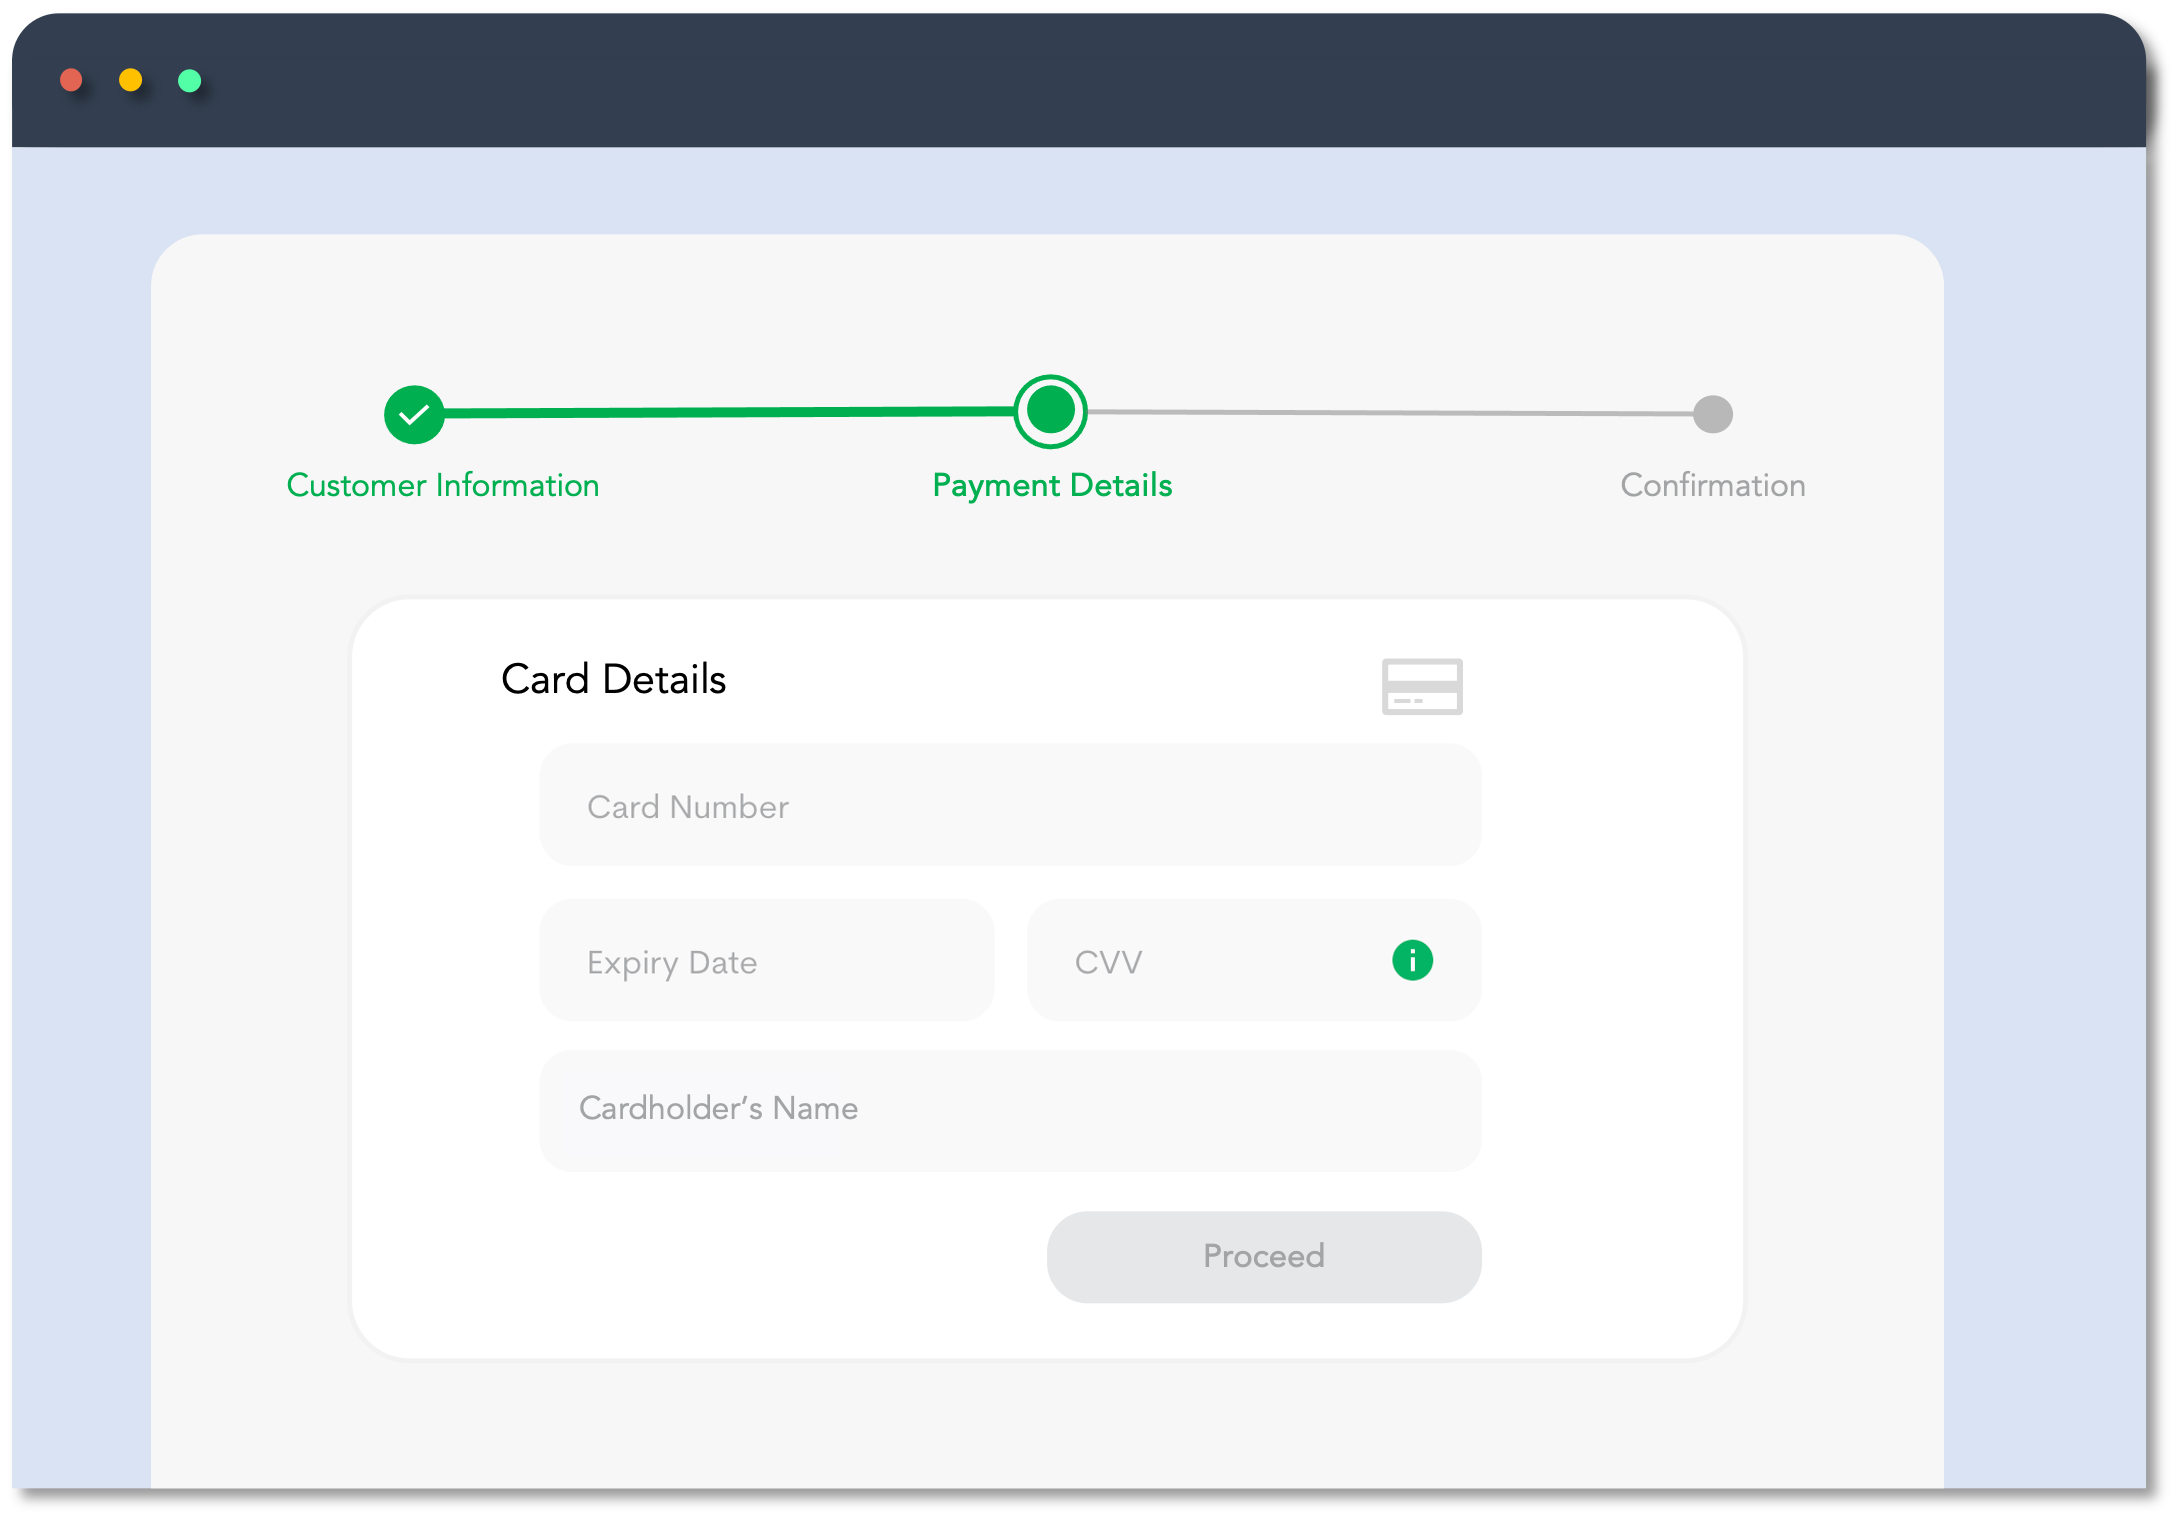
1. Create your Card Details form
Create a card details form for your customers to input their payment information, adhering to Maya Vault's specifications. Refer to the Create Payment Token for the required card information.
Is your platform PCI-DSS certified?
Do not store any card information (i.e. name, card number, expiry dates, CVV/CVC) on your application unless your platform is PCI-DSS certified.
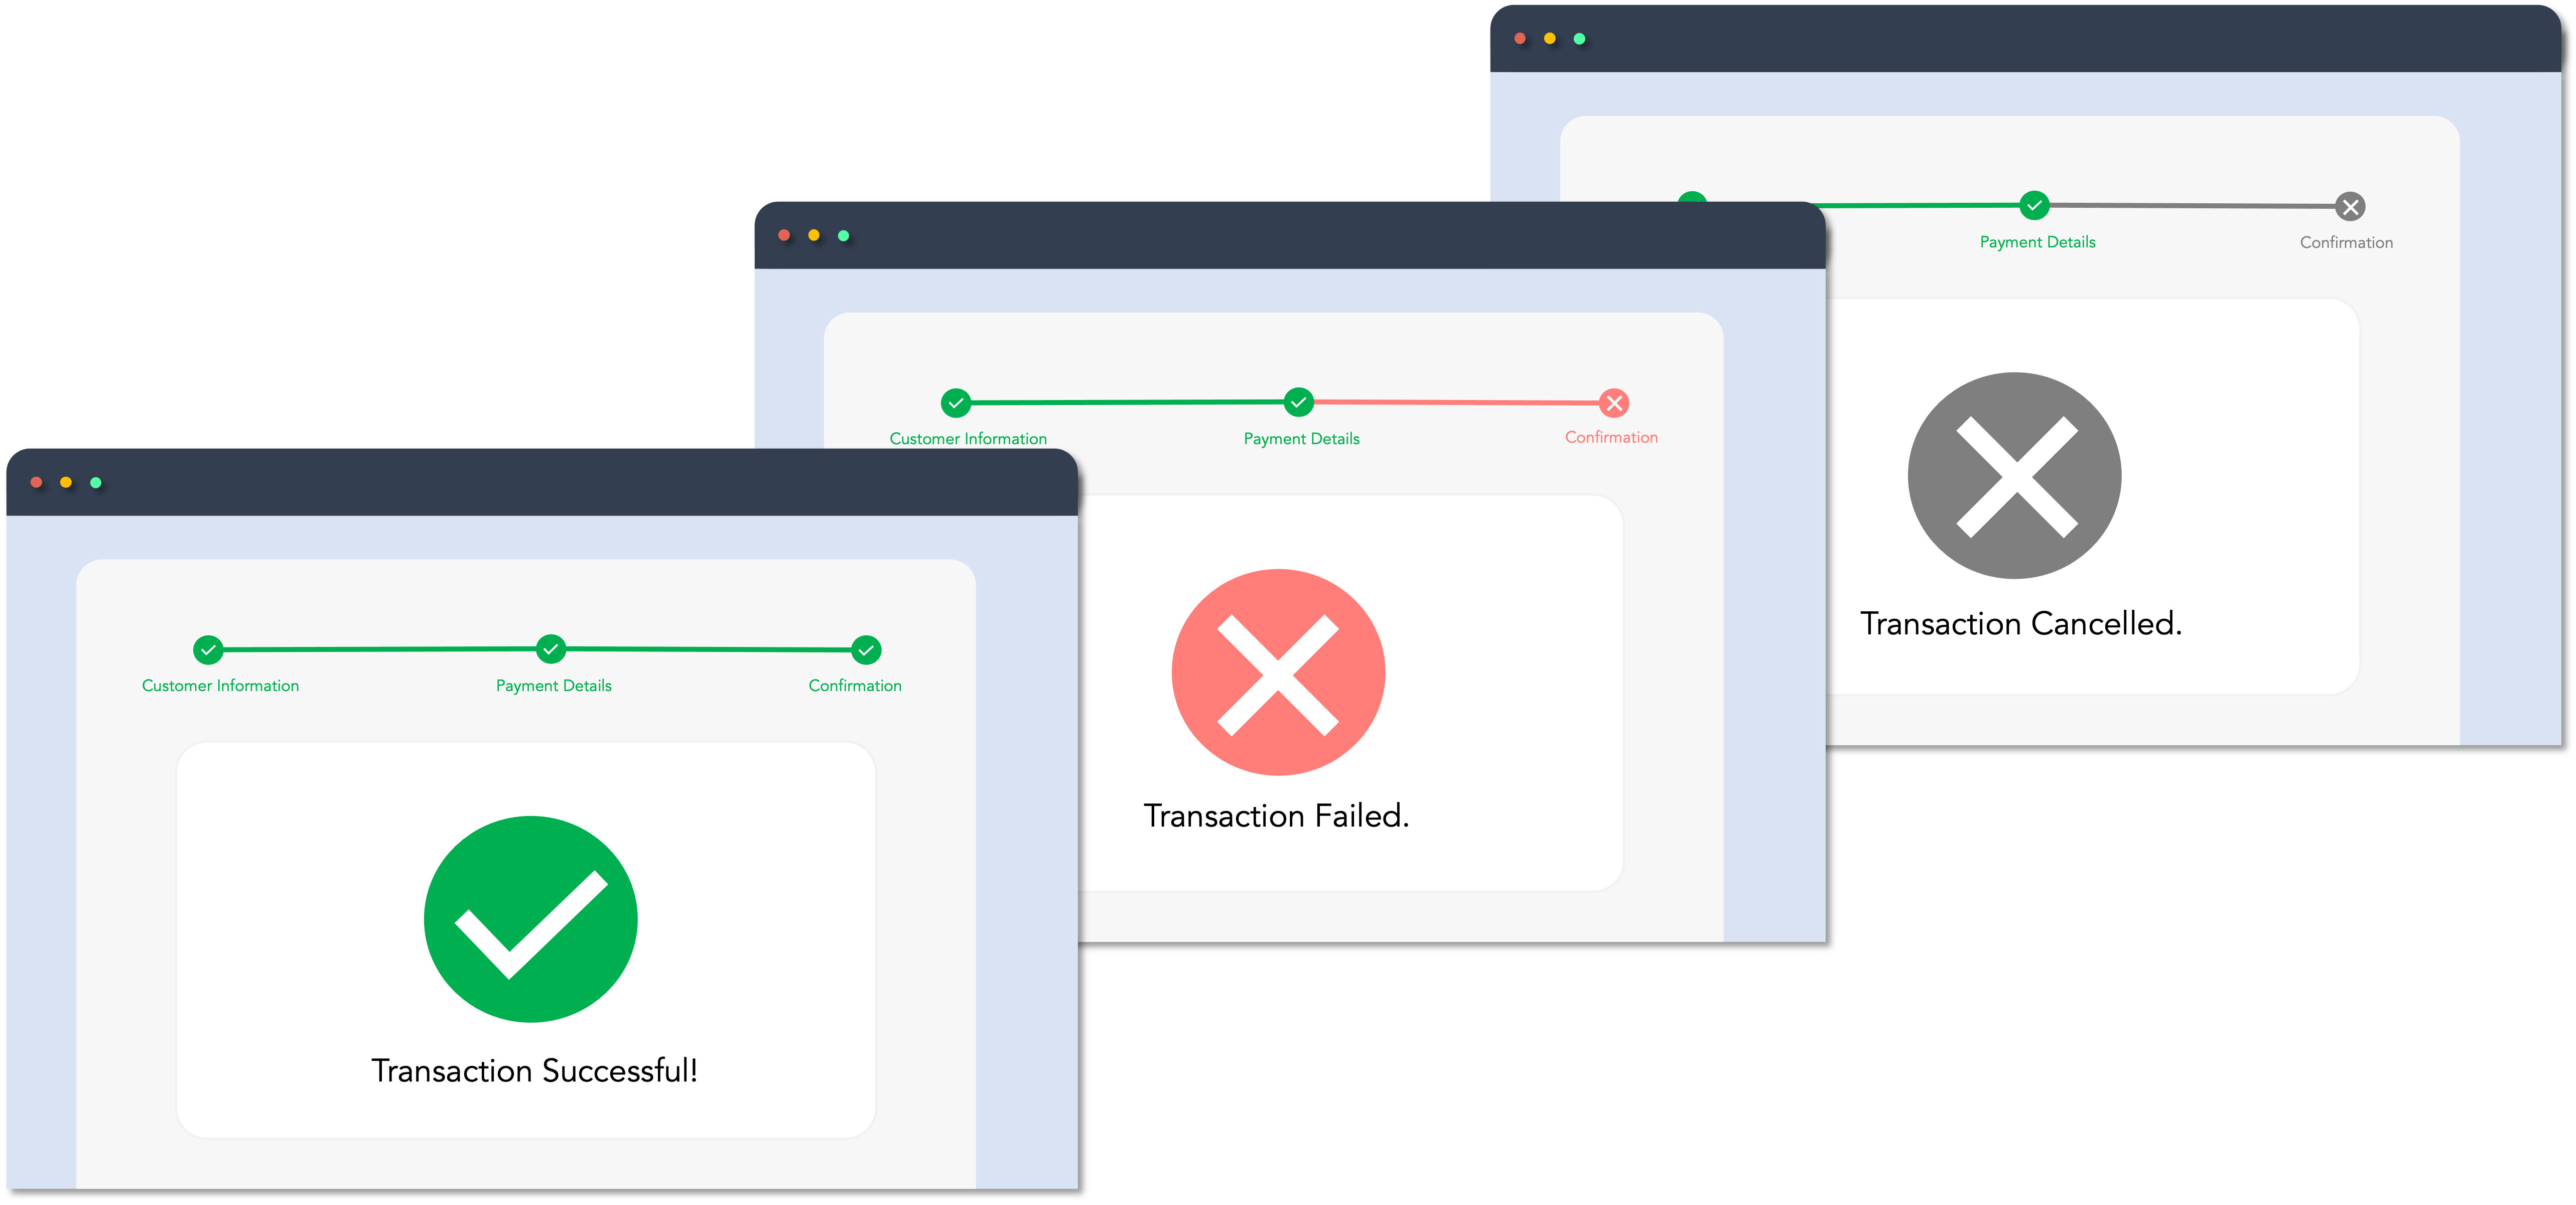
2. Create your Response pages
Every payment state should show an appropriate web page for the customer to know the status of their transaction. You need to host these pages on your website.
Created URLs will be used in the redirectUrl object on the Create Customer Payment transaction request defining where the customer will be redirected when processing the transaction.
Tokenize Card Details
Tokenize customer’s card payment information via Maya Vault.
Tokenize the customer’s card payment information by calling the Create Payment Token endpoint. After a successful call, you'll receive a
paymentTokenId. You will need this ID to create a payment.
Initiate Payment
Initiate a single payment transaction using the paymentTokenId.
paymentTokenId.Step 1: Create Payment
To complete the payment transaction, your application should call the Create Payment endpoint providing the following:
paymentTokenIdfrom the Create Payment Token endpoint- all of the other required transaction details.
The Create Payment endpoint will return a verificationUrl.
Step 2: Redirect Customer to verificationUrl
verificationUrlRedirect the user to the verificationUrl to proceed with the card verification and complete the payment. This will prompt the customer for the 3DS authentication stage.
3DS authentication validation depends on the rules and processes of the customer's card-issuing bank.
Monitor Real-time Transaction Events
Monitor and receive transaction updates.
Maya uses webhooks to keep your application informed about critical events related to your payment requests. These notifications include updates on payment status (e.g., success, failure, cancellation) along with relevant response codes. Webhooks allow you to react to real-time events and automate transaction handling within your system.
To help you get started, refer to the following resources:
If your application does not receive a webhook notification—for example, due to network issues or configuration errors—you can fall back on the following retrieval endpoints to check the transaction status manually:
Endpoints
The following are the Maya Vault endpoints for the One-time Card Payment.
| Name | HTTP method | Key Type | Endpoints | Description |
|---|---|---|---|---|
| Create Payment Token | POST | PUBLIC | /payments/v1/payment-tokens | Tokenizes the card details and generates an equivalent paymentTokenId. |
| Create Payment | POST | SECRET | /payments/v1/payments | Creates payment transactions using the card’s paymentTokenId and other payment details. It returns the transaction status and other details such as the paymentId, verificationUrl, etc. |
Managing Payment Transactions
| Name | HTTP Method | Key Type | Endpoint | Description |
|---|---|---|---|---|
| Retrieve Payment via ID | GET | SECRET | /payments/v1/payments/{paymentId} | Retrieves a comprehensive transaction details of the payment identified by the provided paymentId. This will yield an array containing the payment information. |
| Retrieve Payment via RRN | GET | SECRET | /payments/v1/payment-rrns/{rrn} | Retrieve transaction information by providing the merchant's request reference number (rrn), similar to the Retrieve Payment via ID endpoint. |
| Retrieve Payment Status | GET | PUBLIC | /payments/v1/payments/{paymentId}/status | Returns the status of the payment identified by paymentId. |
| Cancel Payment via ID | POST | SECRET | /payments/v1/payments/{paymentId}/cancel | Cancel a payment transaction using the paymentId before it's authorized and the card payment is completed. |
Business Rules to Code
To supplement your knowledge of the integration, it is essential to familiarize the Business Rules to Code for Online Payments . This ensures that technology requirements and other development considerations are met.
At this point, you have understood the following:
- The necessary APIs and their endpoints
- The sequence and purpose of each API
- The prerequisites for building your integration
Can I reuse paymentTokenId?
Answer: No. paymentTokenId can only be used once per payment transaction. If the same payment details are used, you must generate a new paymentTokenId.
My transaction in Sandbox keeps failing. How can I fix this?
Answer: First, ensure your code is implemented correctly by reviewing the required steps. If your setup is correct but errors persist, check the Sandbox Health Page to verify if the service is operational. If the service is up, retrieve the error code and use the search box in the Maya Developer Hub to find relevant guides on resolving it.
Getting timeouts when connecting to the Sandbox of Maya. How can we resolve this?
Answer: If you're encountering timeouts in the Sandbox, first check the Sandbox Health Page to see if the service is operational. If the service is up but the issue persists, visit our Support Page
for the appropriate channel to escalate your concern.