Biller API Sandbox Integration Testing
The Biller API Sandbox Integration Testing is a testing phase performed in the Sandbox environment, wherein you test the integration between Maya's Sandbox API endpoints and your Biller services.
Go to Maya Biller API Quick Start Guide  to learn more about the integration requirements.
The Sandbox Integration Testing tool is a different Postman collection from the previously used Local Development Mock Testing tool
.
Make sure you are done with the Local Development Mock Testing, have submitted your endpoints, and you have been notified by your designated Maya Relationship Manager, that you have been onboarded in the Sandbox environment.
Objectives
At the end of this Sandbox Integration testing phase, the following objectives are expected to be attained:
- To help the merchant developers test the Sandbox integration between Maya's Bills Payment API and the Biller's developed Validate and Post services, ensuring the following:
- Proper configuration on merchant’s services end of provided Sandbox details by Maya (secret key, biller slug, etc).
- Correct implementation of callback request to Maya’s Biller Callback API.
- Ensure network communication between Maya’s Biller API and merchant’s services works, including needed firewall whitelisting and the like.
- To ensure that the agreed biller details are correct before onboarding and deploying in Production.
Pre-requisites
At this point of the engagement, your team should be done with the following:
- Have fully Acquired and Submitted
 all business and technical requirements.
 - Finished development of your Bills payment endpoints
 , and have submitted Local Development Mock Testing
 results.
 - Your designated Maya Relationship Manager has informed you that you may now proceed with Sandbox.
- Download and install Postman
 application.
 - Download the Maya Bills Pay Direct Sandbox Postman Collection
 .
.
The postman application is external to Maya. Changes, updates, or issues outside of the provided Postman Collection or done by the developer, is out of scope of Sandbox support.
How to Setup the Postman Collection
Setting up the downloaded Postman application and the Maya Bills Pay Direct Postman collection.
Click here to view full details
- Download Postman from the link provided above and install it.
- Download the Maya Biller API SBX Collection package.
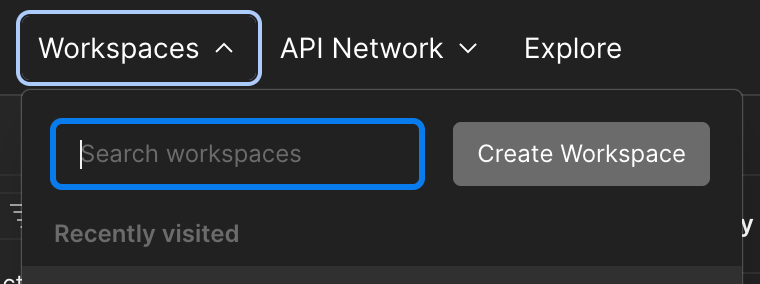
- Create a new workspace by clicking Workspaces + Create Workspace.
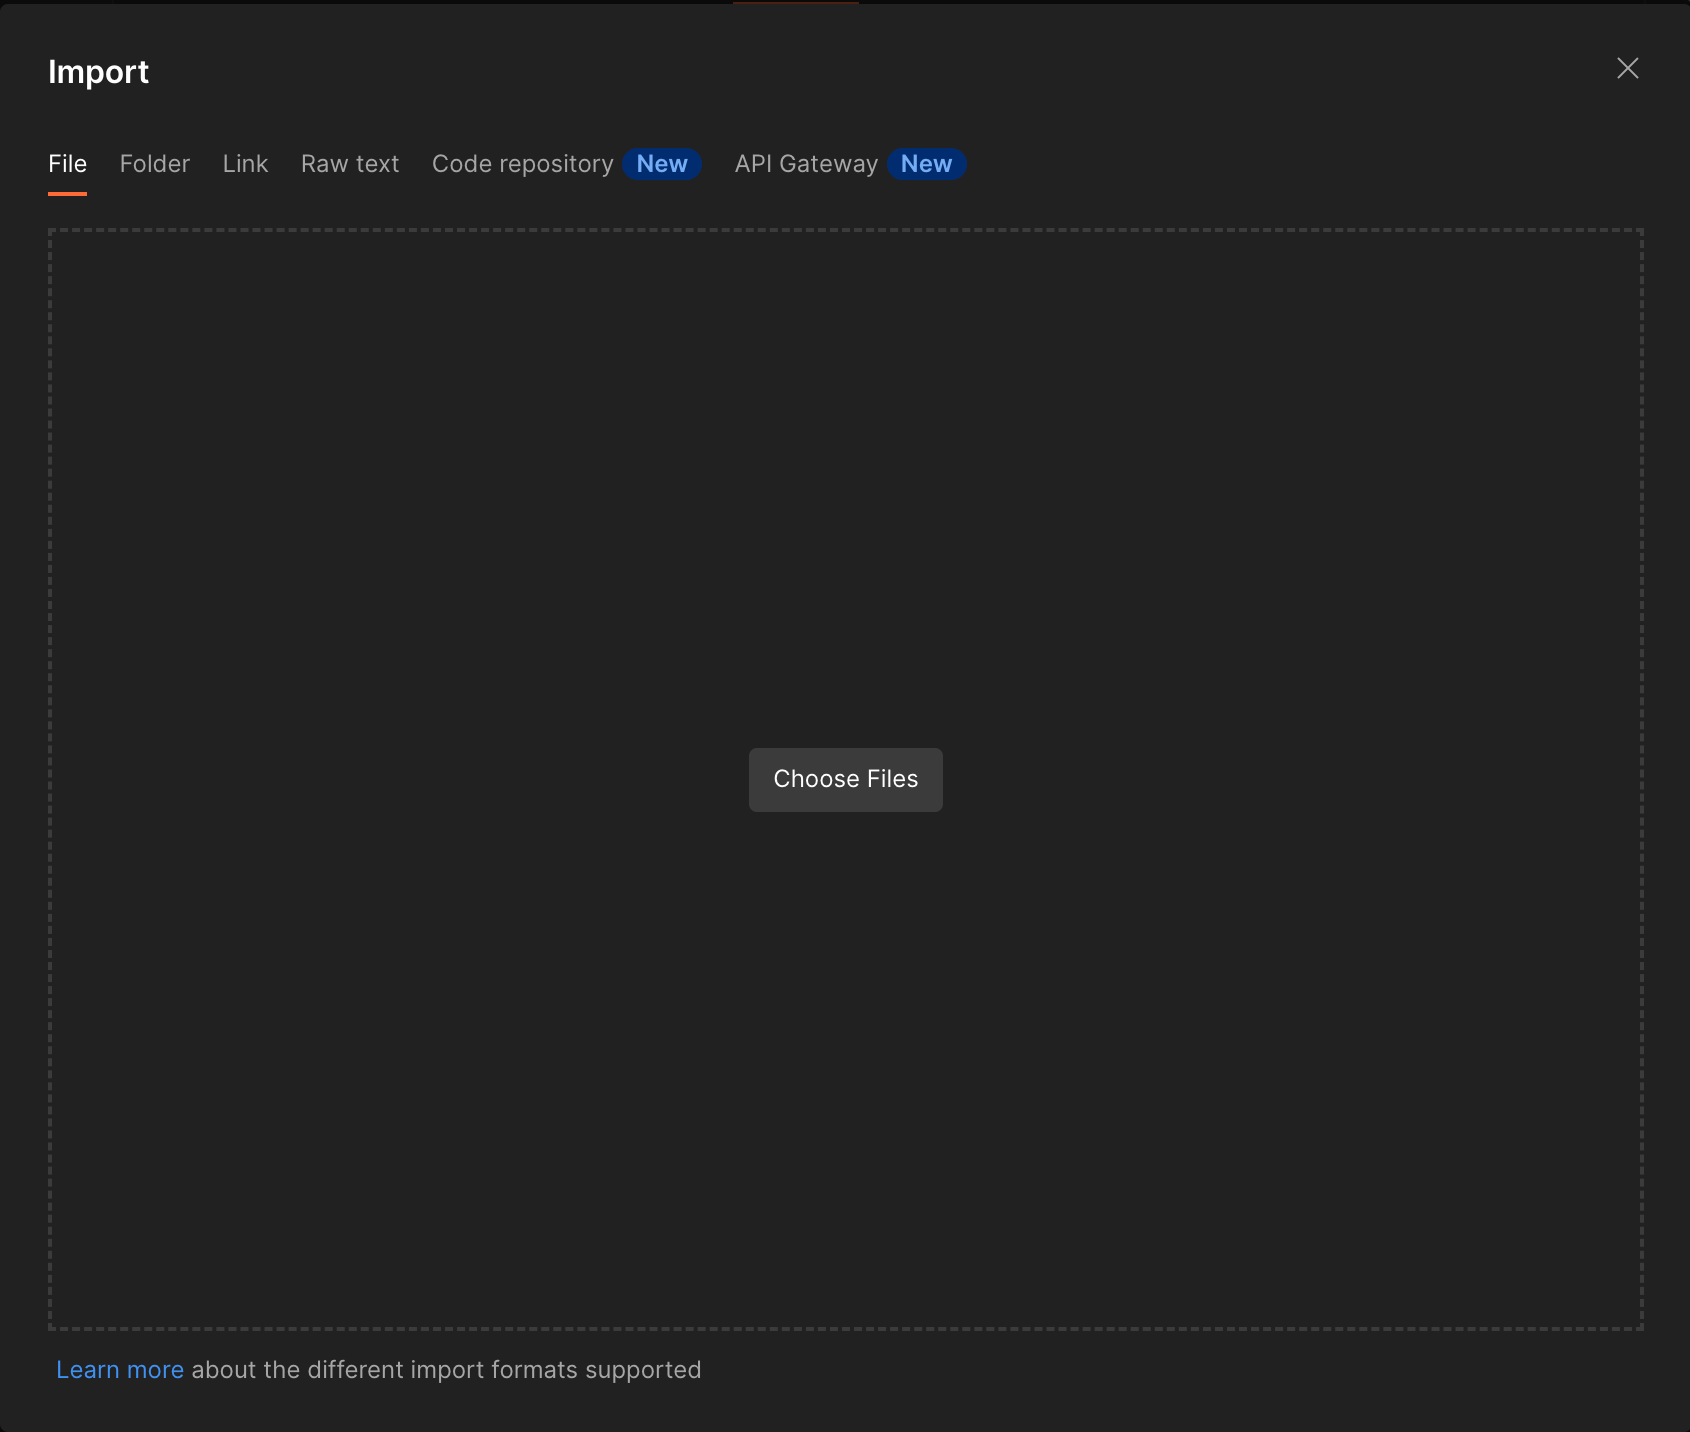
- In the workspace, click Import, and on the File tab, click on Choose Files.
- Select the downloaded Maya Biller API SBX.postman_collection.json file and click Open. A prompt at the bottom of your Postman window will be displayed once the import has been completed.

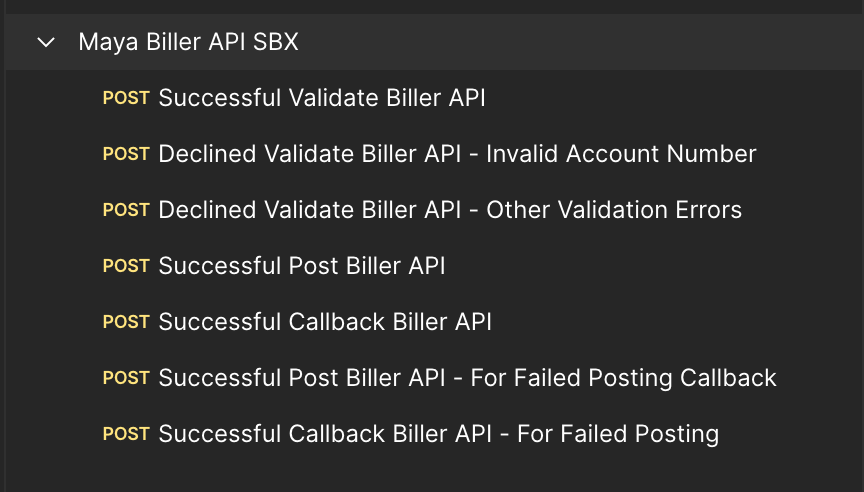
- When successful, the collection should be added as shown below.
How to Configure Your Variables
Once you have installed Postman and imported the Maya Biller API SBX Postman Collection, the next step is to configure the variables within the Postman Collection, to include provisioned biller information; such as biller internal ID, the computed Authorization header based on the secret key given, and both valid and invalid test accounts to use, among others.
Click here to view full details
- In the Maya Biller API SBX collection, click on the Variables tab.
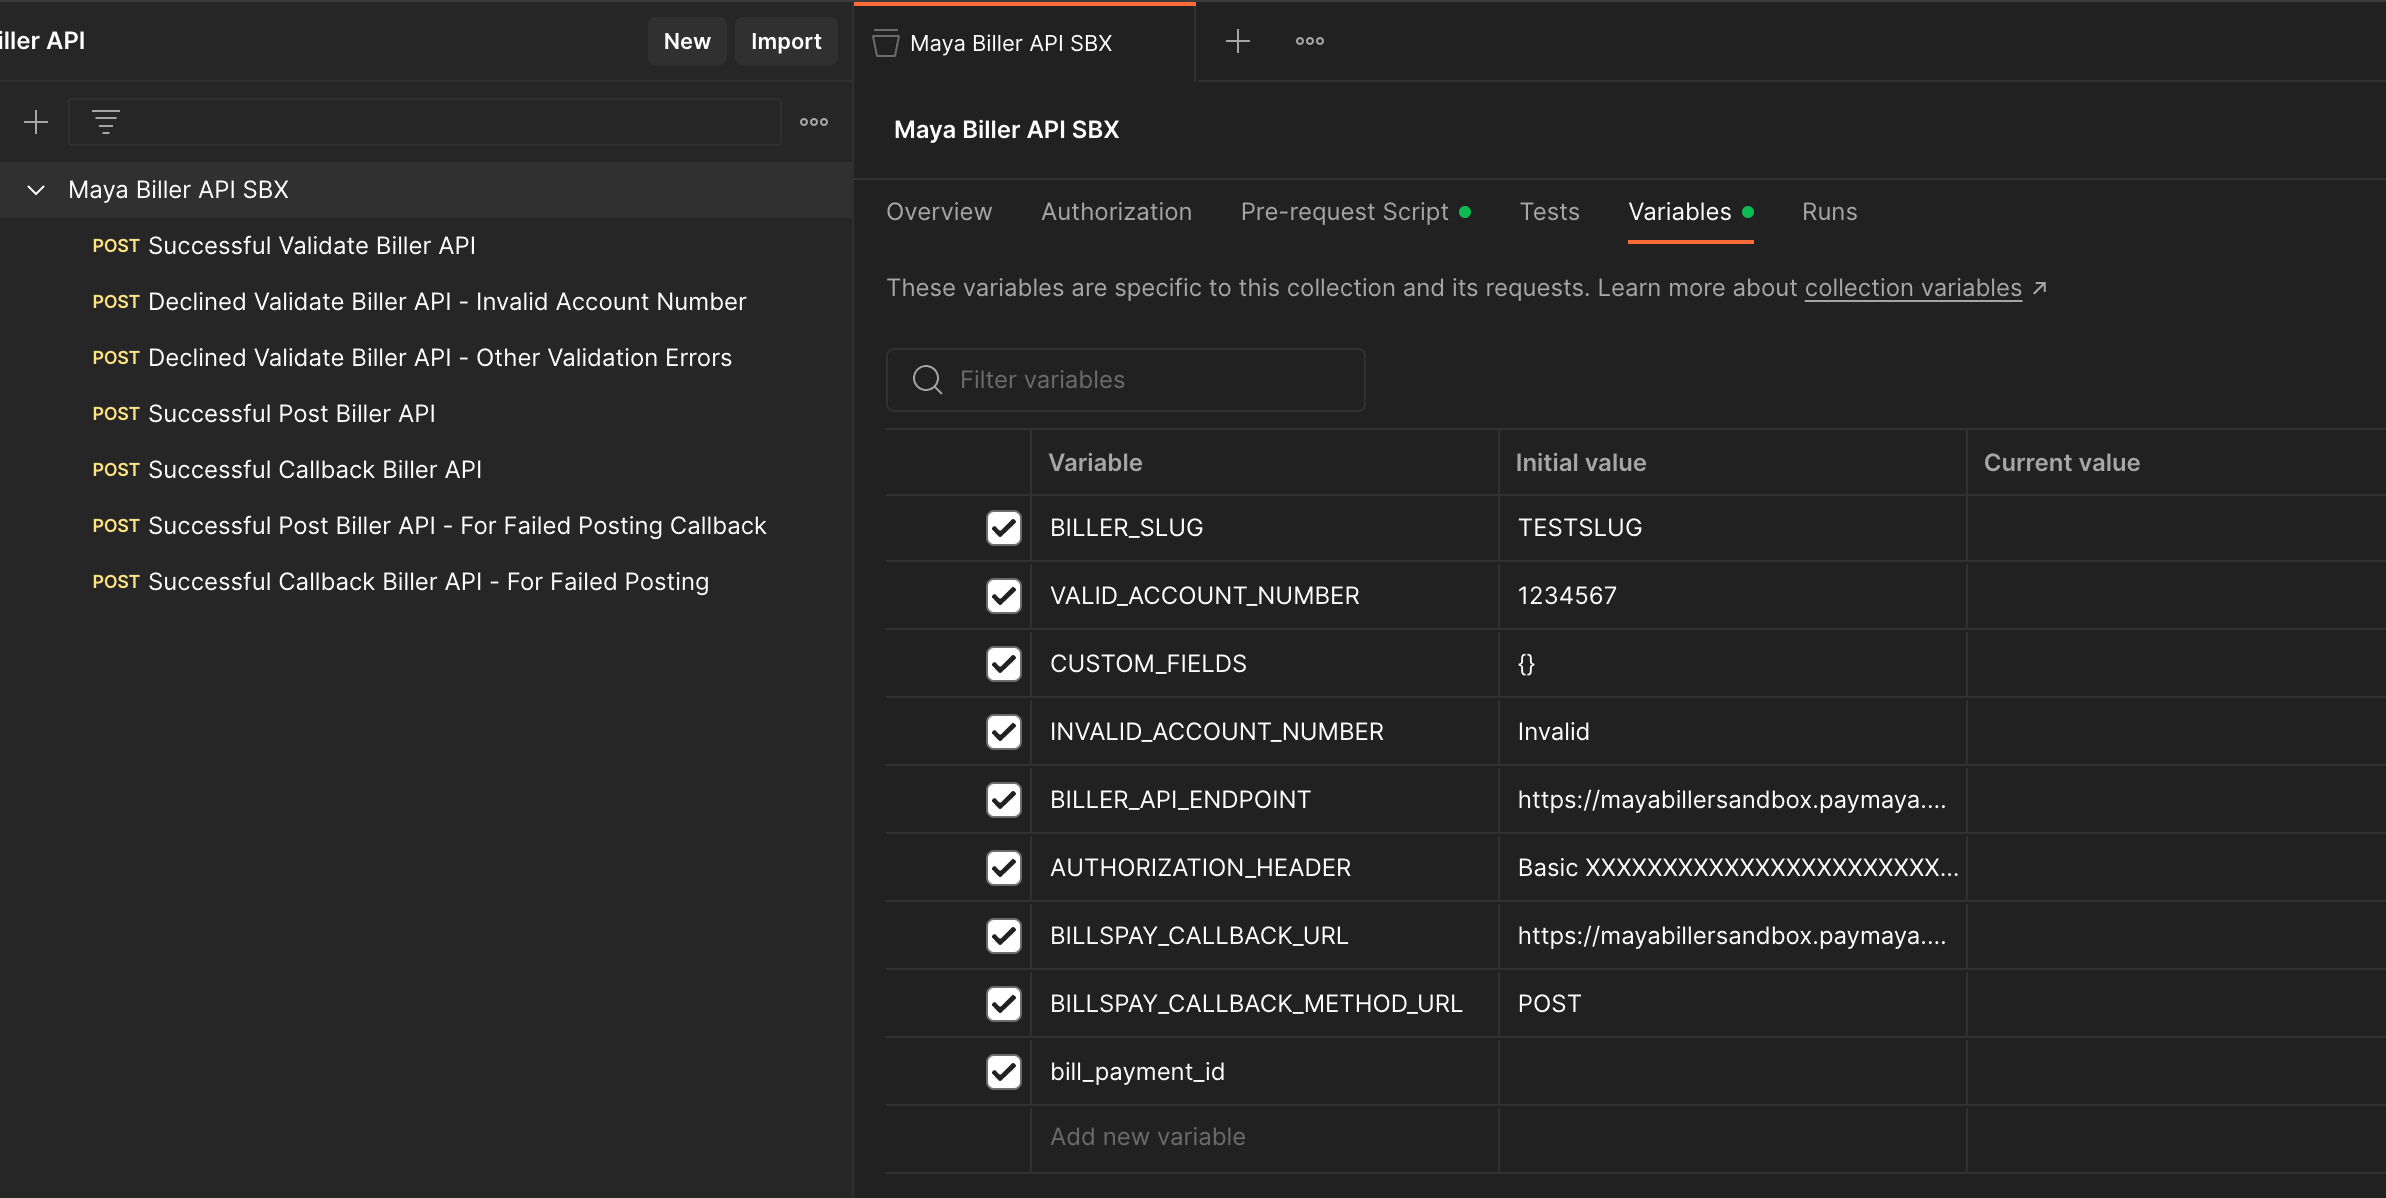
- Update the below variables in the CURRENT VALUE column. Click on the SAVE button once values have been updated to apply the changes made.
| Variable | Description | Remarks |
|---|---|---|
| BILLER_SLUG | This would serve as your unique biller identifier on Maya’s end. | To be provided by Maya during the Sandbox Integration Testing. |
| VALID_ACCOUNT_NUMBER | Valid biller account number | Input a valid account number that your service would accept during the validation step. |
| CUSTOM_FIELDS | Additional fields accepted for bill payment. | Should include Additional Fields that your service expects to receive from a bill payment request. This should be in JSON format. a. Field names should correspond to how Maya has configured the field on their end. b. For the drop-down type field, the value should be the mapped value of the option selected and not the placeholder. c. If no additional fields, input an empty body instead: {} Example: { "FirstName": "Juan", "LastName": "Dela Cruz", "ContactNumber": "09170981234", "BillDate": "12/31/2023", "PaymentType": "STL" } |
| INVALID_ACCOUNT_NUMBER | Invalid biller account number | Input an invalid account number that your service would not be able to accept during validation step. |
| BILLER_API_ENDPOINT | Designated endpoint for Maya’s Biller SBX environment. | Do not update |
| AUTHORIZATION_HEADER | Authorization header value to be used for Callback. | Refer to Biller API Signature and Authorization for the computation of the authorization header. for the computation of the authorization header.The Sandbox key will be provided during Integration Testing with Maya Bills Pay. NOTE: Configure the provided Sandbox secret key in the biller’s Sandbox environment services. |
| BILLER_CALLBACK_URL | Designated Callback API URL for Maya’s SBX environment. | Do not update |
| BILLER_CALLBACK_METHOD_URL | This is Maya’s callback HTTP method. | Do not update |
Start your Testing
At this point, you should have the following:
- Have downloaded the Postman and the Maya Bills Pay Direct Sandbox Postman Collection
; and have setup the variables.
- You have a developed endpoints for your services, and understood the in-app customer journey
and API sequence of Maya's Bills payment
.
- Reviewed and understood the Biller API guides.
Make sure test results have passed the minimum requirements for each Biller API. In cases of errors that require troubleshooting, refer to Bills Payment Troubleshooting Guide
.
Validate Endpoint Testing
This is the stage wherein the biller's Validate endpoint receives the transaction request to validate the correctness of the bill payment transaction details.
Click here to view full details
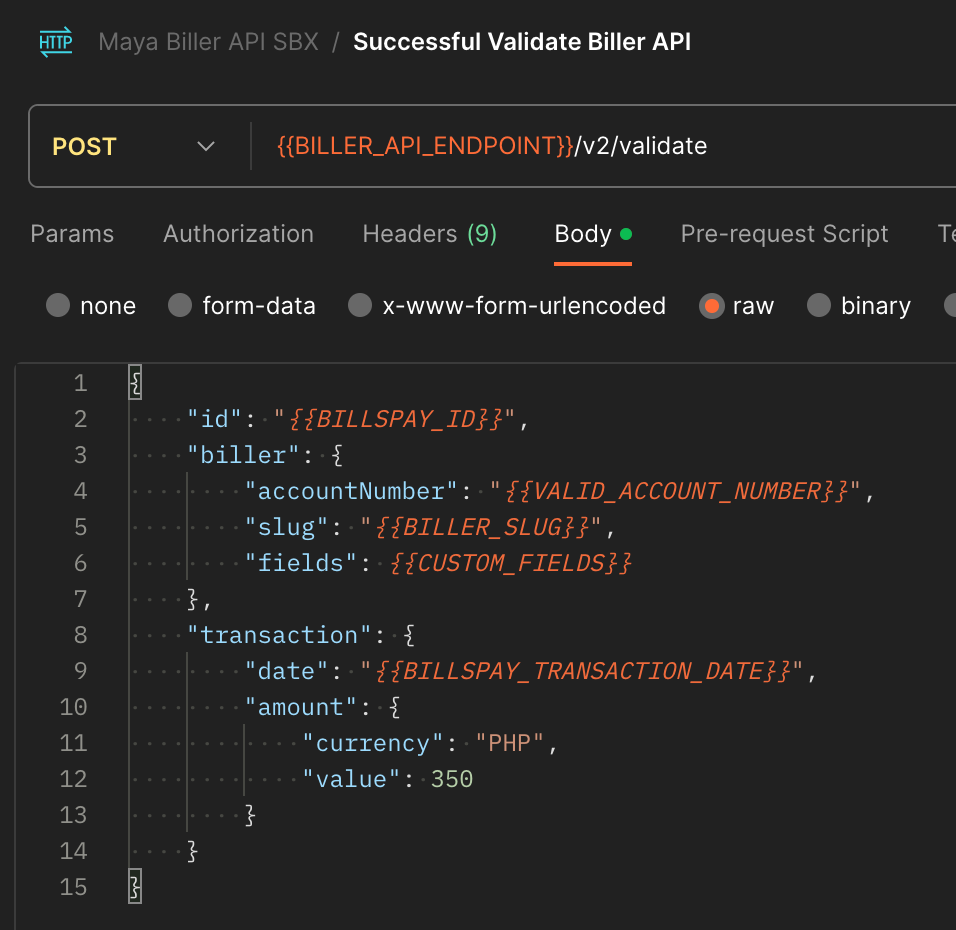
- For each validate request included in the Postman collection, you may update the transaction.amount.value for the amount needed to facilitate your testing.
- In cases wherein you may need to test some validation test cases for your biller integration, feel free to add additional requests to the Postman collection and update accordingly.
- There would also be some cases wherein your biller integration can have specific validation rules for the additional fields received. For such, update the biller.fields value in your request to fit the specific test case.
- When updating the additional fields, please refer to the guidelines above in the variables section under CUSTOM_FIELDS.
- Click on the SAVE button to apply any changes made.
- Click on the Send button to execute the request.
- Check the bottom part of the Postman window for the response body from Maya’s Biller API. Corresponding tests have been provided per request to verify if the integration between biller’s service and Maya is successful per scenario.
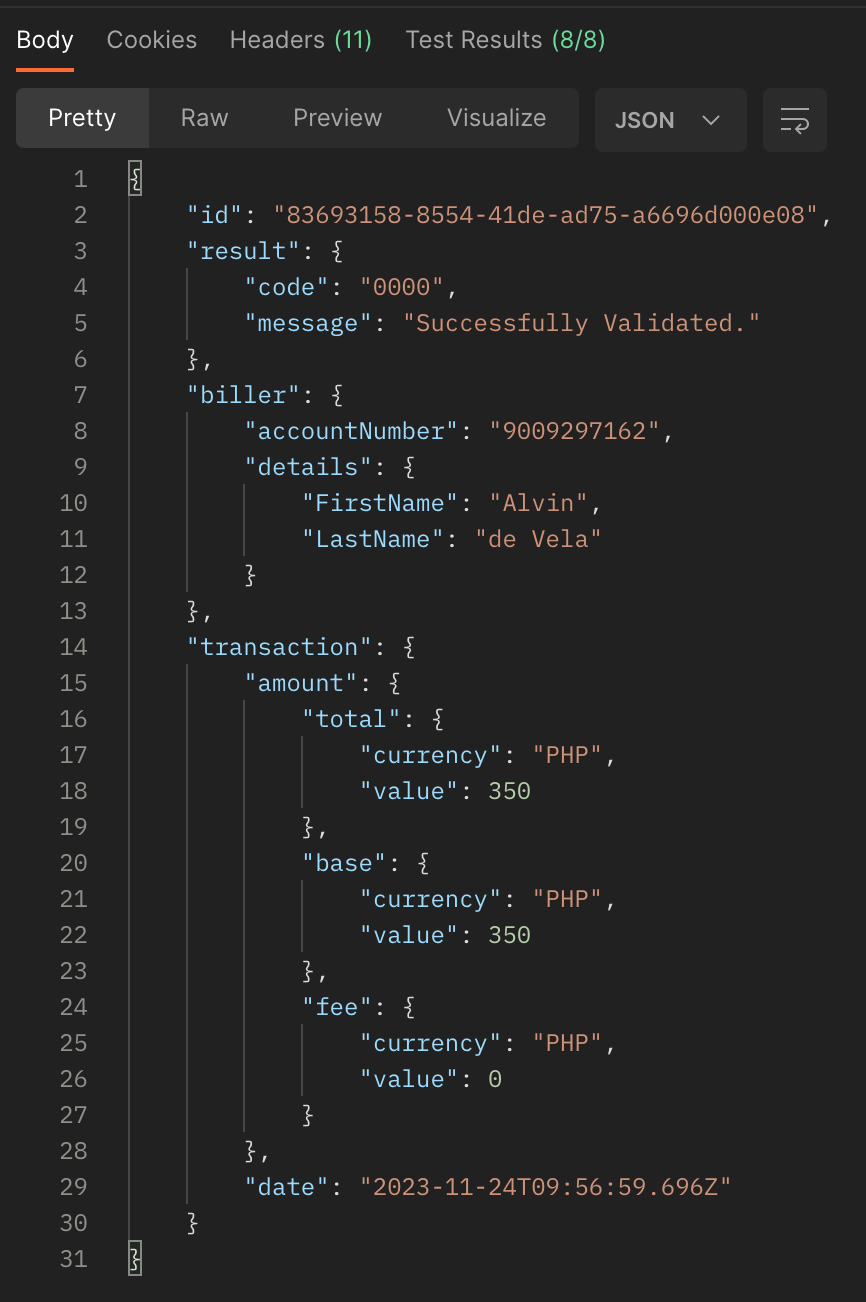
Validate Response Body
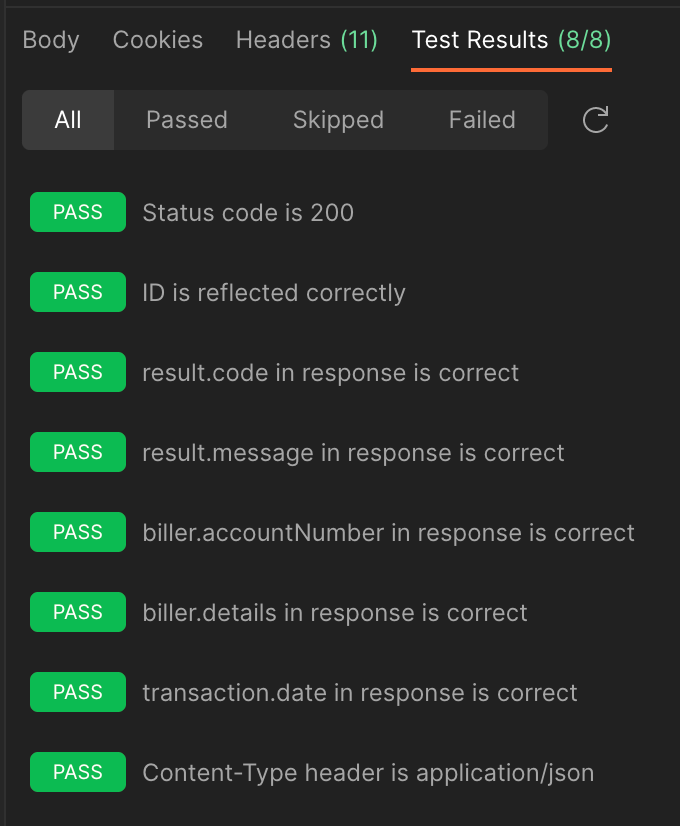
Validate Test Results
Validate Scenarios
Click here to view full details
| Scenario | Description |
|---|---|
| Successful Validate Biller API | Happy path testing for validate endpoint. If applicable, input valid/acceptable values under biller.fields and transaction.amount.value to facilitate a successful validation integration test between Maya and your API. |
| Declined Validate Endpoint - Invalid Account Number | Request to test your invalid account number scenario. Input an expected invalid account number in biller.accountNumber. |
| Declined Validate Endpoint - Other Validation Errors | Request to test any other validation error scenarios. By default, the Postman collection has a negative value for transaction.amount.value as this is an expected validation error for the amount field. If your API has an expected validation logic, update the appropriate fields as necessary. Examples: 1. You have a minimum amount validation for your API of Php 500. Input a value less than 500 under transaction.amount.value to test your validation logic. 2. You have to match on your end that an account number inputted belongs to a person with First Name: Juan and Last Name: Dela Cruz. Update the values under biller.fields to test your validation logic for this.NOTE: For such validation logic that your API might have, we suggest returning a descriptive error message under result.message in your validation response. This exact message would be directly displayed in the Maya App and read by the customer trying to pay for the bill. |
Post Endpoint Testing
Partner’s Biller Post Endpoint to receive a Post Bill Request which includes the bill details, amount, fee, and callback URL.
Click here to view full details
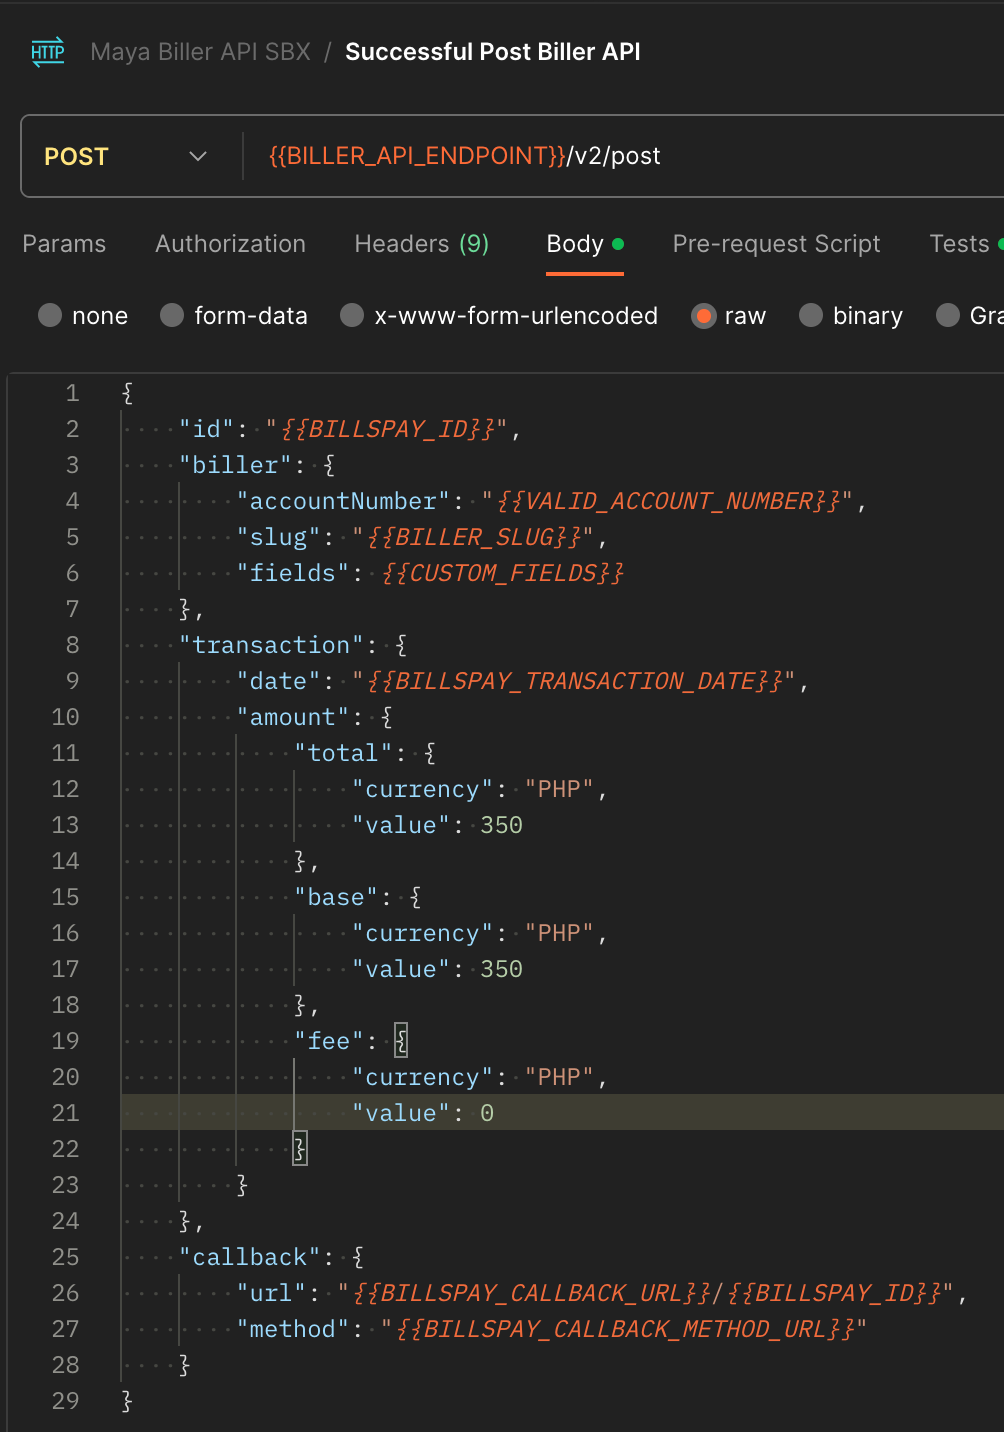
- For the successful post request included in the Postman collection, you may update the values for transaction.amount.total.value and transaction.amount.base.value.
- Note that the values for these fields should be the same.
- Click on the SAVE button once values have been updated to apply the changes made.
- Click on the Send button to execute the request.
- Check the bottom part of the Postman window for the response body from Maya’s Biller API. Corresponding tests have been provided for the post request to verify if the integration between the biller’s service and Maya is successful for the post scenario.
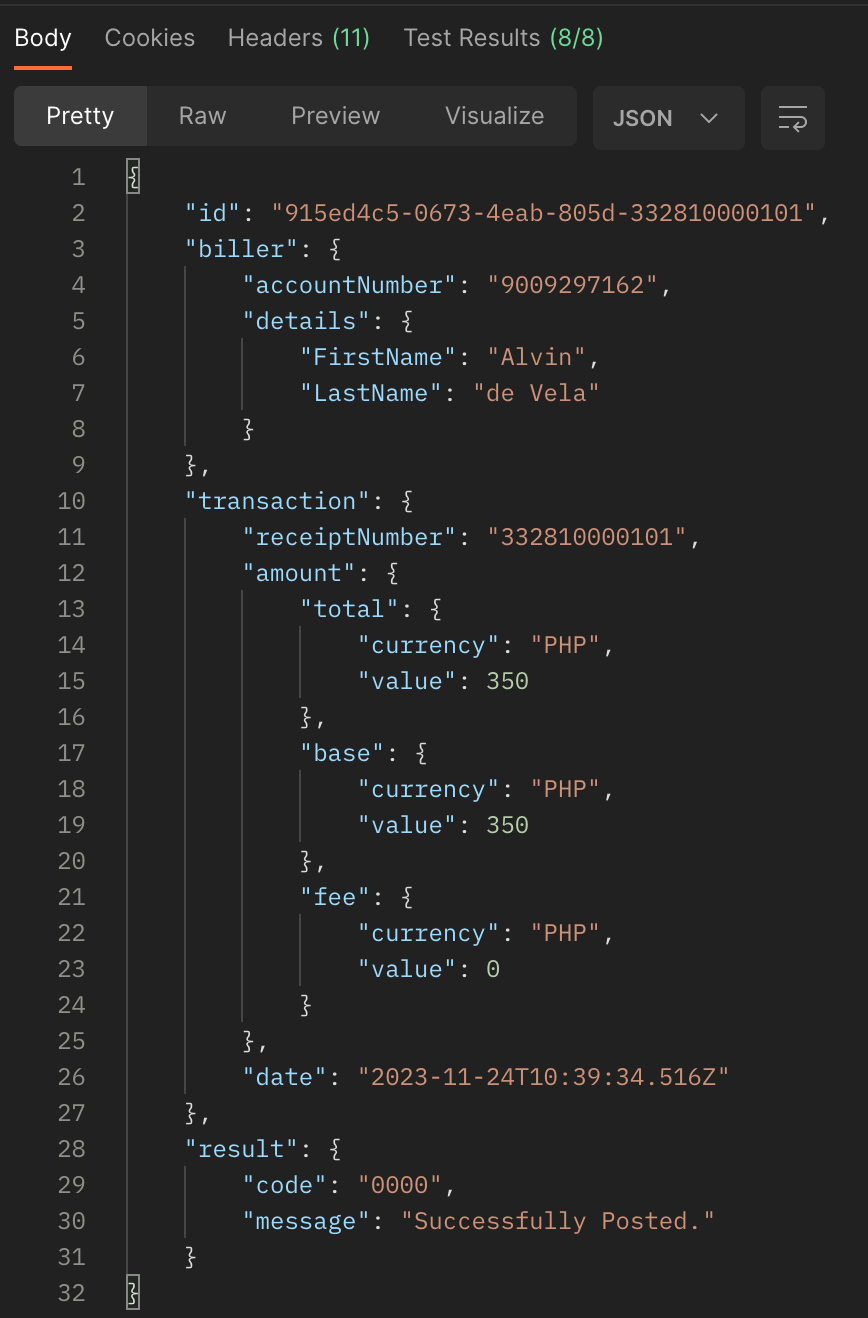
Post Response Body
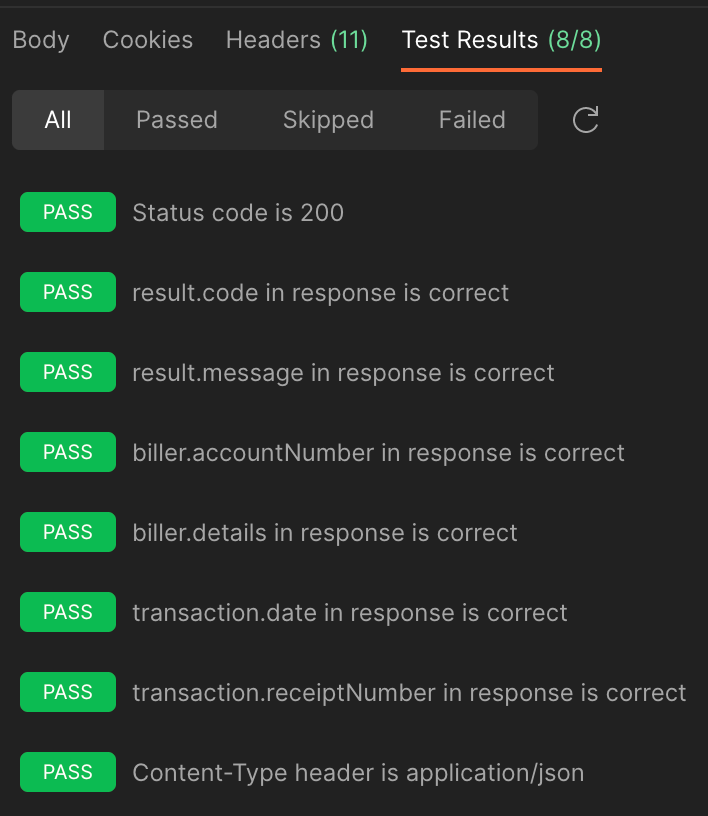
Post Test Results
Post Scenarios
Click here to view full details
| Scenario | Description |
|---|---|
| Successful Post Endpoint | Happy path testing for post endpoint. IMPORTANT NOTE FOR BILLER SBX POST REQUEST: Please do not mind the callback.url value generated from the Postman request. A different callback URL will be sent by our Biller SBX service to the biller’s post-service API. This callback URL contains a generated Bill Payment ID from Maya’s SBX environment and could be persisted already on the biller’s end. The persisted callback URL received would then be usable on the next leg of integration testing: Callback Testing. |
| Declined Post Endpoint - Invalid Paymaya Signature | Do not remove. This would be used to test a Failed Posting scenario during Callback. |
Callback Testing
The Partner Biller's endpoint is to send at least one (1) callback to Maya for each posted bill payment transaction.
Click here to view full details
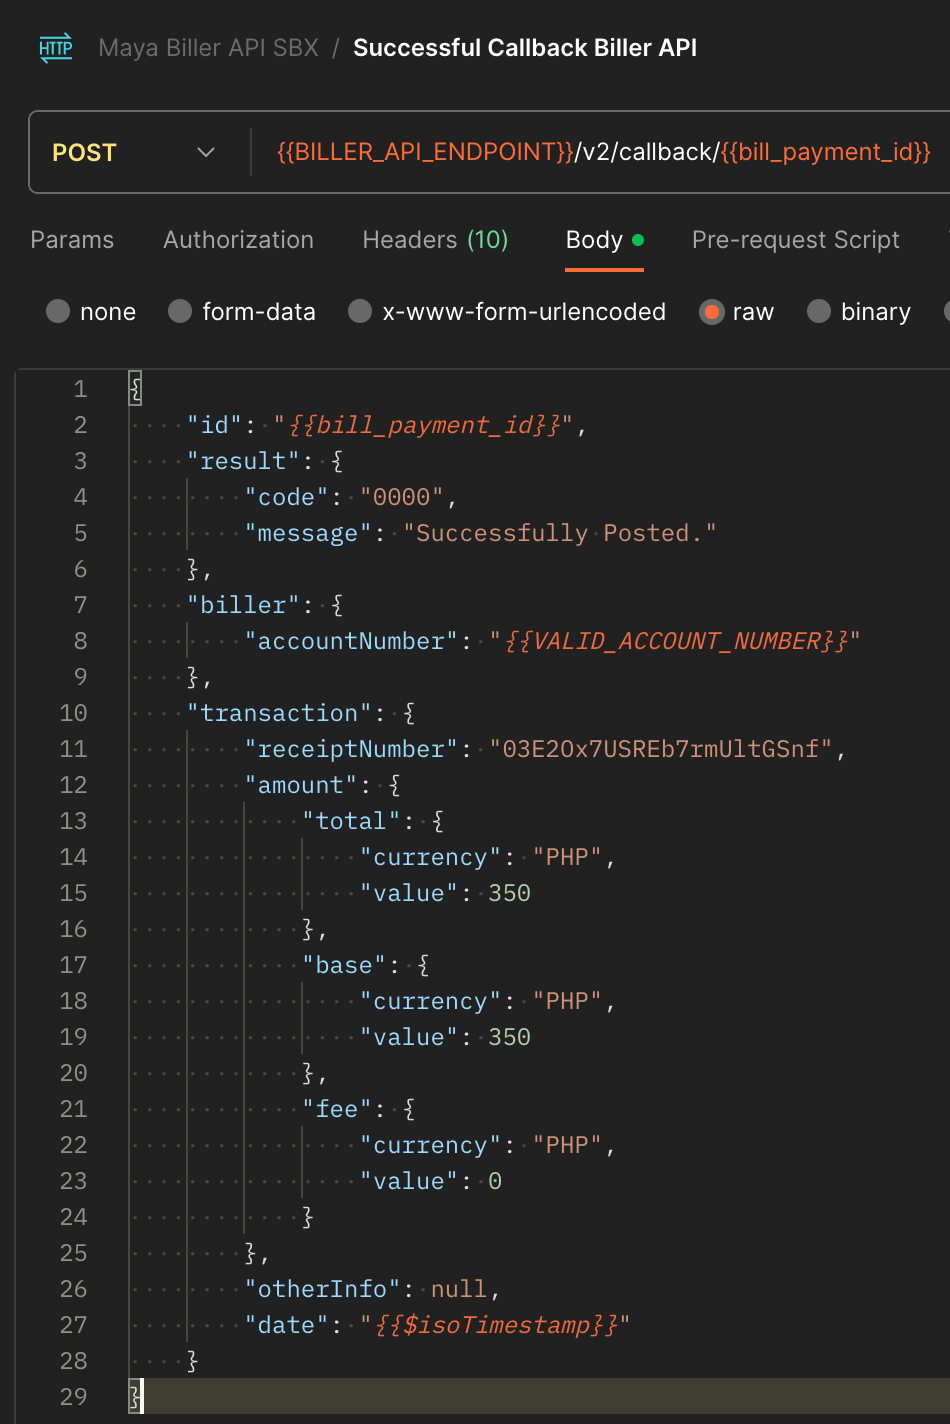
- The included Callback requests simulate how to notify Maya whether the bill payment transactions made during the Post requests have been successfully posted on the biller’s end.
- If transaction.amount.total.value and transaction.amount.base.value have been updated in your Post request, be sure to update the Callback requests using the same values.
- Click on the SAVE button once values have been updated to apply the changes made.
- Click on the Send button to execute the request.
- Check the bottom part of the Postman window for the response body from Maya’s Biller API. Corresponding tests have been provided for the callback request to verify if the callback request for the bill payment transaction is correct.
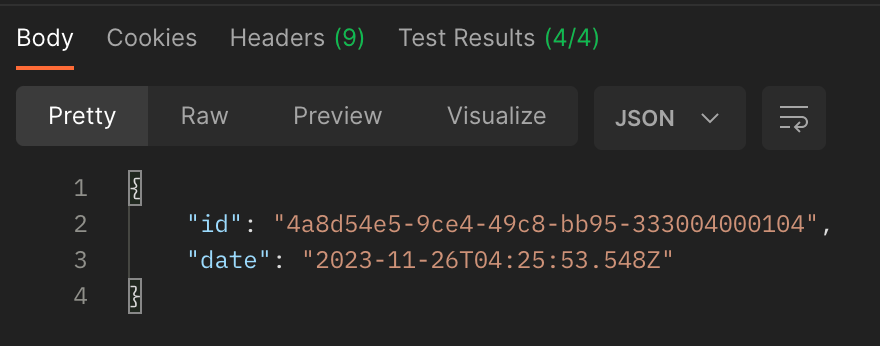
Callback Response Body
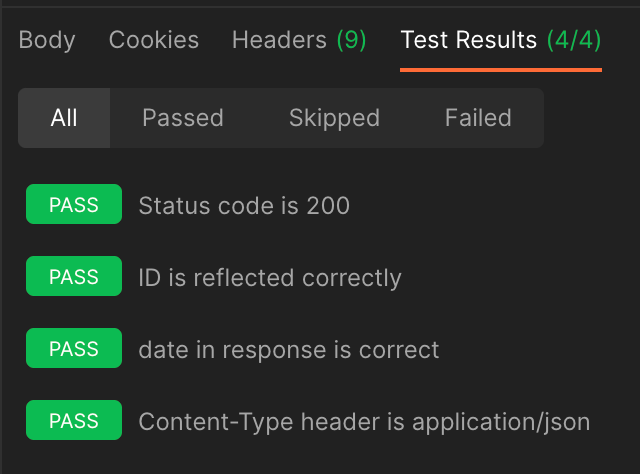
Callback Test Results
Callback Scenarios
Click here to view full details
| Scenario | Description |
|---|---|
| Successful Callback Biller API | Happy path testing for callback endpoint assuming the biller would be notifying Maya that the bill payment made has already been posted on their end. For successful posting callback, result.code should be 0000. Indicate a receipt number that could be a valid identifier on the biller’s end under transaction.receiptNumber field. This request would use the Bill Payment ID generated from the previous Successful Post Endpoint request. |
| Successful Callback Biller API - For Failed Posting | Happy path testing for callback endpoint assuming biller would be notifying Maya that the bill payment made has failed to post on their end. For failed posting callback, result.code should NOT be 0000. As much as possible, please indicate under result.message a concise reason why the posting failed on the biller’s end. Indicate a receipt number that could be a valid identifier in the biller’s end under the transaction.receiptNumber field. This request would use the Bill Payment ID generated from the previous Successful Post Biller API - For Failed Posting Callback request. |
Execute and Submit Sandbox Integration Tests
Once the biller partner is done running the individual tests from the Biller API SBX Postman, the biller would then do a final Postman run for the collection and submit it to Maya for further API compliance checking.
Make sure test results have passed the minimum requirements for each Biller API. In cases of errors that require troubleshooting, refer to Bills Payment Troubleshooting Guide
.
Click here to view full details
IMPORTANT
Before proceeding with test execution, clear your Postman Console logs first. This is to ensure that the logs to submit would only be for the corresponding test run only.
To clear console logs:
- From the bottom part of your Postman window, click on the Console button. The console tab should appear.
- From the upper-right corner of the Console tab, click on the Clear button.
- All previous Console logs should be cleared. You may now close the Console tab again by clicking on the X button at the upper-right corner of the tab.
- From Postman, click on the collection and click on the Run button at the right-side of the page. The Runner tab should be displayed.

- From the Runner tab, check that all included tests are ticked. Tick on the Save responses option. Click on the Run Maya Biller API SBX button. All tests included in the collection should run.
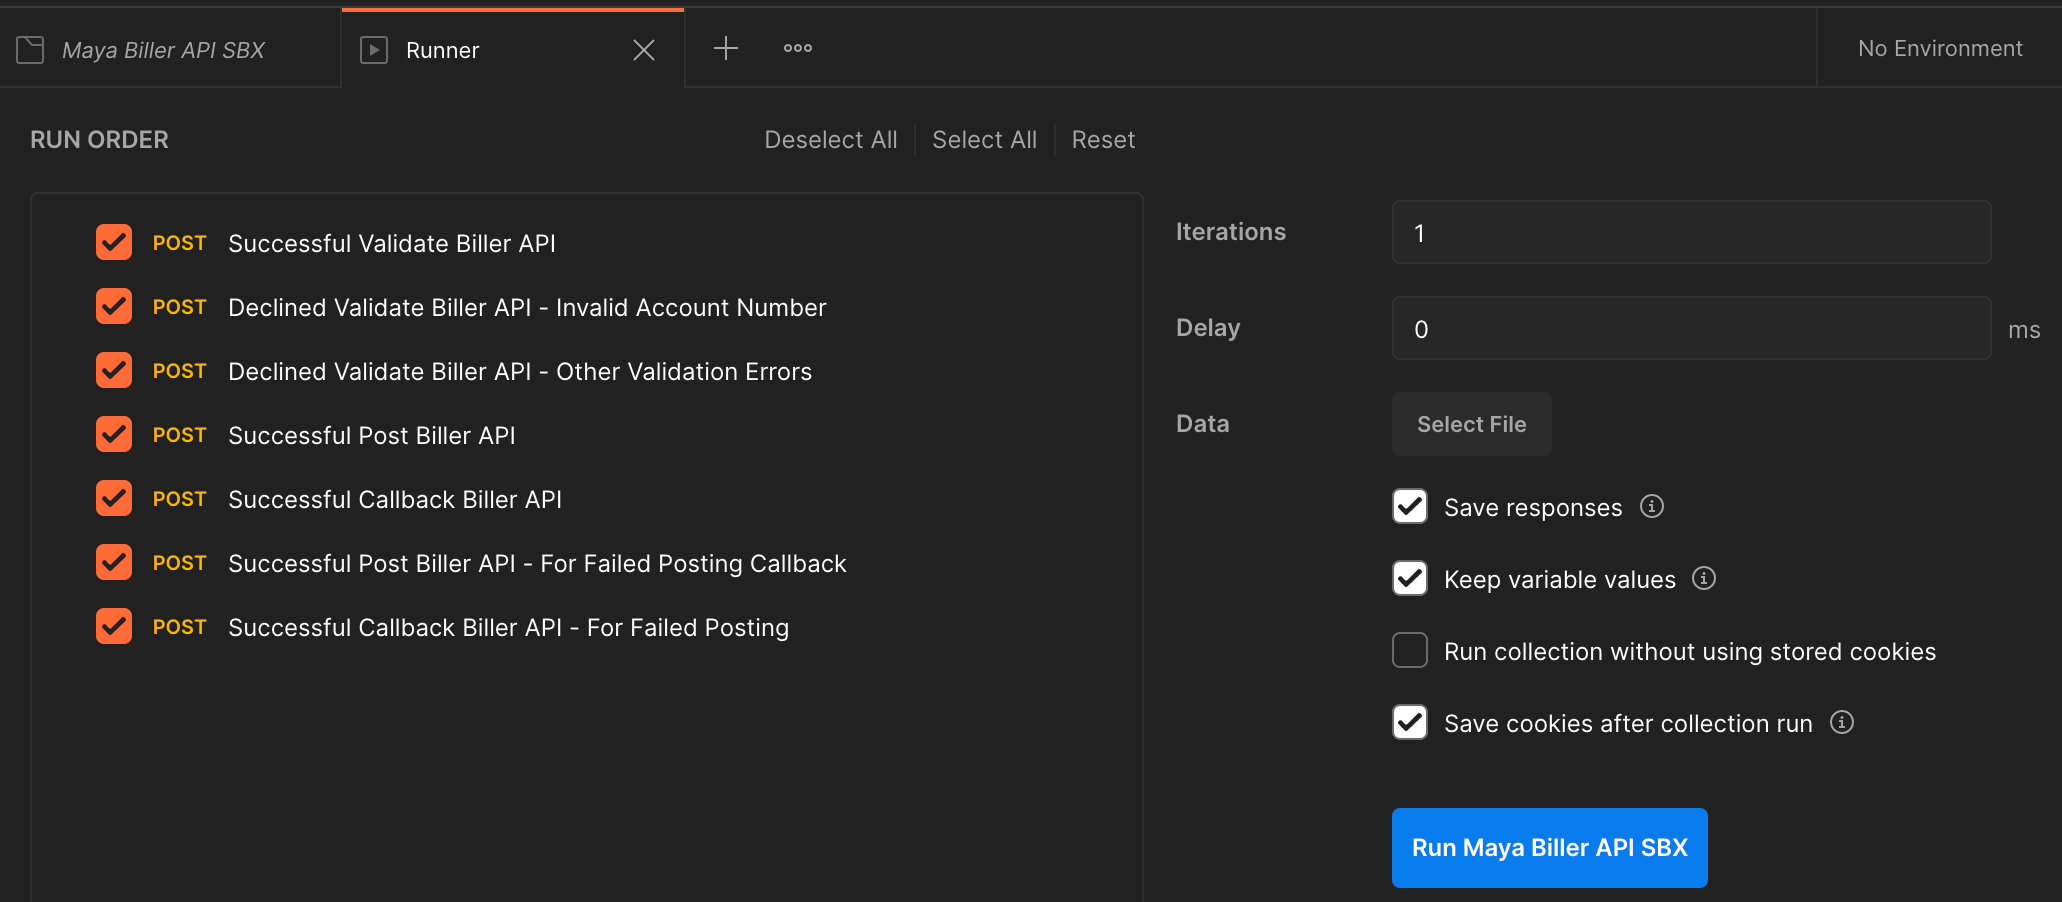
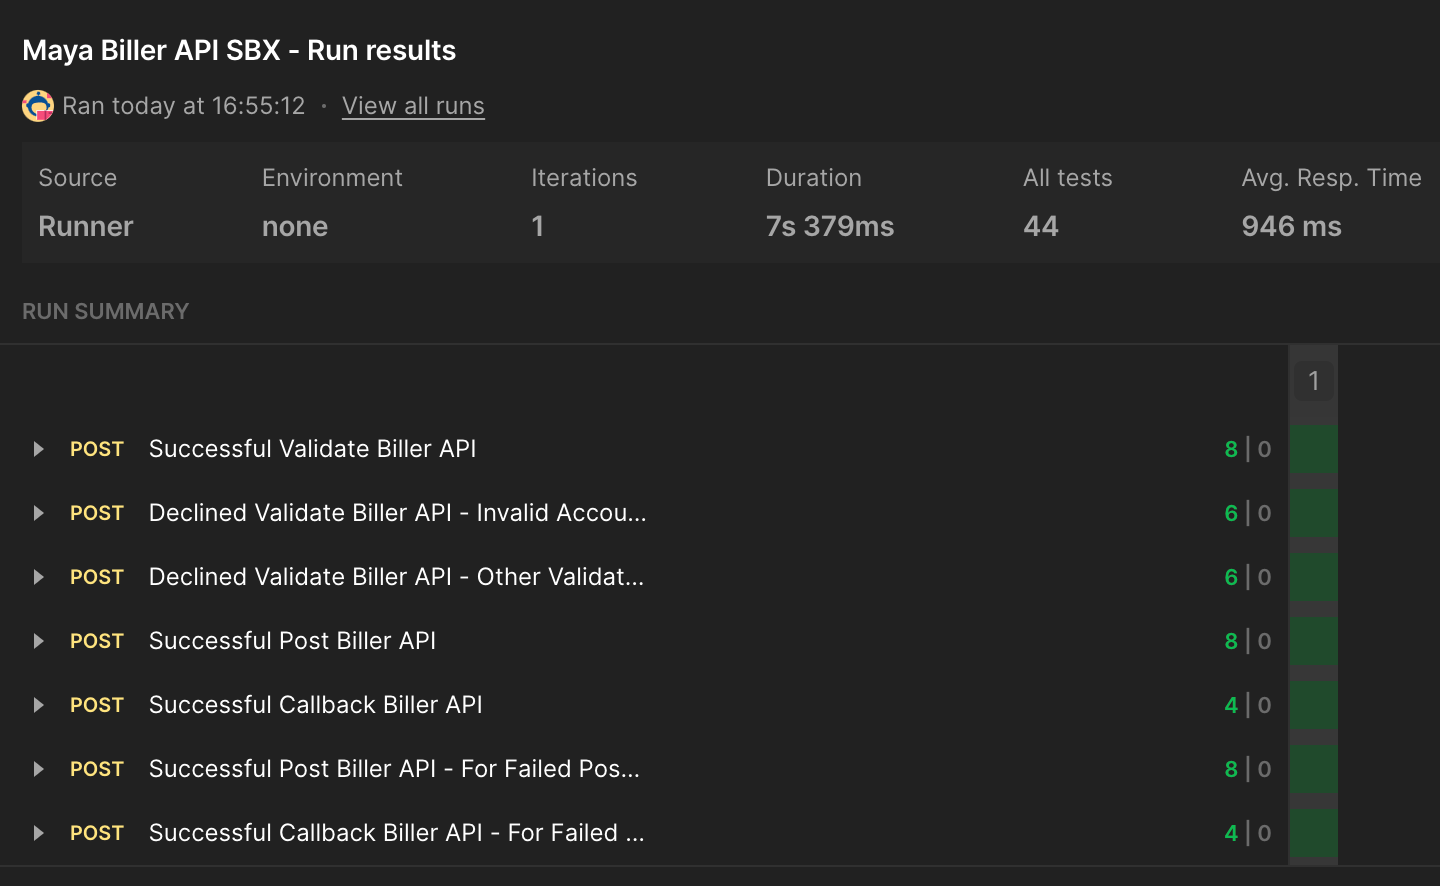
- Once Runner is done executing the requests, take a screenshot of the Run summary page to be attached and submitted later. Also, tap on the Export Results button at the right side of the window. and rename the file with the format: <YYYY.MMDD_BILLERNAME> and save.


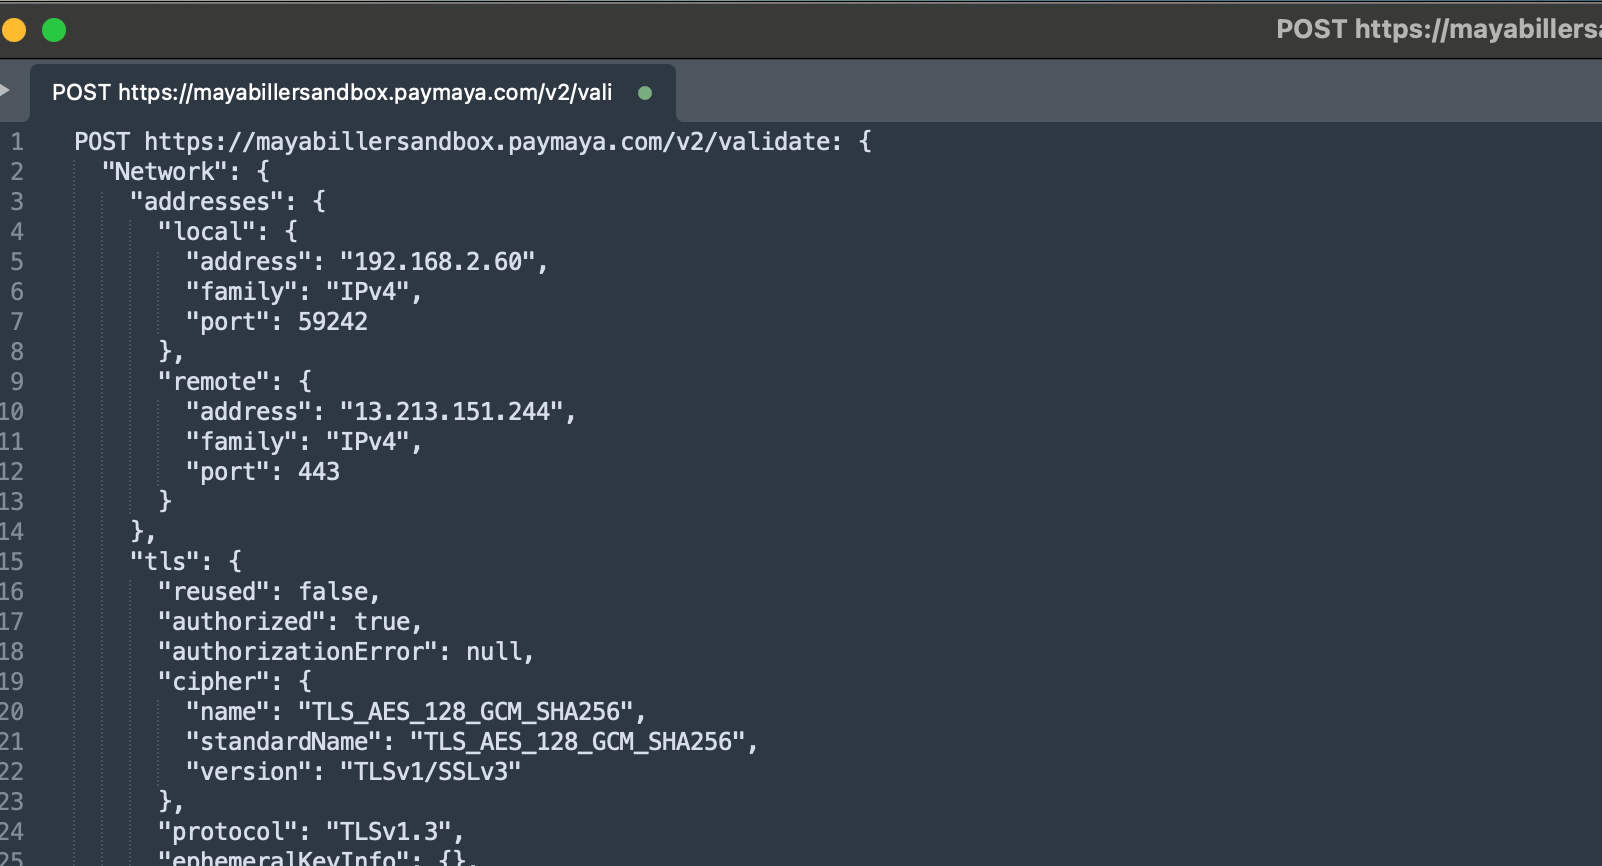
- Open your Console logs and copy the entire console logs by clicking on the Copy button. Paste on your preferred Notepad application and save it as a text file with the filename format <YYYY.MMDD_BILLERNAME_LOGS>.


- Submit the Export Results and Console Logs files to Maya for checking.
Send the results via email with the following information
- Email the files to your designated Maya Relationship Manager and cc [email protected]
.
- With Email Subject: (Merchant Biller Name) - Sandbox Integration Test Results.
- Attach the screenshot of the test run results in the e-mail body.
- Attach the Export Results and Console Log Files.
Feedback Lead time is 3-5 Business days. Coordinate with your designated Maya Relationship Manager for updates. Go to Maya Biller API Quick Start Guide
to learn more about the next steps and integration requirements.
If you're experiencing server errors or timeouts, check the Sandbox Health Page
for real-time updates on service status. If an outage is indicated, rest assured that our team is already on it, working to restore services as soon as possible.
Updated 9 months ago
