
Getting Creative with Content Management Systems
Created by: John Michael Ferraris 5min read
Jan 3, 2023
When it comes to the technical side of launching a blog, content management systems (CMS) such as WordPress, Magento, and Medium are probably what come to mind. However, you might encounter one reason or another that prohibits you from using those systems.
So what can you do when you want to launch a blog but don’t have the usual platforms or tools to do it? In our case, we improvised using a platform that we were already using.
Context
The tech team in Maya wanted to have a platform for showcasing the best practices that we were currently using or innovating in the software development and user design space. This felt like a good enough idea that we expanded it to feature the talents and stories of other teams outside of our initial tech and UX-centric scope.
With our blog vision set, the next step was to actually create content and use a platform to host that content. Unfortunately, we realized that creating a completely new official Maya space using the previously mentioned CMSes would require a lot of internal approval and back-and-forth, which would greatly delay the launching of the blog.
Not wanting to lose any momentum, the tech team realized that we could use an existing pseudo-CMS that we were already using: the Maya Developer Hub.
What is the Maya Developer Hub?
The Maya Developer Hub is actually the website you’re currently on right now! It was initially created as a technical guide for merchants and their developers who were using the Maya suite of solutions. Currently, it hosts both the guides for developers and the Maya blog.
With the existence of Maya’s Developers Hub the possibility of creating a Tech Blog became a reality. The mission that we accepted was to build and curate Maya’s Maya Tech Blog within Maya Developer Hub.
Approach
Maya Developer Hub was built using a ReadMe which is a tool to create interactive developer hubs. ReadMe is not a blog platform so the team needs to be creative on the solution.
One feature of the platform was Custom Pages in which users will be able to create their own page within their hubs and design it using CSS and Javascript – this where we started off.
Exploring Custom Pages as a solution has its limits:
- There is no “blog” management feature
- Custom Pages caters only to 1 content per page.
With limitations of our platform’s features, the tasks for this approach were:
- Create a custom page that will contain “links” of the blog entries
- Each “blog entry” will be its own custom page.
Time to Hack
Task #1
I mentioned in previous section that Custom Pages can be designed using its own CSS. We need to design our Task #1.
Task #1 (Create a custom page that will contain “links” of the blog entries) is where it took a bit of time. The single page should be:
- Responsive
- List more than 10 links without putting new coding effort when adding new links in the next 2 weeks.
I am not good in frontend development but I am good in Googling answers. I started with the thought that the custom page will be limited number of columns and dynamic rows given a limited page-width which led me to these links:
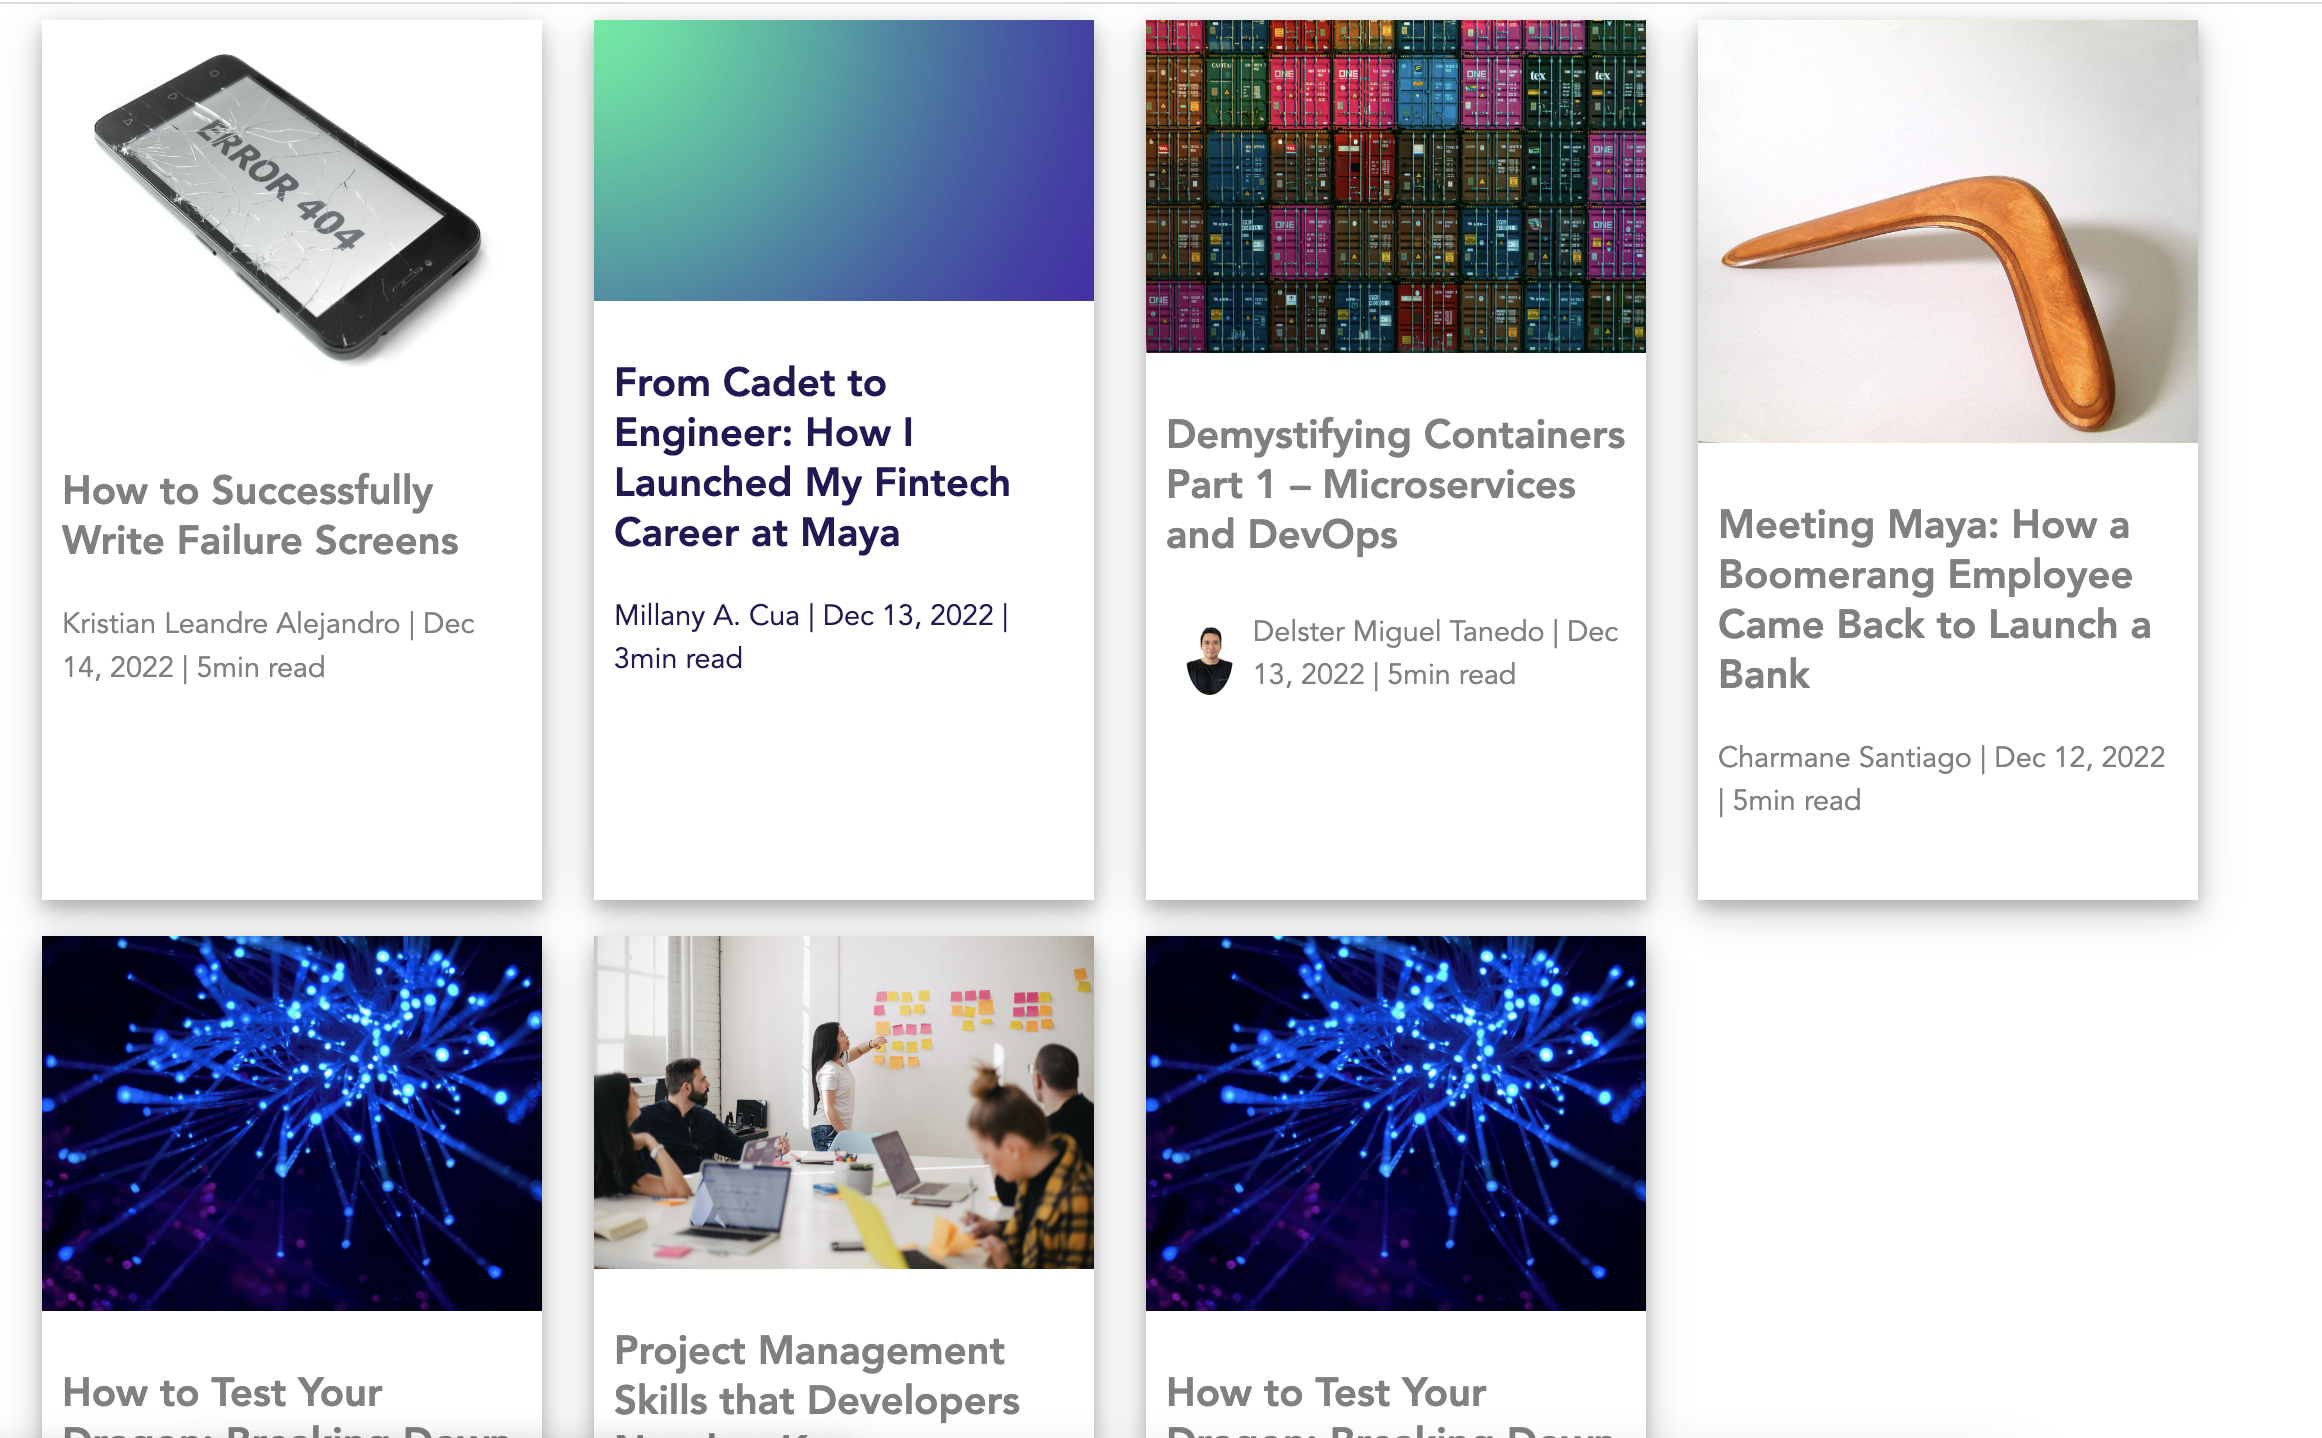
We now have a grid display that is set to 4 columns and auto fill rows given a limited page-width
// The CSS
.blogs {
  display: grid;
  grid-template-columns: repeat(4, 1fr);
  grid-template-rows: repeat(auto-fill, 450px);
  grid-row-gap: .5em;
  grid-column-gap: 1em;
}

// The HTML
<div class="blogs">
  <!-- Always append new <a> block after this line -->
  <a class="blog-entry" href="#">
    Blog A
  </a>
  <a class="blog-entry" href="#">
    Blog B
  </a>
  <a class="blog-entry" href="#">
    Blog C
  </a>
  <a class="blog-entry" href="#">
    Blog D
  </a>
</div>
Task #2
We will need to… write the blog entries in a custom page. 😄 There’s nothing special in this task, blogs are submitted and will just be written in its own custom page.
Putting it all together
Once the blog entries has its own page and url, we need to link it on the main page (task #1)
<div class="blogs">
  <!-- Always append new <a> block after this line -->
  <a class="blog-entry" href="the-link">
  	<img class="cover-photo" src="cover-photo"/>
    <div class="blog-info">
    	<h3>The Title B</h3>
    	<div class="author">
    		<img src="profile-photo-url"/>
      	<div class="bio">
        	Author's Bio | Oct 20, 2022 | 5min read
      	</div>
    	</div>
    </div>
  </a>
  <a class="blog-entry" href="the-link">
  	<img class="cover-photo" src="cover-photo"/>
    <div class="blog-info">
    	<h3>The Title A</h3>
    	<div class="author">
    		<img src="profile-photo-url"/>
      	<div class="bio">
        	Author's Bio | Oct 10, 2022 | 5min read
      	</div>
    	</div>
    </div>
  </a>
</div>
Current Limitations
V1s always has its limits and this Tech Blog still has a few such as pagination, tags management and many more.
Building this Tech Blog has been a nice project to refresh my developer skills even when I am now a product owner. Though the Maya Blog might eventually leave ReadMe and move towards a more dedicated CMS, for now, it is time to grow this product for more blog entries this 2023.
Contributors

Learn more about Maya!
- Head back to our Maya Tech Blog for more interesting articles
- Keep up with the latest stories of innovation from Maya Stories
- or Check us out in LinkedIn.